How to Replace a Bathroom Faucet: Step-by-Step Guide
Master how to replace a bathroom faucet with this step-by-step guide covering tools, installation tips, and expert troubleshooting advice.
So your bathroom faucet has seen better days, huh? Maybe it's dripping constantly, looking crusty around the edges, or just doesn't match that gorgeous renovation you've been working on. Whatever the reason, replacing a bathroom faucet is one of those home improvement projects that looks intimidating but really isn't once you know what you're doing.
Here's the beautiful truth. You don't need to be a plumber or have years of experience to pull this off. With basic tools, a little patience, and this how to replace a bathroom faucet: step-by-step guide, you'll have that shiny new fixture up and running before lunch. Seriously, most people can complete this job in under two hours, and that includes the inevitable trip to the hardware store because you forgot something.
The best part? You'll save yourself a pretty penny by skipping the plumber's service call. We're talking anywhere from $150 to $350 that stays right in your pocket. Plus, there's something deeply satisfying about turning on a faucet you installed yourself and watching water flow perfectly. Let's roll up our sleeves and get into it.
Why Replacing Your Bathroom Faucet Makes Sense
Before we grab our wrenches, let's talk about why this project is worth your weekend time. Understanding the benefits helps you stay motivated when you're lying awkwardly under the sink wondering why you started this.
Old faucets waste water like nobody's business. A dripping faucet can waste over 3,000 gallons annually. That's not just bad for the environment; it's money literally going down the drain. New faucets come with better washers, cartridges, and overall construction that keeps water where it belongs.
Then there's the aesthetic factor. Nothing dates a bathroom faster than an old, corroded faucet with lime buildup and worn finishes. Swapping it out instantly modernizes the space without the cost and hassle of a full renovation.
Modern faucets also offer improved functionality. Many now feature single-handle operation, pull-out sprayers, touchless technology, and better temperature control. These aren't just fancy extras; they make daily routines easier and more enjoyable.
From a home value perspective, updated fixtures signal to potential buyers that a home has been well-maintained. It's a small investment that contributes to overall property appeal.
Gathering Your Tools and Materials
Alright, let's talk about what you'll need. Nothing's worse than getting halfway through a project and realizing you're missing something crucial. Trust me, I've made that frustrating trip to the hardware store more times than I care to admit.
Essential Tools
You'll want to have these items ready before starting:
Adjustable wrench or basin wrench
Channel-lock pliers
Screwdrivers (both flathead and Phillips)
Plumber's tape (also called Teflon tape)
Bucket or container for water
Flashlight or headlamp
Towels or rags
Penetrating oil like WD-40
Materials You'll Need
Beyond tools, gather these supplies:
Your new faucet (obviously)
Supply lines if not included with faucet
Plumber's putty or silicone caulk
Cleaning supplies for the sink surface
Choosing the Right Replacement Faucet
Here's where folks sometimes trip up. Not all faucets fit all sinks, so you need to match your new fixture to your existing setup.
Check your sink's hole configuration. Single-hole sinks need single-hole faucets, though some faucets come with deck plates that cover extra holes. Three-hole sinks typically accommodate centerset faucets where handles and spout are connected, or widespread faucets with separate components.
Measure the distance between holes if you have multiple openings. Standard centerset spacing is four inches, while widespread configurations usually span eight inches or more.
Consider the spout height and reach. A faucet that's too tall might cause splashing, while one too short won't clear certain sink depths comfortably.
Preparing for the Installation
Preparation makes everything smoother. Skipping these preliminary steps is like trying to bake a cake without preheating the oven. Sure, you might eventually get there, but why make things harder on yourself?
Shut Off the Water Supply
This one's non-negotiable, folks. Find the shut-off valves under the sink and turn them clockwise until they stop. Most bathrooms have two valves, one for hot and one for cold. If your valves are stuck or won't turn, don't force them. You might need to shut off water at the main house valve instead.
After closing the valves, turn on the faucet to release any remaining water and pressure in the lines. Keep a bucket handy because some water will dribble out when you disconnect things.
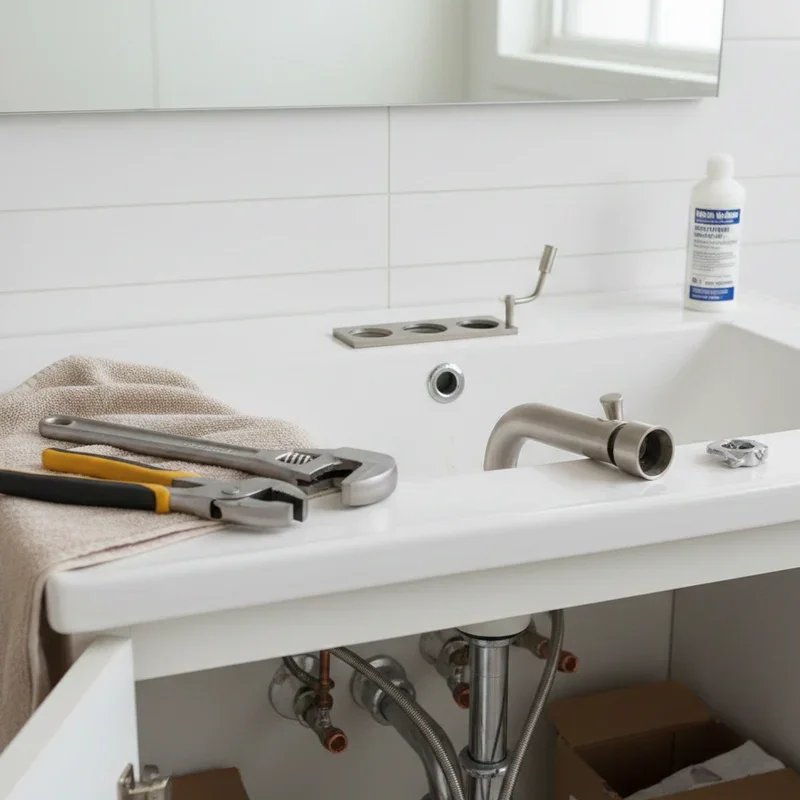
Clear the Workspace
Remove everything from under the sink. Cleaning supplies, extra toilet paper, that mysterious box you shoved in there three years ago and forgot about. You need clear access to work comfortably.
Lay down towels to catch drips and protect the cabinet floor. A flashlight or headlamp is essential because under-sink spaces are notoriously dark. Your phone flashlight works in a pinch, but hands-free lighting makes the job much easier.
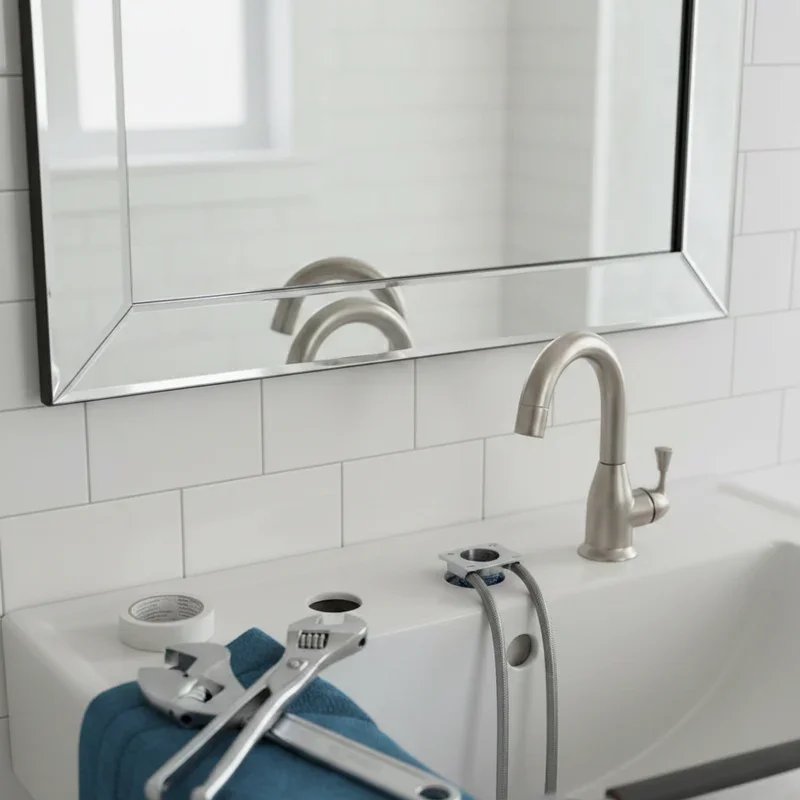
Take a Photo
Here's a pro tip that'll save you headaches. Before disconnecting anything, snap a few photos of the existing connections. If you get confused during installation, you'll have a reference showing how everything was hooked up originally.
How to Replace a Bathroom Faucet: Step-by-Step Guide for Removal
Now we're getting to the good stuff. Removing the old faucet is often the trickiest part because you're dealing with connections that have been in place for years, sometimes decades.
Disconnecting the Supply Lines
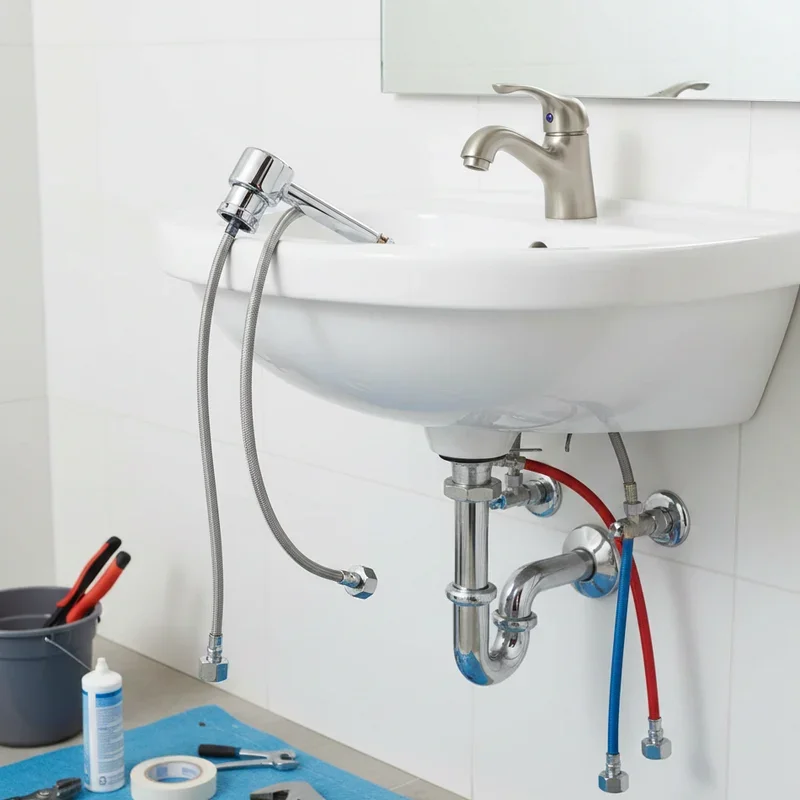
Locate where the supply lines connect to the faucet. Using your adjustable wrench or pliers, loosen the nuts connecting the supply lines to the faucet stems. Turn counterclockwise to loosen.
Have your bucket positioned underneath because residual water will spill out. If the connections are corroded or stuck, spray some penetrating oil and let it sit for ten minutes before trying again.
Once loose, completely remove the supply lines. Inspect them while you're at it. If they're showing signs of wear, cracking, or corrosion, now's the perfect time to replace them with new braided stainless steel lines.
Removing the Mounting Hardware
Look underneath the sink for the nuts or clips holding the faucet to the sink deck. These mounting nuts can be incredibly stubborn, especially on older installations.
This is where a basin wrench becomes your best friend. Its long handle and swiveling jaw are specifically designed for reaching into tight spaces behind sinks. If you don't own one, consider buying or borrowing one because it makes this step infinitely easier.
Turn the mounting nuts counterclockwise to remove them. Sometimes they're so corroded that they won't budge. In extreme cases, you might need to cut through them with a hacksaw or rotary tool. Just be careful not to damage the sink.
Lifting Out the Old Faucet
With the mounting hardware removed, the faucet should lift right out. Wiggle it gently if it seems stuck. Old plumber's putty or caulk might be holding it down, so patience helps here.
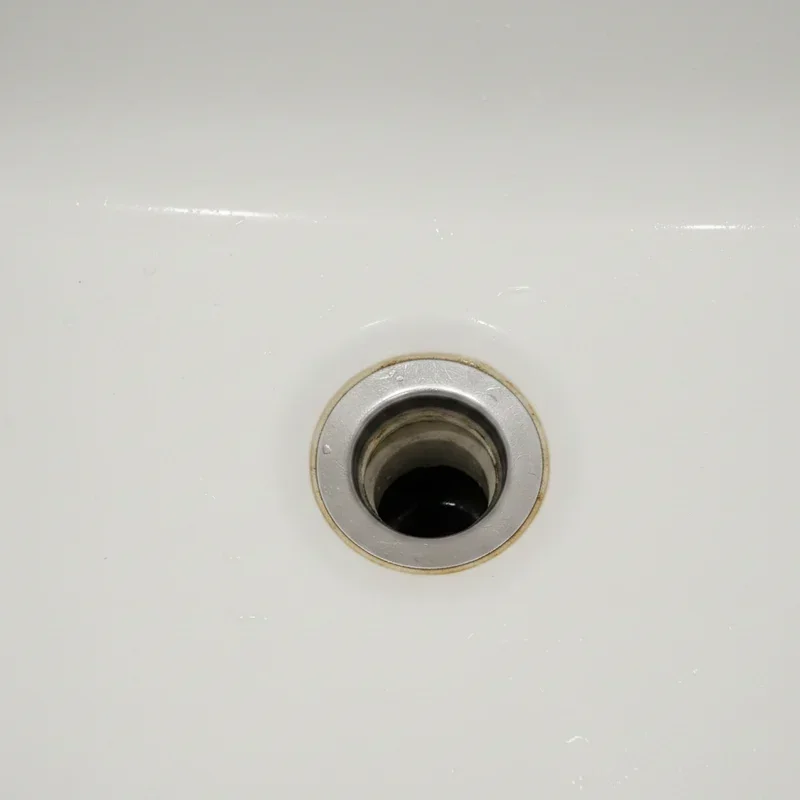
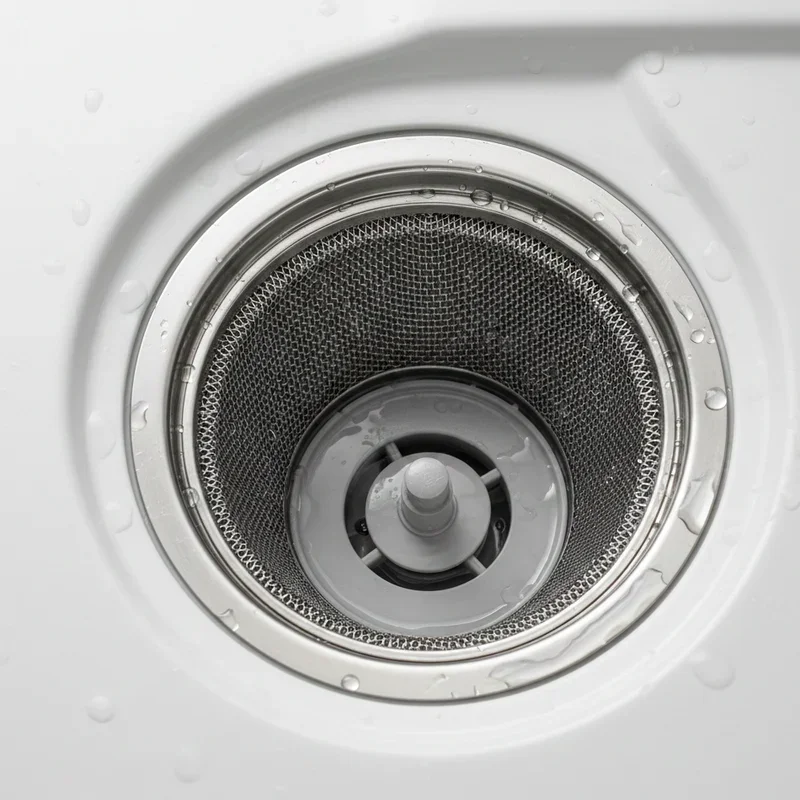
Once removed, clean the sink surface thoroughly. Scrape away old putty, remove any buildup, and give the area a good wipe down. Starting with a clean surface ensures your new faucet sits flush and seals properly.
Installing Your Brand New Faucet
Here comes the fun part. Watching your new faucet come together is genuinely satisfying. Follow these steps carefully, and you'll be admiring your handiwork in no time.
Reading the Instructions
I know, I know. Nobody likes reading instructions. But each faucet model has its quirks, and spending five minutes with the manual can prevent mistakes that take much longer to fix. Manufacturers include specific guidance for good reason.
Pay attention to any model-specific requirements, recommended sealants, and torque specifications if mentioned.
Applying Sealant
Most faucets require either plumber's putty or silicone caulk between the faucet base and sink surface. Check your faucet instructions because some finishes can be damaged by putty and specifically require silicone.
For plumber's putty, roll it between your hands to form a rope about the thickness of a pencil. Press it around the underside of the faucet base plate, creating a continuous seal.
For silicone, apply a thin bead around the base perimeter. Work neatly because silicone can be messy and is visible if it squishes out.
Setting the Faucet in Place
Lower the faucet through the mounting hole, feeding any attached supply lines or lift rod through as well. Press down firmly to seat the base against the sink surface.
Check alignment from above. Make sure the faucet sits straight and centered over the sink bowl. Adjustments are much easier now before everything's tightened down.
Securing the Mounting Hardware
From underneath, hand-thread the mounting nuts onto the faucet stems. Get them started by hand to ensure proper threading before using tools.
Once hand-tight, use your basin wrench or pliers to snug them down. The goal is secure without overdoing it. Over-tightening can crack porcelain sinks or damage plastic mounting components.
Some modern faucets use a different mounting system with brackets or clips. Follow the specific instructions for your model.
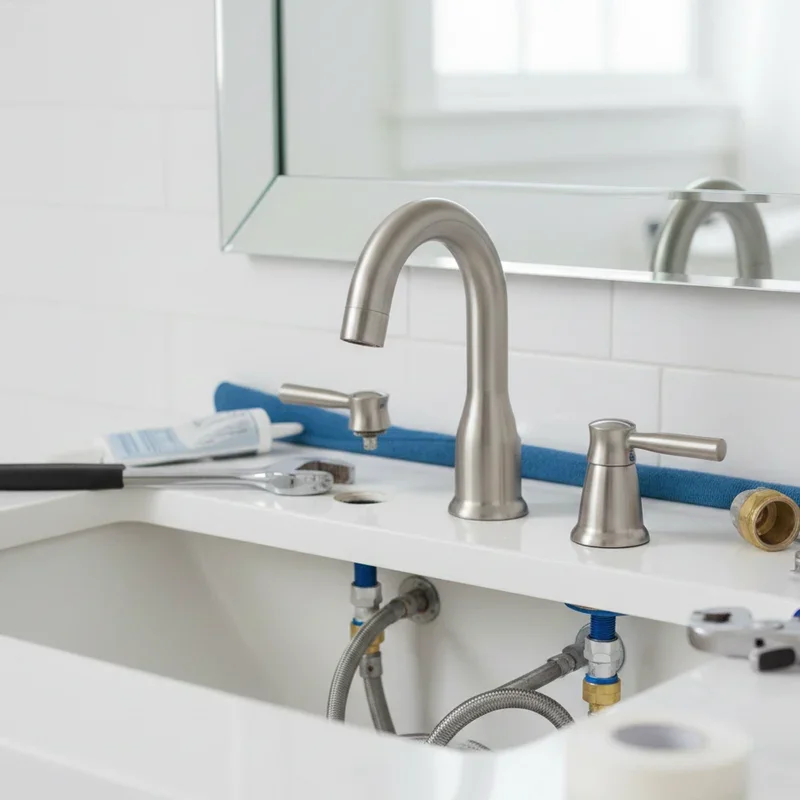
Connecting Supply Lines
Wrap the threaded faucet stems with plumber's tape. Wind the tape clockwise around the threads, overlapping slightly as you go. Three or four wraps usually provides adequate seal.
Attach the supply lines, tightening the connections by hand first, then snugging with a wrench. Again, don't go overboard. These connections need to be tight enough to prevent leaks but not so tight that you damage the fittings.
Connect the other end of the supply lines to your shut-off valves. Same process: hand-tight first, then a quarter turn with a wrench.
Installing Additional Components
Many bathroom faucets include a pop-up drain assembly. This is the mechanism that opens and closes your drain stopper.
Thread the lift rod through the hole in the faucet body. Connect it to the pivot rod using the clip provided. Adjust the length so the stopper opens and closes smoothly when you pull the lift rod.
If your faucet has a separate sprayer or other accessories, install them according to manufacturer directions.
Testing Your Installation
You're almost there. This final phase separates successful installations from those that need rework.
Turning Water Back On
Slowly open the shut-off valves by turning counterclockwise. Go gradually rather than cranking them wide open immediately. This prevents pressure surges that could stress new connections.
Watch for leaks at every connection point. Have someone up top checking the faucet base while you observe underneath. Even tiny drips indicate a connection that needs attention.
Running Water Tests
Turn on the faucet and let water run for a minute or two. Check that hot and cold operate correctly, meaning the hot side produces hot water and vice versa.
Test the aerator by observing water flow. It should be smooth and even. Sputtering or uneven flow might indicate debris in the lines, which often clears after running water for a few minutes.
If you installed a pop-up drain, verify it operates correctly. Pull the lift rod up; the stopper should close. Push it down; the stopper should open. Adjust the connection if needed.
Addressing Leaks
Finding a small leak isn't failure; it's normal troubleshooting. Turn off the water and tighten the offending connection slightly. If the leak persists, you might need to disconnect, add more plumber's tape, and reconnect.
Leaks around the faucet base suggest inadequate sealant. Remove the faucet, clean both surfaces, apply fresh putty or silicone, and reinstall.
Troubleshooting Common Issues
Even following this how to replace a bathroom faucet: step-by-step guide perfectly, sometimes things don't go as planned. Here's how to handle typical problems.
Low Water Pressure
If your new faucet has weak flow, the aerator might be clogged with debris from installation. Unscrew it from the spout tip and rinse it clean. Reinstall and test again.
Still weak? Check that the supply valves are fully open. They should turn counterclockwise until they stop.
Water Goes Everywhere
A spraying or splashing faucet often means a problem with the aerator. It might be installed incorrectly, missing its washer, or damaged. Remove it, inspect all components, and reinstall carefully.
Hot and Cold Reversed
This embarrassing mistake happens more often than people admit. The fix is simple: swap the supply line connections. Hot water lines connect to the left side (from the user's perspective), cold to the right.
Persistent Dripping
New faucets shouldn't drip. If yours does, the internal cartridge or valve may have been damaged during shipping or installation. Contact the manufacturer because most offer warranties covering defects.
Wobbly Faucet
If the faucet moves or feels unstable, the mounting nuts need additional tightening. Get back under the sink and snug them up. Just don't go crazy; moderate pressure is sufficient.
Maintaining Your New Faucet
You've done the hard work, so let's keep that new faucet looking and functioning beautifully for years to come.
Wipe it down regularly with a soft cloth to prevent water spots and mineral buildup. Avoid abrasive cleaners or scrubbing pads that can scratch finishes.
Clean the aerator every few months by unscrewing it and soaking in vinegar to dissolve mineral deposits. This maintains optimal water flow.
Address drips immediately rather than letting them persist. Early intervention usually means a simple washer or cartridge replacement rather than bigger problems later.
If you live in an area with hard water, consider installing a water softener or using filtered water to extend faucet life and reduce mineral accumulation.
When to Call a Professional
While this guide helps most people succeed with faucet replacement, certain situations warrant professional assistance.
If your shut-off valves won't close or are badly corroded, a plumber can replace them safely. Working with water that won't shut off is a recipe for disaster.
Discovering significant water damage or mold under the sink means you've got bigger issues that need expert attention.
If you encounter galvanized or lead pipes, professional evaluation ensures safe handling and proper upgrades.
And honestly, if you start this project and feel overwhelmed or unsafe, there's no shame in calling for backup. Knowing your limits is wisdom, not weakness.
Conclusion
Replacing a bathroom faucet is genuinely one of the most rewarding DIY projects you can tackle. Armed with this how to replace a bathroom faucet: step-by-step guide, you now have all the knowledge needed to upgrade your fixture confidently. Take your time, follow each step carefully, and don't rush the process. Before you know it, you'll be enjoying your beautiful new faucet and the satisfaction that comes from doing it yourself. Happy plumbing!
Read next: How to Replace a Kitchen Faucet: Step-by-Step
Frequently Asked Questions
1. How long does it typically take to replace a bathroom faucet?
Most homeowners complete the job within one to two hours with proper preparation.
2. Do I need to turn off the main water supply?
Usually shutoff valves under the sink suffice, but use main supply if necessary.
3. Can I reuse my old supply lines with a new faucet?
Replacing supply lines during faucet installation is recommended for preventing future leaks.
4. What causes a newly installed faucet to leak?
Loose connections, insufficient plumber's tape, or damaged washers typically cause new faucet leaks.
5. Should I hire a plumber or do it myself?
Most handy homeowners can handle this project with basic tools and patience.
Stay up to date with our latest ideas!