How to Drain Hot Water Heater Safely and Easily
Learn how to drain hot water heater safely and easily with step-by-step instructions, essential tips, and troubleshooting advice for homeowners.

Well, here's something most homeowners don't think about until it's too late: when was the last time you drained your water heater? If you're scratching your head trying to remember, or worse, wondering why you'd even need to do that, you're definitely not alone! Most folks install a water heater and forget about it until they're taking an unexpectedly cold shower on a Monday morning. But here's the kicker: learning how to drain hot water heater safely and easily is one of those simple maintenance tasks that can add years to your water heater's life and save you a bundle in the long run.
Picture this: inside your water heater, minerals from your water supply are slowly but surely settling at the bottom of the tank. It's like sand building up at the bottom of a fish tank, except this sediment can cause your water heater to work overtime, increase your energy bills, and eventually lead to premature failure. The good news? Draining your water heater once or twice a year can prevent these problems, and honestly, it's easier than assembling furniture from that Swedish store we all love to hate!
Understanding Your Water Heater
Types of Water Heaters
Before diving into the draining process, let's get familiar with what you're working with. Not all water heaters are created equal, and knowing your type helps ensure you're taking the right approach.
Traditional Tank Water Heaters are the most common type you'll find in homes. These big cylindrical tanks, usually tucked away in basements, garages, or utility closets, store and heat 30 to 80 gallons of water. They're reliable workhorses but need regular maintenance to prevent sediment buildup.
Tankless Water Heaters, on the other hand, heat water on demand and don't store it. While they still benefit from occasional flushing, the process is different from what we're covering here. If you've got one of these modern marvels, check your manufacturer's instructions for maintenance procedures.
Why Draining Is Necessary
You know how your coffee maker gets that crusty buildup if you don't clean it regularly? Same principle applies here, except the stakes are higher! Water contains dissolved minerals like calcium and magnesium, and when water is heated, these minerals precipitate out and sink to the bottom of your tank.
This sediment layer acts like a barrier between your heating element and the water, forcing your heater to work harder and longer to maintain temperature. It's like trying to cook with a thick layer of burnt food stuck to your pan. Not only does this increase your energy bills, but it also creates hot spots that can damage the tank's lining and lead to leaks.
Safety Precautions Before You Begin
Essential Safety Gear
Alright, before you channel your inner plumber, let's talk safety. Working with hot water heaters isn't particularly dangerous if you're careful, but taking shortcuts here could leave you with burns, floods, or both!
First things first, grab these essentials:
Heavy-duty rubber gloves to protect your hands from hot water
Safety glasses because nobody wants rusty water in their eyes
Closed-toe shoes with good grip (flip-flops are a no-go)
Long pants to protect your legs from splashes
Preliminary Checks
Before you start turning valves and draining water, do a quick inspection of your water heater. Look for any signs of damage, rust, or existing leaks. If you spot major corrosion or water pooling around the base, stop right there and call a professional. Trying to drain a compromised tank is like poking a sleeping bear; it might seem fine until suddenly it's not!
Check the temperature and pressure relief valve (that's the one with a pipe running down the side of your tank). If it's actively leaking or shows signs of heavy corrosion, you'll want to address that issue first or have a pro take a look.
How to Drain Hot Water Heater Safely and Easily: Preparation Steps
Turning Off the Power Source
This step is absolutely crucial, folks! Heating elements that fire up without water covering them will burn out faster than ice cream melts in July. The last thing you want is to drain your tank and fry your heating elements in the process.
For Electric Water Heaters: Head to your electrical panel and flip the breaker for your water heater to the OFF position. Don't just trust the switch; double-check that the power is off by testing the water temperature after about an hour. It should be noticeably cooler.
For Gas Water Heaters: Locate the gas control valve on your water heater (usually at the bottom front) and turn it to the "Pilot" position. This keeps the pilot light on but prevents the burner from firing up. Some folks prefer to turn the gas completely off, and that's fine too, just remember you'll need to relight the pilot later.
Letting the Water Cool
Here's where patience pays off, big time! That water in your tank is seriously hot, typically around 120-140°F. Draining scalding water is dangerous and can damage your garden if that's where you're directing the flow.
Wait at least 4-6 hours after turning off the heat source, or better yet, do this step the night before and drain in the morning. I know waiting isn't fun when you're ready to tackle a project, but trust me, handling lukewarm water beats dealing with burns any day of the week!
Gathering Your Tools
Having everything ready before you start makes the whole process smoother. Here's what you'll need:
Garden hose (long enough to reach from your water heater to your drainage point)
Bucket (for catching initial dirty water samples)
Flathead screwdriver (for older drain valves)
Adjustable wrench or channel locks (just in case)
Towels or rags (because water always finds a way to drip where you don't want it)
Teflon tape (handy if you need to reseal connections)

The Step-by-Step Draining Process
Shutting Off the Water Supply
Now we're getting to the meat and potatoes of how to drain hot water heater safely and easily! Locate the cold water supply valve at the top of your water heater. It's usually a gate valve or ball valve on the pipe leading into the tank. Turn it clockwise until it stops to shut off the water supply.
Can't find the valve or it won't budge? No problem! You can shut off your home's main water supply instead. Sure, it means no water in the house during draining, but sometimes that's the safer option, especially with older valves that might break if forced.
Connecting the Drainage System
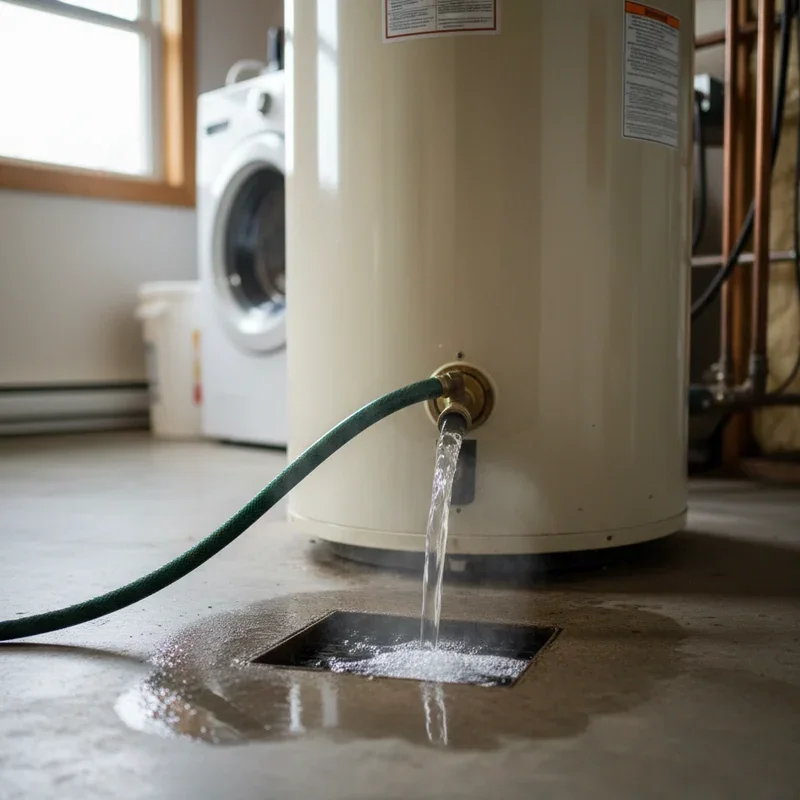
Time to hook up your garden hose! The drain valve is located near the bottom of your tank and looks like a regular outdoor spigot or a plastic valve with threads for a hose connection.
Thread your garden hose onto the drain valve, making sure it's tight enough to prevent leaks but not so tight you strip the threads. Run the other end of the hose to your drainage point. This could be a floor drain, outdoor area, or utility sink. Just make sure wherever you're draining to can handle the volume and heat of the water.
Pro tip: If draining outside, avoid areas near plants you care about. The sediment-laden water can affect soil pH and isn't great for your prized roses!
Opening Relief Valves
Before opening that drain valve, you need to allow air into the tank, otherwise, you'll create a vacuum that prevents proper draining. Think of it like trying to pour juice from a can without punching that second hole; it just glug-glug-glugs out slowly.
Open a hot water faucet somewhere in your house, preferably on an upper floor. This breaks the vacuum and allows water to flow freely. You can also open the temperature and pressure relief valve on the tank itself, though this can be messier.
The Actual Draining Process
Here goes nothing! Slowly open the drain valve. If it's a plastic valve, turn the handle counterclockwise. For older brass valves, you might need a flathead screwdriver to turn the valve stem.
The water might start flowing immediately, or it might take a minute if there's sediment blocking the valve. Don't panic if the flow seems slow at first; sediment often partially clogs the drain valve. If nothing comes out after a few minutes, you might need to gently poke the valve opening with a wire (carefully!) to break up any blockage.
Let the tank drain completely. Depending on your tank size and water pressure, this usually takes 20-45 minutes. You'll know it's empty when water stops flowing from the hose.

Dealing with Sediment
Flushing Out Stubborn Buildup
Draining alone sometimes isn't enough to remove all the sediment, especially if it's been years since the last maintenance. Here's where we get a bit more aggressive with cleaning.
Once the tank appears empty, turn the cold water supply back on for about 30 seconds while the drain valve is still open. This creates a powerful flush that stirs up and removes stubborn sediment. The water coming out might look pretty nasty, like rusty soup, but that's exactly what you want to see leaving your tank!
Repeat this flush process 2-3 times until the water runs relatively clear. Yeah, it uses some water, but it's way cheaper than replacing a water heater prematurely!
When to Call a Professional
Sometimes, despite your best efforts, things don't go as planned. If you encounter any of these situations, it's time to phone a pro:
The drain valve won't open or close properly
You discover significant rust or corrosion on the tank
Water continues leaking after closing all valves
Sediment is so severe that water won't drain at all
You smell gas (for gas heaters) at any point during the process
Refilling and Restarting Your Water Heater
Closing All Valves
Alright, the dirty work is done! Now let's get your water heater back up and running. First, close the drain valve tightly. Give the hose connection a little wiggle to make sure it's secure; even a tiny leak here can cause big problems later.
Close any hot water faucets you opened earlier, but leave one slightly open to allow air to escape as the tank fills. This prevents air pockets from forming in your plumbing system.
Refilling the Tank
Turn the cold water supply valve back on slowly. You'll hear water rushing into the tank, which is music to a homeowner's ears! Keep an eye on that open hot water faucet; it'll sputter and spit as air escapes from the system.
Once you get a steady stream of water from the faucet (no more air bubbles), close it. Your tank is now full! But don't celebrate just yet; we still need to check for leaks. Inspect all connections, especially around the drain valve and where you connected the hose. Even a small drip now can become a big problem later.
Restoring Power and Heat
Now comes the moment of truth! For electric heaters, head back to your breaker box and flip the switch back on. For gas heaters, turn the gas control valve back to your desired temperature setting and relight the pilot if necessary (follow your manufacturer's instructions for this).
Don't expect hot water immediately; it takes time to heat a full tank. Electric heaters typically need 1-2 hours, while gas heaters are faster at 30-45 minutes. Use this waiting time to clean up and pat yourself on the back for a job well done!
Maintenance Tips and Best Practices
How Often Should You Drain?
The million-dollar question! The answer depends on your water quality and usage, but here's a good rule of thumb:
Hard water areas: Every 6 months
Average water quality: Once a year
Soft water areas: Every 1-2 years
High-usage households: Every 6-9 months
Mark your calendar or set a phone reminder. Making this a regular part of your home maintenance routine, like changing HVAC filters, ensures you won't forget.
Signs Your Water Heater Needs Draining
Sometimes your water heater will practically beg for attention. Watch for these telltale signs:
Rumbling, popping, or crackling sounds from the tank
Longer heating times than usual
Reduced hot water volume
Rusty or cloudy hot water
Higher energy bills without increased usage

Troubleshooting Common Issues
Stuck or Leaking Drain Valves
Got a drain valve that won't budge or won't stop dripping? Don't force it! Older brass valves can break if you torque them too hard. Try spraying some penetrating oil around the valve stem and let it sit for an hour before trying again.
If the valve leaks after draining, sometimes a simple washer replacement does the trick. For plastic valves that won't seal properly, you might need to replace the entire valve. This isn't a huge job, but it does require draining the tank again, so you might want professional help.
Slow or No Drainage
If water barely trickles out or stops completely, sediment is likely blocking the valve. Try these fixes:
Gently tap around the valve with a hammer to dislodge sediment
Briefly turn the cold water on to create pressure
Use a coat hanger wire to carefully probe the valve opening
Disconnect the hose and try draining into a bucket
Sometimes sediment is so severe that professional power flushing is needed. This involves special equipment that creates high-pressure water jets to break up deposits.
Conclusion
There you have it! Learning how to drain hot water heater safely and easily isn't just about following steps; it's about understanding why each step matters and taking the time to do it right. Regular draining prevents sediment buildup, extends your water heater's life, improves efficiency, and saves money on energy bills. With the right preparation, tools, and patience, this maintenance task becomes just another seasonal chore that keeps your home running smoothly and your showers consistently hot!
Read next: How to Flush a Water Heater Tank: Step-by-Step Guide
Frequently Asked Questions
Q1: Can I drain my water heater if it's never been done?
A: Yes, but expect heavy sediment and possible valve issues requiring professional help.
Q2: Is it safe to drain a water heater by myself?
A: Absolutely, if you follow safety precautions and turn off power sources first.
Q3: How long does the entire draining process take?
A: Plan for 2-3 hours including cooling time, draining, flushing, and refilling completely.
Q4: Will draining remove the rotten egg smell from hot water?
A: Sometimes, but persistent odors usually indicate bacteria requiring different treatment methods.
Q5: Can I use the drained water for my garden?
A: Not recommended due to sediment and potential chemical content from tank materials.
Stay up to date with our latest ideas!