How to Build a Table: Beginner-Friendly DIY Tips
Master how to build a table with these beginner-friendly DIY tips. Create stunning furniture for your home without expert skills!
Let's be honest for a moment. There's something magical about gathering around a table you built with your own two hands. Whether it's family dinners, holiday celebrations, or late-night conversations over coffee, that piece of furniture becomes more than just wood and screws. It becomes a story, a memory, a testament to what you're capable of creating.
Now, I know what you might be thinking. Building a table sounds like something only experienced woodworkers should attempt. Maybe you've watched a few YouTube videos and felt completely overwhelmed by fancy joinery techniques and expensive tools. But here's the thing. Your first table doesn't need to be complicated. In fact, some of the most beautiful, beloved tables are surprisingly simple to construct.
This how to build a table: beginner-friendly DIY tips guide strips away the intimidation and breaks everything down into manageable steps. We're not going to pretend you need a fully equipped workshop or decades of experience. What you need is enthusiasm, patience, and willingness to learn as you go. By the time you've finished reading, you'll have a clear roadmap from raw lumber to a functional piece of furniture you'll be proud to show off.
Ready to roll up your sleeves? Let's build something that'll last for generations.
The Timeless Appeal of Handcrafted Tables
Before we dive into the how-to portion, let's talk about why building your own table beats buying one from a furniture store every single time.
First, there's the customization factor. Store-bought tables come in predetermined sizes, finishes, and styles. But what if your dining room needs something 6 inches narrower than standard? What if you want a finish that matches your grandmother's hutch perfectly? When you're the builder, you're also the designer. Every dimension, every color, every detail is yours to decide.
Then there's the quality consideration. Mass-produced furniture often relies on particleboard, dowels, and glue that break down over time. Your handbuilt table uses solid wood and proper joinery that gets stronger with age. Twenty years from now, while that big-box store table sits in a landfill, yours will still be hosting dinner parties.
And honestly? The satisfaction is unmatched. There's profound pride in answering "Where'd you get that table?" with a casual "Oh, I made it." Watching people's eyebrows rise in surprise never gets old, trust me on this one.
Essential Tools for Table Building
You don't need a warehouse full of equipment to build a beautiful table. Starting with a modest tool collection and adding pieces as needed makes far more sense than blowing your budget before cutting a single board.
Power Tools That Make Life Easier
A circular saw handles most cutting tasks admirably. While a table saw offers more precision for repetitive cuts, a circular saw with a straightedge guide produces surprisingly accurate results for far less money.
Your drill becomes your best friend during assembly. Invest in a quality cordless model with good battery life. You'll use it constantly for drilling pilot holes and driving screws, switching between bits dozens of times per project.
A random orbital sander transforms rough lumber into silky smooth surfaces without the learning curve of belt sanders. It removes material quickly but forgives mistakes, making it perfect for beginners who haven't developed a sanding touch yet.
If you can swing it, a pocket hole jig revolutionizes table construction. These clever tools create angled holes that allow screws to pull joints tight while remaining hidden from view. Companies make affordable versions specifically designed for occasional DIYers.
Hand Tools You'll Actually Use
Never underestimate the humble tape measure. Get a quality one with a locking mechanism and clear markings. A worn-out tape leads to inaccurate measurements and frustrating mistakes.
Carpenter's squares and speed squares ensure your cuts are straight and your corners meet at perfect 90-degree angles. These inexpensive tools pay for themselves immediately in improved accuracy.
Clamps might be the most underrated tools in woodworking. You genuinely cannot have too many. Bar clamps hold tabletops together during glue-ups. F-clamps secure work to your bench. Spring clamps handle lighter duty tasks. Buy more than you think you need.
A quality handsaw still has its place, particularly for small adjustments and fitting work where firing up a power saw seems like overkill.
Selecting the Right Wood for Your Table
Choosing lumber intimidates many beginners, but it doesn't need to. Understanding a few basics helps you make confident decisions at the lumber yard.
Softwoods for Budget-Friendly Projects
Pine tops the list for first-time table builders. It's affordable, widely available, and forgiving to work with. Modern pine furniture has shed its cheap reputation as people embrace the casual, cottage aesthetic that pine provides naturally.
Douglas fir offers more strength than pine while remaining relatively affordable. Its straight grain and warm color make it attractive for rustic farmhouse tables.
Cedar brings natural beauty and weather resistance, though it's softer than other options and dents more easily in high-use applications.
Hardwoods for Heirloom Quality
Oak has built tables for centuries, and for good reason. Red oak and white oak both offer exceptional durability, beautiful grain patterns, and the ability to take stains in countless directions. Oak costs more than softwoods but creates furniture that truly lasts.
Maple provides a lighter appearance with incredible hardness. It's more challenging to work with hand tools but rewards effort with elegant results.
Walnut represents the premium choice for furniture makers. Its rich brown color deepens with age, and the wood machines beautifully. Expect to pay significantly more, but the results speak for themselves.
What to Look for at the Lumber Yard
Sight down each board's length to check for warping, twisting, or bowing. Minor imperfections sometimes work out during construction, but severely warped boards cause nothing but headaches.
Check moisture content if the yard has a meter available. Wood above 12% moisture continues drying after you bring it home, potentially warping or cracking your finished project.
Look for boards with tight, straight grain when possible. Wild grain patterns look interesting but tend to cause more wood movement and finishing challenges.
How to Build a Table: Beginner-Friendly DIY Tips for Planning Your Project
Jumping straight into cutting without a plan leads to wasted materials and frustration. Taking time upfront to think through your project saves both.
Determining Your Table's Purpose and Size
What will this table actually do? A coffee table, dining table, end table, and workbench have vastly different requirements. Dining tables need specific heights (around 30 inches) and sufficient leg room underneath. Coffee tables sit lower (16 to 18 inches typically) and prioritize surface area over height.
Measure your space carefully. A table that's too large overwhelms a room while one too small looks lost. For dining tables, allow 24 inches of width per person and at least 36 inches between the table edge and walls or furniture for comfortable movement.
Consider what you'll place on the table. Heavy items like televisions or full place settings require sturdier construction than decorative objects that barely weigh anything.
Sketching Your Design
You don't need architectural drawing skills. A rough sketch with dimensions helps you visualize the finished piece and creates a reference during construction. Include overall length, width, and height along with leg placement and any details like aprons or stretchers.
This sketch becomes your shopping list foundation. Calculate how much lumber you need based on your dimensions, then add 15 to 20 percent extra for mistakes and defects. Running short mid-project means either a lumber yard trip that breaks your momentum or compromising your design.
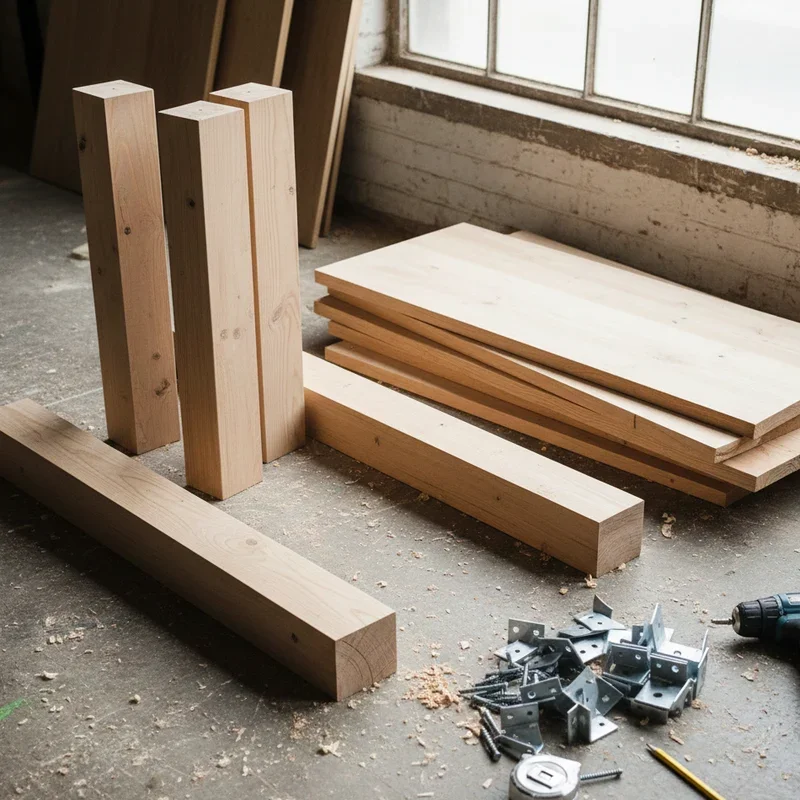
Creating a Cut List
Transfer your sketch into a detailed list of every board you'll need to cut and its exact dimensions. Group similar cuts together to maximize efficiency at the saw.
A typical simple table might include four legs at 29 inches each, two long aprons at 48 inches, two short aprons at 24 inches, and tabletop boards totaling 30 inches wide by 54 inches long.
Having this list organized before you start cutting keeps the project flowing and helps prevent expensive mistakes.
Building a Solid Tabletop
The tabletop is often the most visible part of your table, so let's make it beautiful.
Preparing Your Boards
Start by selecting your best boards for the top. Arrange them to find the most pleasing grain pattern and color combination. Some woodworkers alternate growth ring direction to minimize cupping, while others prioritize appearance.
Joint the edges that will be glued together, ensuring they're perfectly straight and square. Without a jointer, careful passes with a hand plane or even a straight router bit can achieve good results.
Dry fit your boards together, checking for gaps along the seams. Light should not be visible through the joints. If gaps exist, more edge preparation is needed before gluing.
Gluing Up the Top
Apply wood glue evenly along one mating edge of each joint. Use enough to create small squeeze-out when clamped, but not so much that it runs everywhere. A thin, even layer beats thick globs every time.
Position clamps both above and below the assembly to apply even pressure and prevent the top from bowing. Alternate clamps every 12 inches or so for best results.
Let the glue cure fully before removing clamps. Most wood glues reach handling strength in an hour but don't achieve full strength for 24 hours. Patience here prevents heartbreak later.
Flattening and Smoothing
Even carefully glued tops rarely come out perfectly flat. Minor height differences between boards need addressing before the table looks finished.
A hand plane works wonderfully for this task, though it requires practice to use effectively. Working diagonally across the grain first, then with the grain, removes high spots efficiently.
Power sanding with a random orbital sander handles remaining imperfections. Start with coarser grits (80 or 100) to flatten, then progress through 120, 150, and 180 or 220 for smoothness.
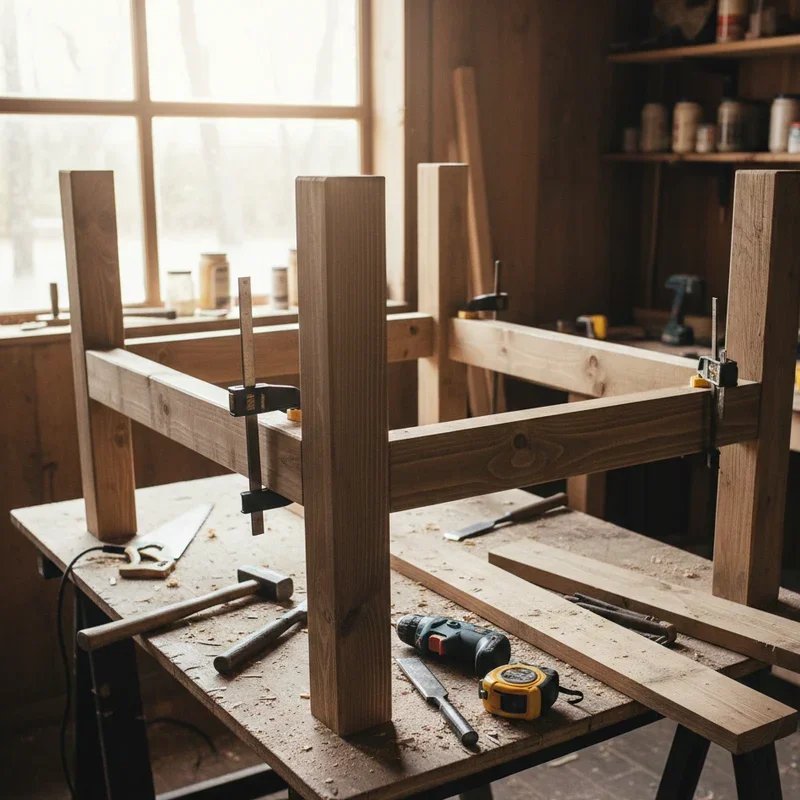
Constructing Sturdy Legs and Base
A gorgeous top means nothing if the base wobbles or collapses. Let's build something rock solid.
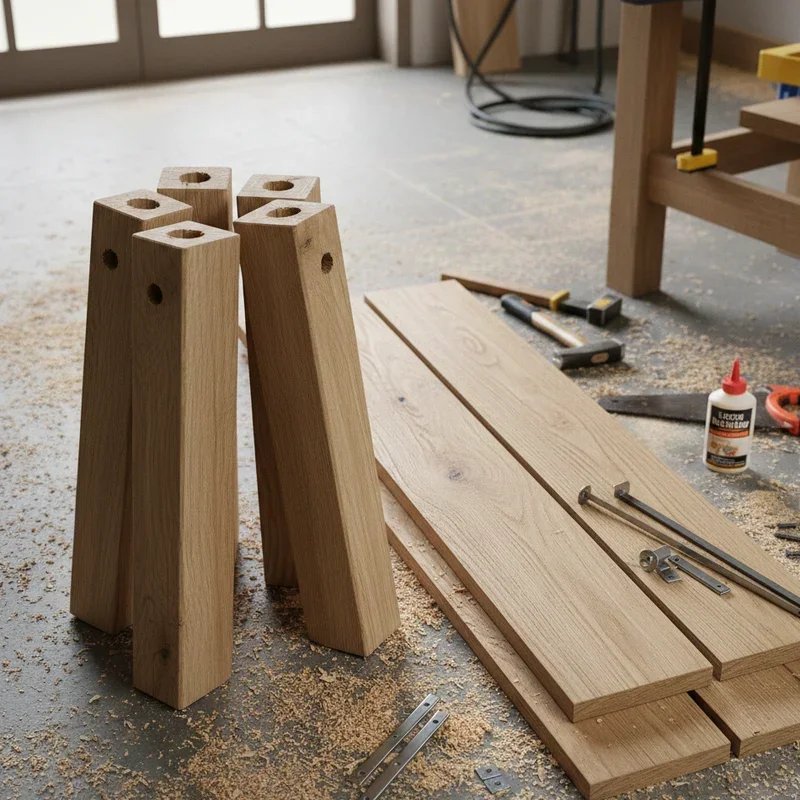
Simple Square Legs
Square legs represent the easiest starting point for beginners. Cut four pieces of 4x4 lumber to identical lengths (typically 28 to 29 inches for dining height after accounting for the tabletop thickness).
Sand each leg smooth, slightly rounding sharp corners for comfort and durability. Perfectly square edges chip and splinter over time, while gentle roundovers stay clean.
For added visual interest, taper the legs from top to bottom using a circular saw or hand plane. This classic detail makes legs appear lighter and more elegant without complicating construction significantly.
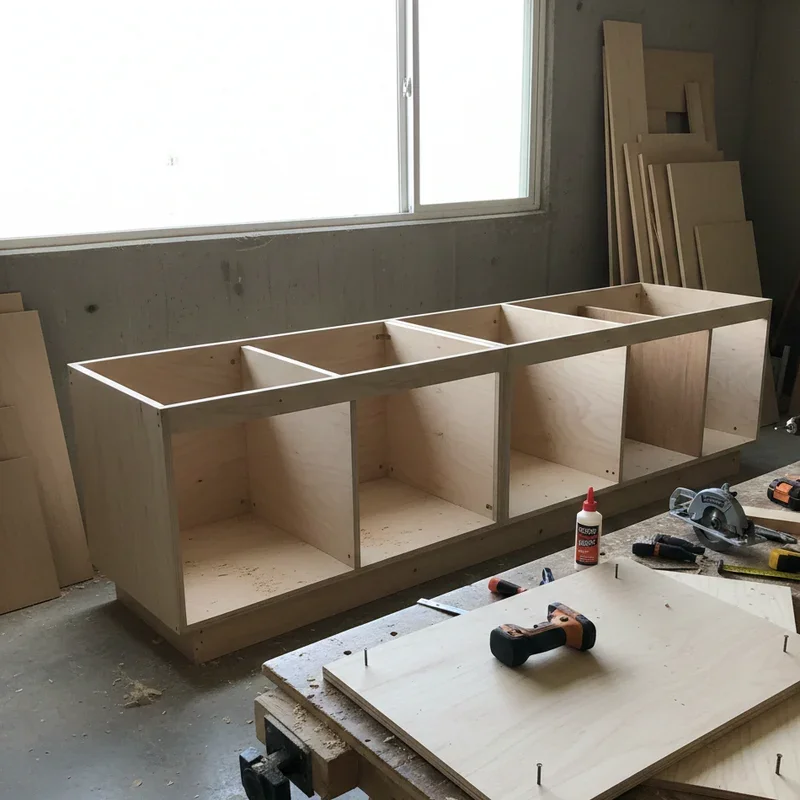
Building the Apron Frame
Aprons are the horizontal boards connecting the legs beneath the tabletop. They provide crucial structural support and prevent the table from racking sideways.
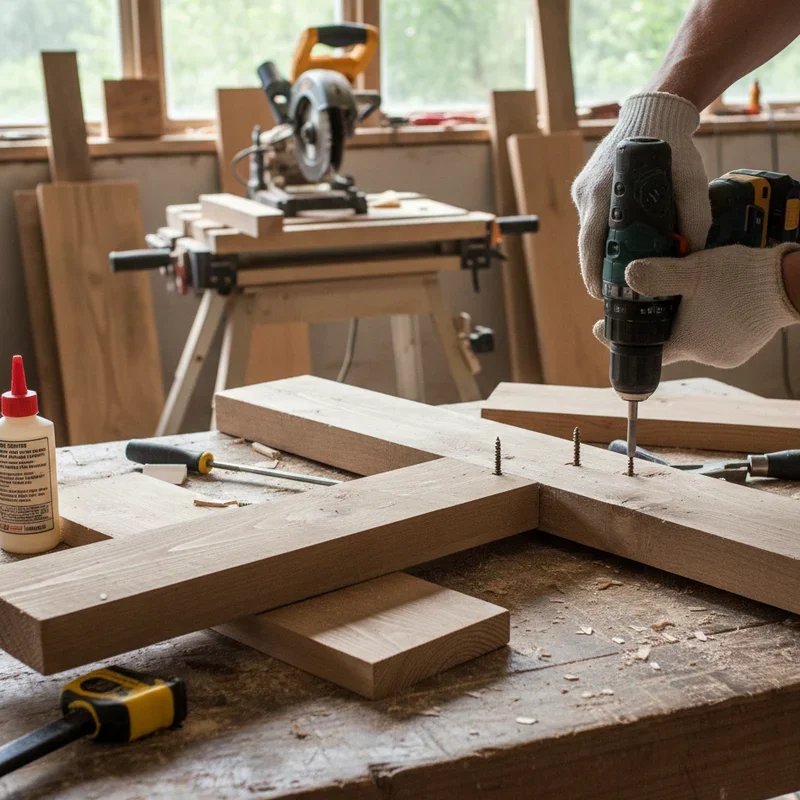
Cut apron boards to length, accounting for the joinery method you're using. For a 48-inch table with 3.5-inch square legs using pocket hole joinery, your long aprons might be 41 inches to fit between the legs.
Pocket hole joinery makes apron attachment straightforward. Drill pocket holes on the inside face of each apron end, then drive screws into the legs. The screws pull everything tight while remaining completely hidden.
Traditional mortise and tenon joints offer superior strength for those wanting to develop their skills. Cut rectangular mortises (holes) in the legs and matching tenons (projections) on the apron ends. When glued together, this joint withstands incredible stress.
Adding Stretchers for Extra Stability
Wider or heavier tables benefit from stretchers connecting the legs lower down. These additional horizontal members prevent legs from splaying outward and add substantial rigidity.
H-stretchers run from leg to leg on each end, with a long stretcher connecting them in the middle. This classic configuration provides excellent strength while maintaining knee clearance.
Box stretchers connect all four legs in a continuous rectangle. They're simpler to build than H-stretchers but can interfere with seating at narrower tables.
Attaching the Top to the Base
This final construction step requires thought because wood expands and contracts with humidity changes. Trapping the top rigidly causes cracks and splits.
Allowing for Wood Movement
Wood moves across the grain as it absorbs and releases moisture through the seasons. A 30-inch wide tabletop might vary by a quarter inch throughout the year. Attachment methods must accommodate this movement.
Figure-eight fasteners install into pockets routed into the apron tops. They allow the top to move slightly while preventing it from lifting off the base.
Z-clips or wooden buttons slide in grooves cut along the apron inside faces. They're inexpensive, easy to install, and proven effective over centuries of furniture making.
Elongated screw holes in the aprons work for simpler tables. Drill oversized or slot-shaped holes in the aprons, then drive screws through into the top. The slots allow screws to shift slightly as the top moves.
Centering and Securing
Flip your tabletop upside down on a padded surface. Position the base assembly centered on the underside, measuring carefully to ensure equal overhang on all sides.
Mark the attachment point locations and install your chosen fasteners. Work around the table systematically, checking alignment as you go.
Flip the completed table right-side up with a helper's assistance. Large tabletops get surprisingly heavy and awkward to handle alone.
Finishing Your Table Like a Professional
Construction's complete, but we're not done yet. The finish protects your work and brings out the wood's beauty.
Final Surface Preparation
Sand the entire table working up through grits to at least 180 for stained finishes or 220 for clear finishes. Remove all dust with a tack cloth or slightly damp rag between grits.
Raise the grain before final sanding by wiping the surface with a damp cloth and letting it dry. This causes wood fibers to swell and stand up. A light final sanding knocks them down permanently, preventing the same thing from happening after finish application.
Choosing Your Finish
Oil finishes penetrate the wood rather than sitting on top. They're easy to apply, simple to repair, and feel natural under the hand. Danish oil and tung oil are popular choices that build subtle sheen over multiple coats.
Polyurethane creates a durable film that resists scratches, heat, and moisture. Water-based versions dry quickly and remain clear, while oil-based products amber slightly and require longer drying times.
Lacquer provides professional-looking results with a sprayer but proves tricky for beginners. The finish builds quickly through multiple thin coats but demands good technique and ventilation.
Natural wax offers the easiest application but provides minimal protection. It's best suited for decorative pieces that won't see heavy use or moisture.
Application Techniques
Apply finish in thin, even coats regardless of which product you've chosen. Thick coats trap solvents, remain tacky, and may never cure properly.
Sand lightly between coats with fine sandpaper (320 grit or higher) to ensure good adhesion. Remove sanding dust completely before applying subsequent coats.
Allow proper drying time between coats. Rushing this stage ruins finishes more often than any other mistake. When the label says wait 24 hours, wait 24 hours.
How to Build a Table: Beginner-Friendly DIY Tips for Avoiding Common Mistakes
Learning from others' errors saves you from making the same ones yourself.
Skipping pilot holes ranks among the most common beginner mistakes. Driving screws directly into wood, especially near edges or ends, frequently causes splitting. Take the extra few seconds to drill appropriately sized pilot holes every single time.
Neglecting to check for square during assembly leads to tables that rock on three legs or have visibly skewed tops. Measure diagonals frequently as you work. Equal diagonal measurements mean square corners.
Over-tightening screws strips holes and actually weakens joints. Stop when the screw head seats firmly against the wood. More torque doesn't mean more strength.
Expecting perfection on your first project sets you up for disappointment. Every woodworker's first table has imperfections. These become less noticeable with experience, and honestly, they're part of what makes handmade furniture special.
Conclusion
Building your own table opens a door to creativity, accomplishment, and practical skill development that lasts a lifetime. Starting with simple designs and basic techniques builds confidence while producing functional furniture your family will treasure. Don't let fear of imperfection hold you back from this rewarding pursuit. Every master woodworker built a first table that had its quirks and learning moments. What matters is taking that first step, making those first cuts, and discovering what your hands can create when given the chance.
Read next: How to Fit a Dining Table in a Small Living Room
Frequently Asked Questions
1. What type of wood should absolute beginners use for their first table project?
Pine offers the best combination of affordability, availability, and forgiving workability for first-time builders.
2. How long does it typically take a beginner to build a simple table?
Expect to spend two to three weekends from raw lumber to finished piece including drying time.
3. Do I need expensive professional tools to build a quality dining table?
No, basic tools like a circular saw, drill, and sander produce excellent results with patience.
4. What's the most common mistake that causes homemade tables to wobble annoyingly?
Legs cut to slightly different lengths cause wobbling, so measure and cut all four together.
5. Can I build a sturdy table without using any complicated woodworking joints?
Absolutely, pocket hole joinery and simple screwed construction create surprisingly strong table frames.
Stay up to date with our latest ideas!