How to Build a Door Frame: Step-by-Step DIY Guide
Learn how to build a door frame with this step-by-step DIY guide covering materials, measurements, installation tips, and expert techniques.
So you've got a doorway that needs framing, and you're wondering if this is something you can tackle yourself. Well, here's some fantastic news. Building a door frame is absolutely within reach for most DIY enthusiasts, and it's one of those skills that'll serve you well for years to come.
Whether you're finishing a basement, creating a new room, or replacing a damaged frame, understanding how to build a door frame: step-by-step DIY guide style will save you serious money and give you bragging rights at your next barbecue. There's nothing quite like pointing to a perfectly hung door and saying, "Yeah, I did that myself."
Now, I won't sugarcoat it. This project requires precision. Doors are fussy things, and a frame that's even slightly off will cause headaches down the road. Sticking doors, gaps that let in drafts, and hardware that won't align properly are all consequences of sloppy framing. But don't let that intimidate you. With careful measuring, the right materials, and a methodical approach, you'll end up with a frame that's square, plumb, and ready for whatever door you throw at it.
Let's dive into everything you need to know to get this job done right.
Understanding Door Frame Basics
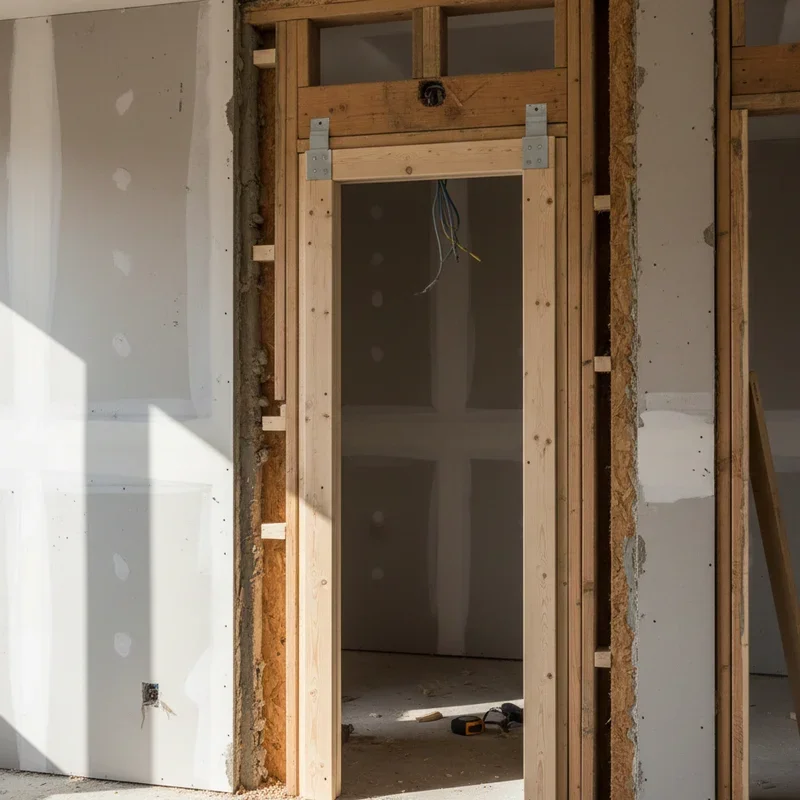
Before picking up a single tool, it helps to understand what we're actually building here. A door frame consists of several components working together, and knowing their names and functions makes the whole process clearer.
The rough opening is the hole in your wall where the door will go. This opening is framed with lumber and needs to be slightly larger than the door unit itself to allow for adjustments during installation.
King studs run the full height from the bottom plate to the top plate of your wall. They provide structural support on either side of the doorway and transfer loads around the opening.
Jack studs, sometimes called trimmer studs, sit alongside the king studs but are shorter. They support the header directly and define the height of your rough opening.
The header spans the top of the opening, carrying the load from above and transferring it to the jack studs. Header size depends on the opening width and whether the wall is load-bearing.
The door jamb is the finished frame that goes inside the rough opening. It consists of two side jambs and a head jamb, creating the surface against which the door closes and where hinges and strike plates mount.
Gathering Materials and Tools
Having everything ready before starting prevents those frustrating mid-project hardware store runs. Trust me, nothing kills momentum like realizing you're missing a crucial item.
Lumber You'll Need
For the rough frame:
Two king studs (typically 2x4 lumber for interior walls)
Two jack studs
Header material (doubled 2x4s, 2x6s, or larger depending on load)
Cripple studs if needed above the header
Bottom plate material if starting from scratch
For the finished jamb:
Jamb stock (usually 3/4 inch thick boards)
Casing or trim for finishing
Essential Tools
Round up these items before beginning:
Tape measure
Framing square and speed square
Level (4-foot level works great)
Circular saw or miter saw
Hammer or framing nailer
Drill with bits
Pencil
Safety glasses and hearing protection
Wood shims
Construction adhesive
Fasteners and Hardware
16d framing nails or 3-inch framing screws
8d finish nails or 2-inch brad nails
Wood screws for jamb installation
Measuring for Your Door Frame
Here's where the old carpenter's wisdom "measure twice, cut once" really matters. Getting measurements right at this stage prevents major headaches later.
Determining Rough Opening Size
The standard rule is to make your rough opening 2 inches wider and 2.5 inches taller than your door slab. So for a standard 32-inch by 80-inch door, you'd frame a rough opening of 34 inches wide by 82.5 inches tall.
This extra space accommodates the jamb thickness (about 3/4 inch on each side) plus room for shimming and adjustments. The extra height accounts for the head jamb and allows space for flooring material underneath.
If you're installing a prehung door unit, check the manufacturer's specifications. Some units require slightly different rough opening dimensions.
Checking Existing Conditions
When working with an existing wall, examine what you're dealing with. Is the floor level? Are the surrounding studs plumb? If the floor slopes or walls lean, you'll need to account for these imperfections during installation.
Use your level to check the floor across the opening width. Note any variation because this affects how you cut your jack studs.
How to Build a Door Frame: Step-by-Step DIY Guide for Rough Framing
Alright, let's get building. This section covers creating the structural rough frame that supports everything else.
Step One: Mark Your Layout
Starting with the bottom plate, mark where your king studs will go. Measure carefully from your reference point, typically an existing wall corner or other fixed element.
Mark both edges of each king stud location. Standard lumber is 1.5 inches thick, so your marks should be 1.5 inches apart. Write an X between the marks to indicate where the stud goes.
Step Two: Cut the King Studs
Measure the distance from the bottom plate to the top plate of your wall. This measurement determines your king stud length. In standard 8-foot ceiling construction, king studs typically run about 92 and 5/8 inches, but always measure your specific situation.
Cut two king studs to length, ensuring square cuts on both ends.
Step Three: Calculate and Cut Jack Studs
Jack stud length equals your rough opening height. For that 82.5-inch opening, cut two jack studs at exactly 82.5 inches.
Here's a crucial detail. If your floor isn't level, you'll need to adjust jack stud lengths slightly. The lower side of the floor requires a slightly longer jack stud to keep the header level.
Step Four: Build the Header
Header construction depends on your wall type. For non-load-bearing interior walls, a single 2x4 laid flat often suffices. Load-bearing walls require beefier headers, sometimes doubled 2x10s or even engineered lumber.
For a typical interior door in a non-load-bearing wall, sandwich a piece of 1/2-inch plywood between two 2x4s laid flat. This creates a header 3.5 inches wide, matching your wall thickness.
Cut the header to span between king studs. That's your rough opening width plus 3 inches (1.5 inches for each jack stud).
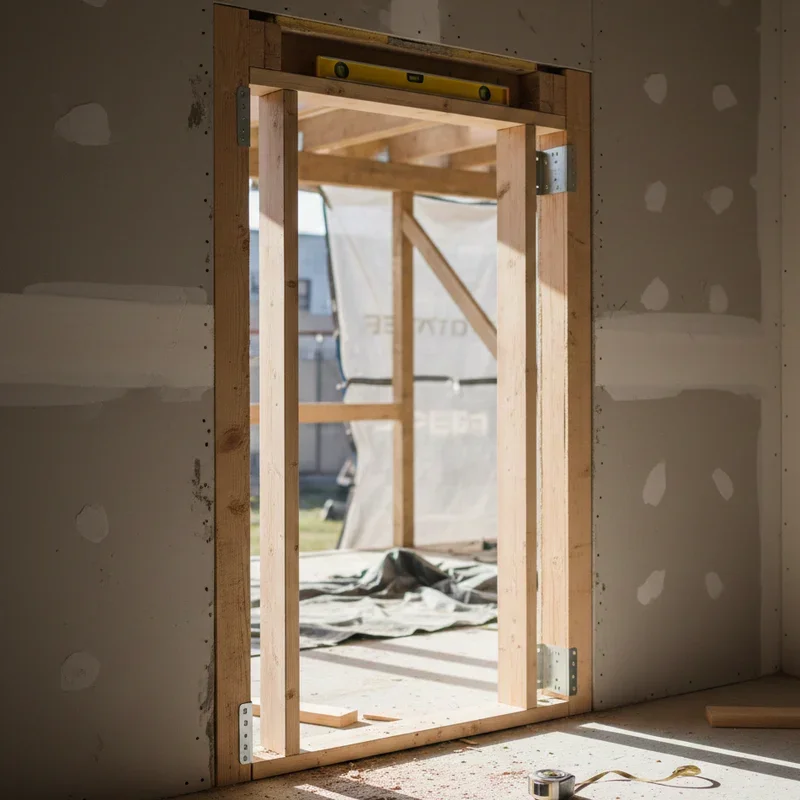
Step Five: Assemble the Components
Now the fun begins. Start by nailing or screwing the king studs in place, ensuring they're plumb and properly positioned according to your marks.
Attach jack studs to the inside face of each king stud. Some carpenters nail the jack and king together before installing them as a unit. Either method works; choose what feels more manageable.
Lift the header into position, resting it on top of the jack studs. Nail through the king studs into the header ends, and toenail through the header into the jack studs.
If there's space between the header and top plate, fill it with cripple studs spaced to match your wall's stud layout.
Step Six: Cut Out the Bottom Plate
With your frame assembled, use a handsaw or reciprocating saw to cut the bottom plate flush with the inside edges of the jack studs. Remove this section to create your doorway.
Sand or file any rough edges that could interfere with jamb installation.
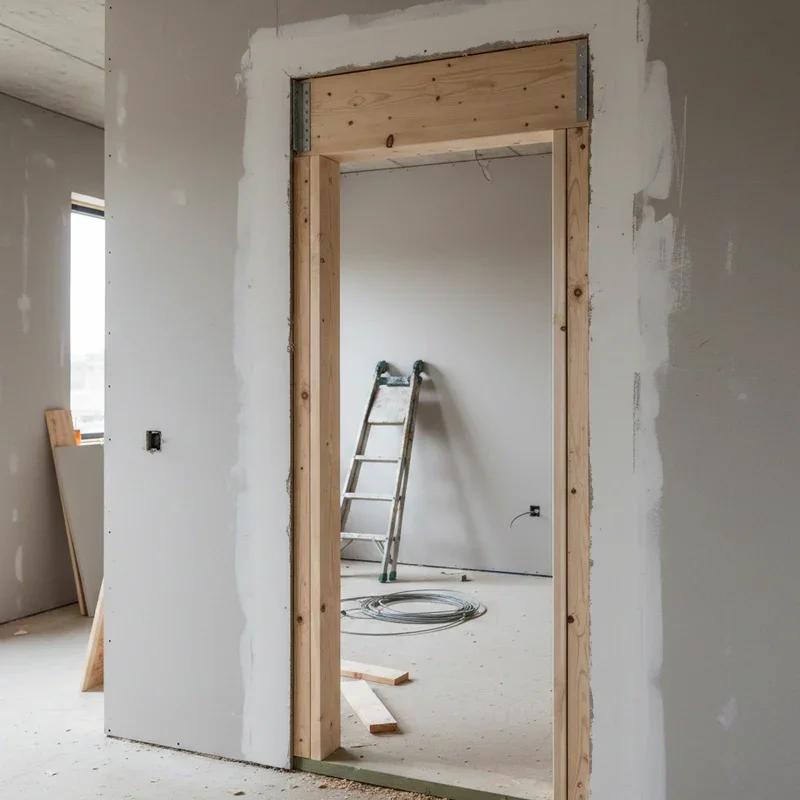
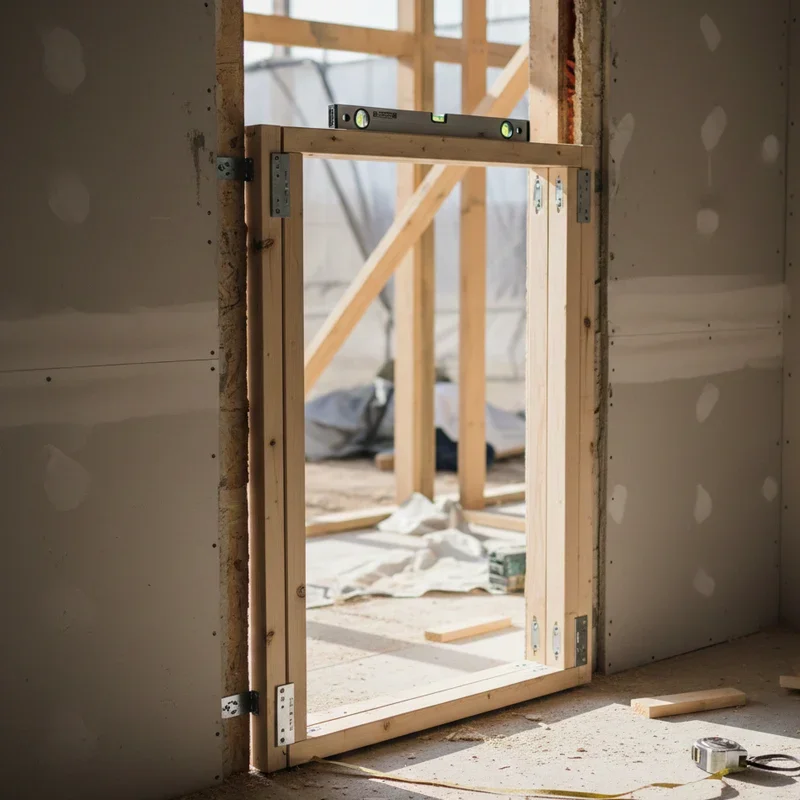
Installing the Door Jamb
The rough frame provides structure, but the jamb creates the finished opening where your door actually operates. Precision here determines whether your door swings smoothly or fights you every time.
Preparing Jamb Material
If you're building a jamb from scratch rather than using a prehung unit, you'll need to cut your jamb pieces. Side jambs should equal the height of your rough opening minus about 1/4 inch for clearance. The head jamb spans the width between side jambs plus their thickness.
Dado or rabbet joints where the head meets the sides create strong connections, but simple butt joints with screws work fine for most applications.
Setting the Hinge Side First
Begin with the hinge side jamb. This side needs to be perfectly plumb because it determines how the door hangs and swings.
Place the jamb in the opening and insert shims behind it at hinge locations, near the top, middle, and bottom. Check for plumb with your level. Adjust shims until the jamb reads perfectly plumb in both directions.
Secure the jamb by driving screws through it and the shims into the king or jack stud. Don't overdrive; you want things snug but not bowed.
Installing the Head Jamb
Rest the head jamb on top of the hinge side jamb. Check for level and shim as needed. The head jamb should be dead level for the door to operate correctly.
Nail or screw through the head jamb into the header, again using shims to fill any gaps and maintain proper positioning.
Setting the Strike Side
The strike side jamb installation depends on your door width. Position this jamb to create the proper width for your door plus about 1/8 inch clearance on each side.
If you're working with a door already in hand, use it as a gauge. Set the door in place against the hinge jamb and position the strike jamb to create even gaps.
Shim and secure just like the hinge side, checking for plumb throughout.
Verifying Your Work
Before calling it done, check everything again. Use your framing square to verify that corners are at 90 degrees. Measure diagonally from corner to corner; equal measurements confirm the opening is square.
Swing a level across the opening at various heights. The jambs should remain parallel from top to bottom.
Finishing Touches
With the jamb installed, a few final steps complete your door frame project.
Installing Door Stops
Door stops are the thin strips against which the door rests when closed. Typically, you install these after hanging the door so you can position them precisely against the closed door face.
Cut stops to length, mitering corners for a clean look. Nail them in place with finish nails, being careful not to split the thin material.
Applying Casing
Casing, or trim, covers the gap between the jamb and wall surface, providing a finished appearance. There's tremendous variety in casing styles, from simple ranch profiles to elaborate traditional designs.
Measure and cut casing pieces, typically mitering corners at 45 degrees for a professional look. Nail through the casing into both the jamb and the wall framing.
Filling and Finishing
Set nail heads below the surface using a nail set. Fill holes with wood putty, let dry, and sand smooth. If you used screws where they'll be visible, countersink them and fill similarly.
Sand any rough spots on the jamb and casing. Prime and paint or stain according to your finish preferences.
Common Mistakes and How to Avoid Them
Learning from others' errors saves you from making your own. Here are pitfalls that trip up many first-time frame builders.
Ignoring Level and Plumb
This one can't be emphasized enough. A frame that's out of plumb causes doors to swing open or closed on their own. Out-of-level headers create uneven gaps at the top of the door. Take the time to get these right.
Wrong Rough Opening Size
Too small, and your door won't fit. Too large, and you'll struggle with excessive shimming and potential stability issues. Double-check your door specifications and cut accordingly.
Skimping on Shims
Some folks try to minimize shimming, but shims are essential for fine-tuning alignment. Use pairs of shims from opposite sides to create flat, adjustable spacers. Don't rely on just one shim that creates a wedge shape.
Forgetting About Flooring
If new flooring will be installed, account for its thickness in your measurements. A frame built for bare subfloor height will be too short once carpet or hardwood goes down.
Over-Tightening Fasteners
Cranking screws too tight bows jamb material, throwing off alignment. Snug is sufficient; let the shims handle keeping things in place.
When Things Get Complicated
Most door frames follow the process outlined in this how to build a door frame: step-by-step DIY guide, but certain situations require additional consideration.
Load-Bearing Walls
Working in load-bearing walls means you're messing with structural elements. Headers must be properly sized to carry the load, and you may need temporary support while working. When in doubt, consult a structural engineer or experienced contractor.
Wide Openings
Openings wider than standard doors, like double doors or wide cased openings, need beefier headers and careful attention to load transfer. Code requirements vary by location, so check local regulations.
Pocket Doors
Pocket doors require specialized framing that accommodates the door sliding into the wall cavity. This involves different stud configurations and header placements than standard swinging doors.
Existing Structure Challenges
Older homes sometimes have unconventional framing, non-standard lumber dimensions, or hidden utilities in walls. Proceed carefully and be prepared to adapt your approach.
Conclusion
Building a door frame might seem daunting initially, but breaking it into manageable steps makes the project entirely achievable. This how to build a door frame: step-by-step DIY guide has walked you through everything from understanding basic components to handling finishing details. Remember that precision matters at every stage, and taking time for careful measurements pays dividends in the final result. With patience and attention to detail, you'll create a sturdy, professional-looking frame that serves perfectly for decades.
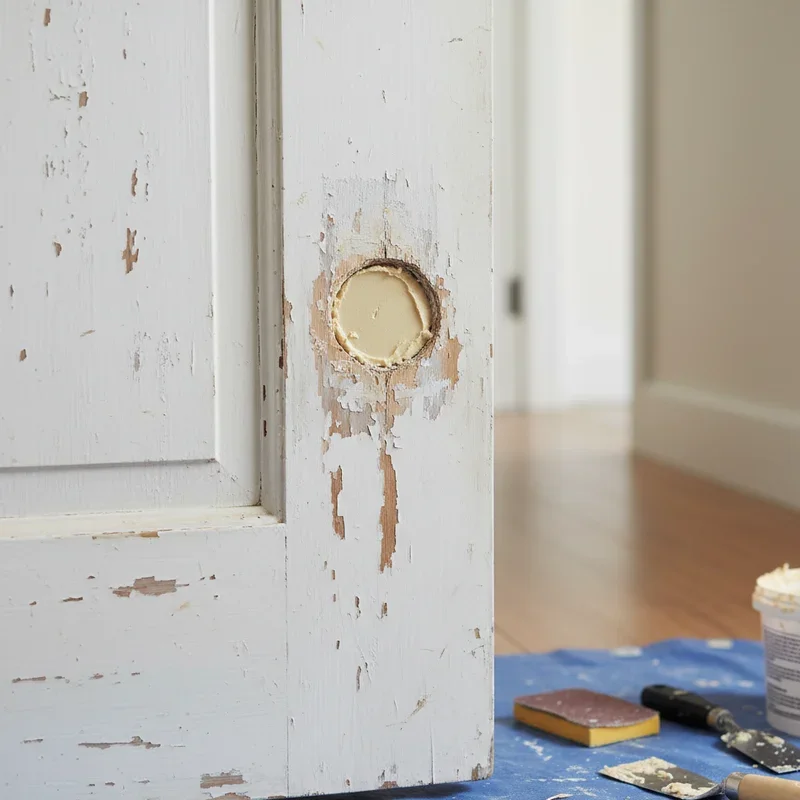
Read next: How to Fix a Hole in a Door Without Replacing It
Frequently Asked Questions
1. What size lumber should I use for door frame construction?
Standard interior walls use 2x4 lumber for studs and header construction typically.
2. How much larger should the rough opening be than the door?
Make rough openings 2 inches wider and 2.5 inches taller than door size.
3. Can I build a door frame in a load-bearing wall myself?
Yes, but ensure proper header sizing and consider temporary support during construction.
4. What causes a door to stick after frame installation?
Frames that are not plumb or square typically cause doors to bind.
5. Do I need special tools to build a door frame?
Basic carpentry tools including level, saw, square, and hammer are usually sufficient.
Stay up to date with our latest ideas!