How to Remove Mold from Bathroom Ceiling Safely and Fast
Learn how to remove mold from bathroom ceiling safely and fast with proven methods, natural solutions, and expert prevention tips.
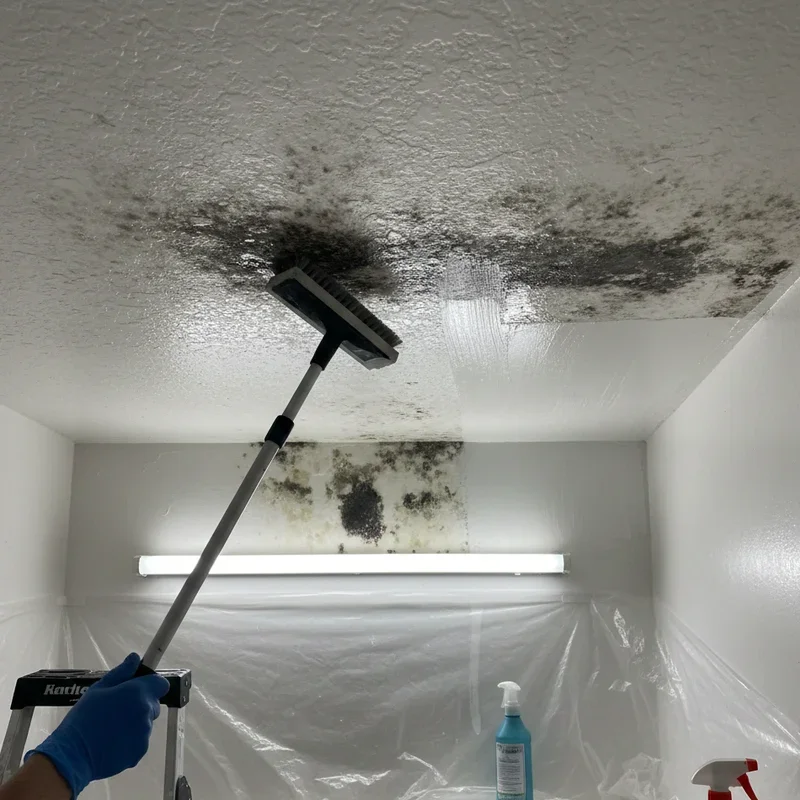
Let's face it, nobody wants to look up while brushing their teeth and spot those ugly black or green patches spreading across the ceiling. It's not just an eyesore; bathroom mold is a sneaky troublemaker that can mess with your health and damage your home if you let it stick around too long.
Here's the thing though. You don't need to panic or call in expensive professionals for every moldy situation. With the right know-how and a bit of elbow grease, you can tackle this problem yourself. Understanding how to remove mold from bathroom ceiling safely and fast isn't rocket science, but it does require following some important steps to protect yourself and get lasting results.
In this comprehensive guide, we'll walk through everything from identifying what type of mold you're dealing with to choosing the best cleaning solutions and preventing future outbreaks. Whether you've got a small spot or a larger infestation, you'll find practical advice that actually works. So roll up your sleeves, and let's get that ceiling looking brand new again.
Why Does Mold Love Your Bathroom Ceiling So Much
Before we dive into removal techniques, it helps to understand why mold keeps showing up in bathrooms in the first place. Think of mold spores like tiny seeds floating through the air constantly. They're everywhere, just waiting for the perfect conditions to settle down and start growing.
Your bathroom hands them that opportunity on a silver platter. Every hot shower creates steam that rises straight up to the ceiling. When that warm moisture hits the cooler ceiling surface, condensation forms. Add in poor ventilation, and you've basically created a mold paradise.
Ceilings above showers and bathtubs suffer the most because they catch the brunt of rising steam. Corners and edges tend to stay damp longer since air circulation doesn't reach them as effectively. If your bathroom lacks a proper exhaust fan or window, the moisture has nowhere to escape, making mold growth almost inevitable.
The ceiling also presents a challenge because water doesn't drain off it like it would from walls. Moisture just sits there, soaking into paint and drywall, creating prime real estate for fungal colonies to establish themselves.
Identifying the Mold on Your Bathroom Ceiling
Not all bathroom mold is created equal, and knowing what you're dealing with helps you approach removal safely. Most commonly, you'll encounter one of these types.
Black mold often gets the most attention because it looks alarming and can cause health issues. It appears as dark greenish-black patches and tends to have a slightly slimy texture when conditions are wet. However, not every dark mold is the dangerous Stachybotrys variety, so don't assume the worst.
Green mold shows up frequently in bathrooms and usually has a fuzzy or powdery appearance. It's typically one of the Aspergillus or Penicillium species. While not as notorious as black mold, it still needs to go.
Pink mold, which actually isn't mold at all but bacteria called Serratia marcescens, creates those salmon-colored stains you sometimes see around drains and on grout. It's easier to remove but indicates high moisture levels.
White mold can be tricky to spot on light-colored ceilings. It often looks powdery and might be mistaken for mineral deposits or efflorescence at first glance.
If the affected area is larger than about ten square feet, or if you notice a strong musty odor even after cleaning visible spots, professional assessment is worth considering. Some situations genuinely do require expert intervention.

Safety Precautions You Cannot Skip
Here's where I need to get a little serious with you. Mold removal isn't dangerous when done properly, but cutting corners on safety can lead to respiratory problems, skin irritation, and other health issues.
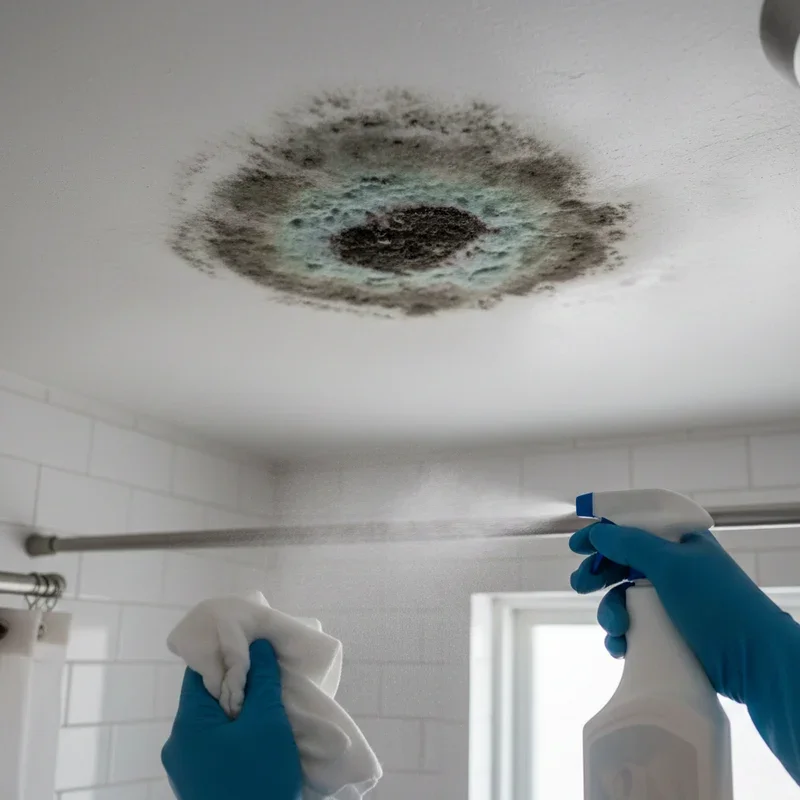
First up, gear yourself properly. Wear an N95 respirator mask at minimum. Those flimsy paper masks won't cut it because mold spores are tiny enough to slip right through. Protect your eyes with safety goggles that seal around your face, not just regular glasses. Pull on rubber gloves that extend past your wrists, and consider wearing old clothes you won't mind throwing away afterward.
Ventilation matters big time during the cleaning process. Open windows if possible and run the exhaust fan. You want those disturbed spores heading outside, not settling elsewhere in your home. If your bathroom lacks good ventilation, set up a box fan in the doorway pointed outward.
Contain the workspace by closing the bathroom door and stuffing a towel underneath to prevent spores from spreading to other rooms. Remove towels, bath mats, and toiletries from the area. Cover the toilet, sink, and any items that can't be removed with plastic sheeting.
Never mix cleaning products, especially bleach with ammonia-based cleaners. This combination creates toxic chloramine gas that can seriously harm your lungs. Stick to one cleaning solution at a time, and rinse surfaces between products if you need to switch.
How to Remove Mold from Bathroom Ceiling Safely and Fast Using Household Products
Good news. You probably already have effective mold-killing products sitting in your kitchen or laundry room. These household solutions work wonderfully for surface mold on painted ceilings.
The White Vinegar Method
Distilled white vinegar is a mold-fighting champion that's gentle enough for most ceiling surfaces. Its acidic nature kills about 82 percent of mold species on contact.
Pour undiluted white vinegar into a spray bottle. Generously coat the moldy areas and let it sit for at least an hour. The longer contact time allows the acid to penetrate and kill mold at the roots. After waiting, scrub gently with a soft brush or sponge, then wipe clean with damp cloths. Let the ceiling dry completely before assessing whether you need another round.
The vinegar smell dissipates as it dries, so don't worry about your bathroom smelling like a salad forever.
The Baking Soda Solution
Baking soda offers a mild, non-toxic approach that's safe around kids and pets. Mix one quarter tablespoon of baking soda with water in a spray bottle and shake until dissolved.
Spray the mixture onto moldy spots and scrub with a brush. Rinse with water, then spray again without scrubbing and allow it to air dry. This second application creates a residue that helps prevent mold from returning.
For stubborn spots, make a paste with baking soda and just enough water to create a thick consistency. Apply the paste directly to mold patches, let it dry, then scrub and rinse.
The Hydrogen Peroxide Approach
Three percent hydrogen peroxide, the kind you find at any pharmacy, works as an antifungal and antibacterial agent. It's also a mild bleaching agent, which helps with those stains mold leaves behind.
Spray undiluted hydrogen peroxide onto the affected ceiling and wait ten minutes. Scrub to remove mold and staining, then wipe the surface clean. Because hydrogen peroxide can lighten some surfaces, test it on an inconspicuous spot first.
The Borax Treatment
Borax is a natural mineral powder that inhibits mold growth while cleaning. Mix one cup of borax with one gallon of warm water until completely dissolved.
Apply the solution using a sponge or spray bottle, scrub the moldy areas, and wipe away excess. Here's the cool part: you don't need to rinse borax off. Leaving a thin residue behind actually helps prevent future mold growth.
When to Bring Out the Bleach
Bleach gets a lot of attention as a mold killer, and it does work effectively on non-porous surfaces. However, it's not always the best choice for ceiling removal.
Here's the deal. Bleach can't penetrate porous materials like drywall or textured ceiling surfaces. It kills mold on the surface but doesn't reach the roots growing beneath. The water content in bleach actually soaks into porous materials and can feed remaining mold once the chlorine evaporates.
That said, for painted, sealed ceiling surfaces without visible damage, a diluted bleach solution can be effective. Mix one cup of bleach with one gallon of water. Apply to the moldy area, wait fifteen minutes, then scrub and rinse thoroughly. Ensure excellent ventilation and never combine bleach with other cleaning products.
If your ceiling is unpainted drywall, textured, or shows signs of water damage, skip the bleach and try the other methods instead.
Tackling Stubborn or Deep-Set Mold
Sometimes surface cleaning isn't enough. When mold has penetrated into ceiling materials or keeps returning despite your best efforts, more aggressive measures become necessary.
For textured ceilings with deep mold penetration, you might need to scrape away the affected texture, treat the underlying surface, and then re-texture. This is messy work that requires proper containment and safety gear.
If mold has reached the drywall beneath paint, the damaged section often needs replacement. Cut out the affected area extending at least a foot beyond visible mold in all directions. Inspect the cavity for moisture sources and address any leaks or condensation issues before installing new drywall.
Popcorn ceilings installed before 1980 might contain asbestos, so get them tested before scraping or disturbing the material. Professional abatement is essential if asbestos is present.
The Step-by-Step Removal Process
Ready to get down to business? Follow this systematic approach for the best results.
Start by preparing your workspace. Remove everything possible from the bathroom, cover remaining fixtures with plastic, and seal the door gap with a towel. Set up ventilation by opening windows and running fans.
Put on all your protective gear before disturbing any mold. Safety glasses, N95 mask, rubber gloves, and old clothes are your armor.
Dry out the area first if it's currently wet. Running a dehumidifier or fans for a few hours before cleaning helps prevent spores from spreading as easily.
Apply your chosen cleaning solution generously to all affected areas. Let it sit for the recommended time based on which product you're using. Patience here pays off with better results.
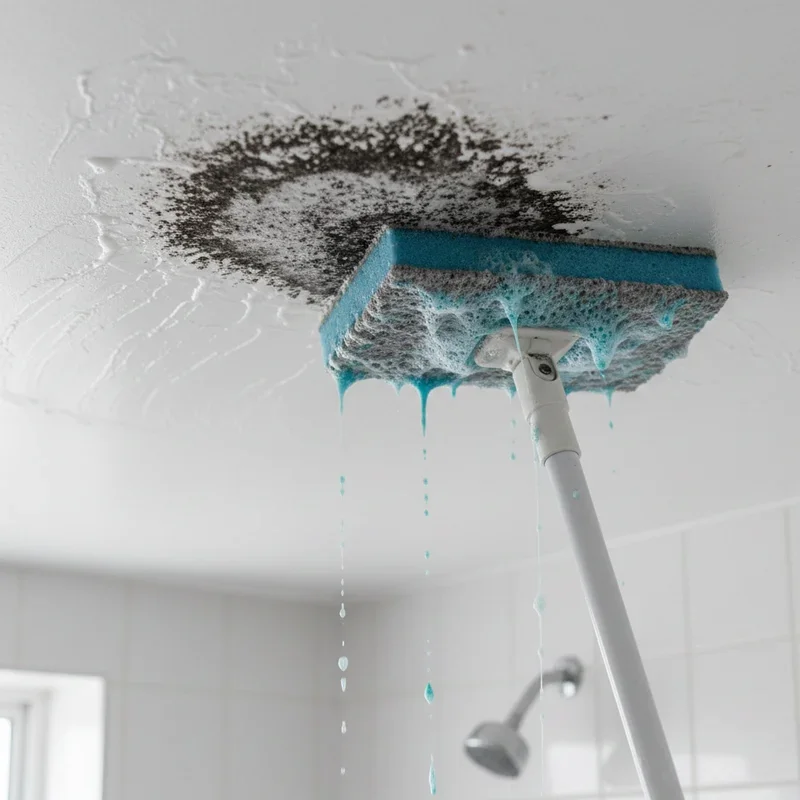
Scrub gently using a soft-bristled brush or non-abrasive sponge. Aggressive scrubbing can damage ceiling surfaces and spread spores around. Work from the outside edges of the moldy area toward the center to avoid spreading contamination.
Wipe the area clean with damp cloths, rinsing them frequently. Use fresh cloths rather than ringing out and reusing dirty ones.
Dry the ceiling completely using fans, a hairdryer on low heat, or simply allowing time with good ventilation. Moisture left behind invites mold right back.
Dispose of all cleaning materials, used cloths, and your protective gear properly. Seal everything in plastic bags before throwing them away.
Give the area a final inspection once completely dry. If any mold remains visible, repeat the treatment process.
Preventing Mold from Returning
Cleaning mold is only half the battle. Without addressing the underlying moisture problem, you'll find yourself repeating this process again and again.
Ventilation improvements make the biggest difference. If you don't have a bathroom exhaust fan, installing one should be a priority. Run it during showers and for at least thirty minutes afterward to remove moisture-laden air. Make sure the fan vents outside your home, not into the attic where moisture can cause different problems.
Wipe down wet surfaces after showering. A quick pass with a squeegee or towel removes water before it can evaporate and condense on the ceiling.
Keep the bathroom door open when not in use to improve air circulation. If privacy allows, leaving it cracked during showers helps too.
Consider running a small dehumidifier in bathrooms prone to moisture problems. Keeping humidity below sixty percent makes conditions much less hospitable for mold growth.
Use mold-resistant paint on bathroom ceilings when it's time to repaint. These special formulations contain antimicrobial additives that inhibit mold and mildew growth.
Check for leaks regularly. Water infiltrating from above, whether from a roof leak, plumbing issue, or air conditioning condensation, can cause ceiling mold that no amount of bathroom ventilation will solve.
Understanding When Professional Help Is Needed
While most bathroom ceiling mold can be handled as a DIY project, certain situations call for professional remediation.
Large areas of mold covering more than ten square feet typically warrant professional attention. At that scale, the risk of spreading contamination throughout your home increases significantly.
Mold resulting from sewage backup or contaminated water requires specialized handling due to health hazards beyond just the fungus itself.
If mold keeps returning despite your best prevention efforts, there may be hidden moisture sources that professionals with specialized equipment can identify.
Anyone with compromised immune systems, respiratory conditions, or severe mold allergies should avoid DIY mold removal entirely.
Structural damage accompanying mold growth, such as soft or crumbling drywall, indicates problems that go beyond simple cleaning.
Common Mistakes to Avoid
Learning how to remove mold from bathroom ceiling safely and fast also means knowing what not to do.
Painting over mold without treating it first just hides the problem temporarily. Mold will grow right through new paint, often worse than before.
Using too much water during cleaning can worsen the moisture situation. Apply solutions in controlled amounts and dry thoroughly afterward.
Neglecting to fix the moisture source guarantees mold will return, often within weeks.
Forgetting to clean surrounding areas allows surviving spores to recolonize your freshly cleaned ceiling.
Rushing the drying process leaves conditions favorable for immediate regrowth.
Conclusion
Dealing with mold on your bathroom ceiling might seem daunting at first, but armed with the right knowledge, it's absolutely manageable. By following proper safety precautions, choosing effective cleaning solutions, and addressing underlying moisture issues, you can eliminate mold and keep it from coming back. Remember that prevention is always easier than removal, so invest in good ventilation and stay vigilant about moisture control. Your bathroom ceiling will thank you for it.
Read next: How to Remove Mold from Tile Grout
Frequently Asked Questions
1. How often should I check my bathroom ceiling for mold growth?
Inspect monthly, especially during humid seasons, to catch problems early before spreading.
2. Can I use essential oils to kill bathroom ceiling mold?
Tea tree oil and clove oil have antifungal properties but work best for prevention.
3. Is bathroom ceiling mold dangerous to my family's health?
Yes, it can trigger allergies, respiratory issues, and worsen asthma symptoms significantly.
4. How long does it take for mold to grow on ceilings?
Mold can establish visible colonies within 24 to 48 hours in damp conditions.
5. Should I replace the ceiling if mold keeps coming back?
Recurring mold often indicates hidden moisture problems needing professional assessment first.
Stay up to date with our latest ideas!