How to Install Shower Drain in Simple Steps
Learn how to install shower drain in simple steps with our comprehensive guide. Expert tips, tools needed, and troubleshooting included.

Well, here's the thing about shower drains: they're one of those home improvement projects that seem way more intimidating than they actually are! Standing in your bathroom, looking at that old, grimy drain that's seen better days, you might be thinking, "Should I really tackle this myself?" The answer is absolutely yes! Learning how to install shower drain in simple steps isn't just about saving money on plumber fees (though that's definitely a nice perk). It's about gaining the confidence to handle essential home maintenance and maybe even impressing yourself with your handiwork.
Picture this scenario: you've just moved into your dream home, but that shower drain looks like it belongs in a horror movie. Or maybe your current drain has started backing up, making every shower feel like you're wading through a kiddie pool. Whatever brought you here, you're about to discover that replacing a shower drain is totally doable, even if you're not exactly Bob the Builder. With the right tools, a bit of patience, and this guide in your back pocket, you'll have a properly functioning, great-looking drain before you know it!
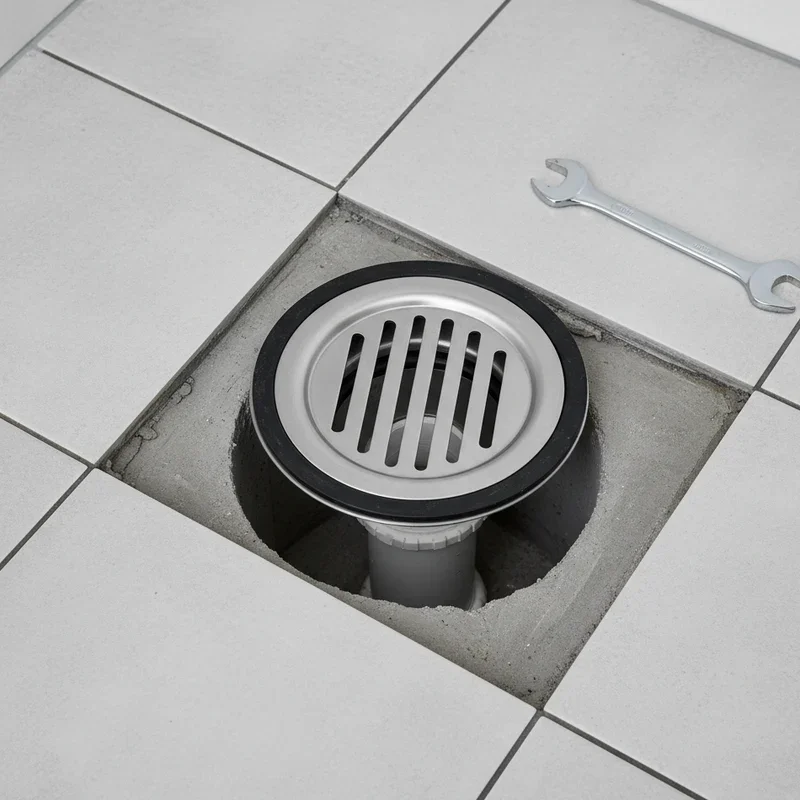
Understanding Shower Drain Components
Before jumping into the installation process, let's get familiar with what we're working with. Think of it like getting to know the players before the big game starts!
The Drain Body
This is the main event, folks! The drain body is essentially the housing that connects to your plumbing system. It's got threads on the outside that help it lock into place, and it's responsible for channeling all that water down to your pipes. Made from materials like PVC, ABS, or sometimes brass, choosing the right one depends on your local building codes and personal preference.
The Drain Flange
Sitting pretty on top, the drain flange is what you actually see when you're taking a shower. It's not just there for looks, though it definitely adds some style points to your bathroom! The flange creates a watertight seal with the shower pan, preventing water from sneaking into places it shouldn't go. Some flanges come with built-in strainer baskets, while others are more minimalist in design.
The Rubber Gasket
Don't let its simple appearance fool you; this little rubber ring is crucial! The gasket creates that all-important waterproof seal between the drain body and your shower base. Without it, you'd have water damage faster than you can say "leaky drain." Always check that your gasket is in good condition because a worn-out gasket is often the culprit behind mysterious bathroom leaks.
The Strainer Basket
This removable piece is your first line of defense against clogs. It catches hair, soap chunks, and whatever else tries to make its way down your drain. Some folks find them annoying, but trust me, fishing out a hairball from the strainer beats snaking your entire drain line any day of the week!

Tools and Materials Needed
Alright, let's talk about what you'll need to get this job done right. Having everything ready before you start is like having all your ingredients prepped before cooking; it makes the whole process so much smoother!
Essential Tools:
Adjustable wrench - Your best friend for tightening connections
Plumber's putty or silicone sealant - For creating watertight seals
Screwdriver set - Both flathead and Phillips head
Channel lock pliers - Great for gripping and turning
Hacksaw or PVC cutter - In case you need to trim pipes
Level - Because nobody wants a tilted drain
Tape measure - Measure twice, install once!
Bucket - To catch any water that might spill
Flashlight or headlamp - You'll need to see what you're doing under there
Materials You'll Need:
New shower drain assembly (obviously!)
PVC primer and cement (if working with PVC pipes)
Teflon tape (for threaded connections)
Cleaning supplies (rags, degreaser)
Sandpaper (medium grit)
Rubber gloves
Safety glasses
Optional But Helpful:
Drain wrench (specialized tool for removing old drains)
Reciprocating saw (for tough removal jobs)
Shop vacuum (for cleanup)
Knee pads (your knees will thank you!)
Pre-Installation Preparation
Now, before we dive into the actual installation, let's get everything squared away. Preparation is half the battle, and rushing through this part is like trying to run before you can walk.
Removing the Old Drain
First things first, you've got to get that old drain out of there. Turn off the water supply to your shower, just to be safe. Even though you shouldn't encounter running water, it's better safe than sorry, right?
Start by removing the strainer cover. Sometimes these unscrew easily, but if yours is being stubborn, a pair of needle-nose pliers inserted into the drain holes can give you the leverage you need. Turn counterclockwise, and remember: righty tighty, lefty loosey!
Once the strainer's out, you'll need to disconnect the drain body from the waste pipe below. This is where things might get a bit cramped, especially if you're working in a tight space. Having access from below, like through a basement or crawl space, makes this way easier. If you're working on a second floor or slab foundation, well, you might need to get creative with your approach.
Cleaning and Assessment
With the old drain removed, take a good hard look at what you're working with. Clean up any old putty, caulk, or grime around the drain hole. This is also the perfect time to check for any damage to the shower pan or surrounding area. Finding problems now is way better than discovering them after you've installed the new drain!
Check the condition of your drain pipe too. If it's corroded, cracked, or just plain nasty, now's the time to address it. Sometimes what starts as a simple drain replacement turns into a slightly bigger project, but hey, that's home ownership for you!
How to Install Shower Drain in Simple Steps: The Main Process
Okay, here we go! This is where the rubber meets the road, or should I say, where the drain meets the shower pan?
Step 1: Test Fit Your New Drain
Before you break out the plumber's putty, do a dry run. Place the new drain body into the hole and make sure it fits properly. The drain should sit flush with the shower base, not too high or too low. If it's not quite right, you might need to make some adjustments to the waste pipe height.
Step 2: Apply Plumber's Putty
Roll out a rope of plumber's putty about as thick as a pencil. Form it into a ring and place it on the underside of the drain flange. This creates that crucial watertight seal. Some folks prefer silicone sealant here, and that's fine too, though putty is easier to work with and adjust if needed.
Step 3: Install the Drain Body
Working from below (if possible), push the drain body up through the hole in the shower pan. From above, thread the drain flange into the drain body. This is where having a helper really comes in handy! One person can hold the drain body steady while the other tightens the flange.
Step 4: Tighten Everything Up
Using your wrench or channel locks, tighten the drain flange until it's snug against the shower base. You want it tight enough to compress the putty and create a seal, but don't go crazy; over-tightening can crack the shower pan, especially if it's fiberglass or acrylic.
Step 5: Connect to the Waste Pipe
Now comes the plumbing connection. Depending on your setup, this might involve PVC cement, compression fittings, or threaded connections. If you're using PVC, remember to use primer first, then cement, and work quickly because that stuff sets fast! Make sure everything is aligned properly; a misaligned connection will cause problems down the road.
Step 6: Install the Finishing Touches
Once the main drain body is secure and connected, install the strainer basket or cover. Clean up any excess putty that squeezed out (a plastic putty knife works great for this), and make sure everything looks neat and tidy.
Testing and Troubleshooting
Alright, moment of truth time! Before you start celebrating your DIY victory, we need to make sure everything actually works.
The Water Test
Fill a bucket with water and slowly pour it down the drain. Watch carefully for any leaks around the flange or underneath at the pipe connections. If you see any drips, don't panic! Sometimes you just need to tighten things a bit more or add some extra sealant.
Next, if you have access from below, have someone run the shower while you watch for leaks underneath. Pay special attention to all connection points. Even a tiny drip now can turn into a major problem later, so take your time with this step.
Common Issues and Solutions
Drain sitting too high or low: This usually means the waste pipe needs adjusting. You might need to add a coupling to raise it or cut it down to lower it.
Leaking around the flange: Remove the flange, clean everything thoroughly, and reapply putty or sealant. Make sure the shower base is clean and dry before reinstalling.
Slow drainage: Check that your P-trap isn't clogged and that the drain pipe has proper slope (1/4 inch per foot is standard).
Wobbling drain cover: The drain body might not be secured properly, or the shower base could be uneven. You might need to shim or re-level things.
Advanced Installation Scenarios
Sometimes, learning how to install shower drain in simple steps involves dealing with not-so-simple situations. Let's tackle some of those curveballs!
Working with Different Shower Base Materials
Fiberglass/Acrylic Pans: These are pretty forgiving but can crack if you overtighten. Use a backup washer if your drain kit includes one, and consider using silicone instead of putty since it's gentler on the material.
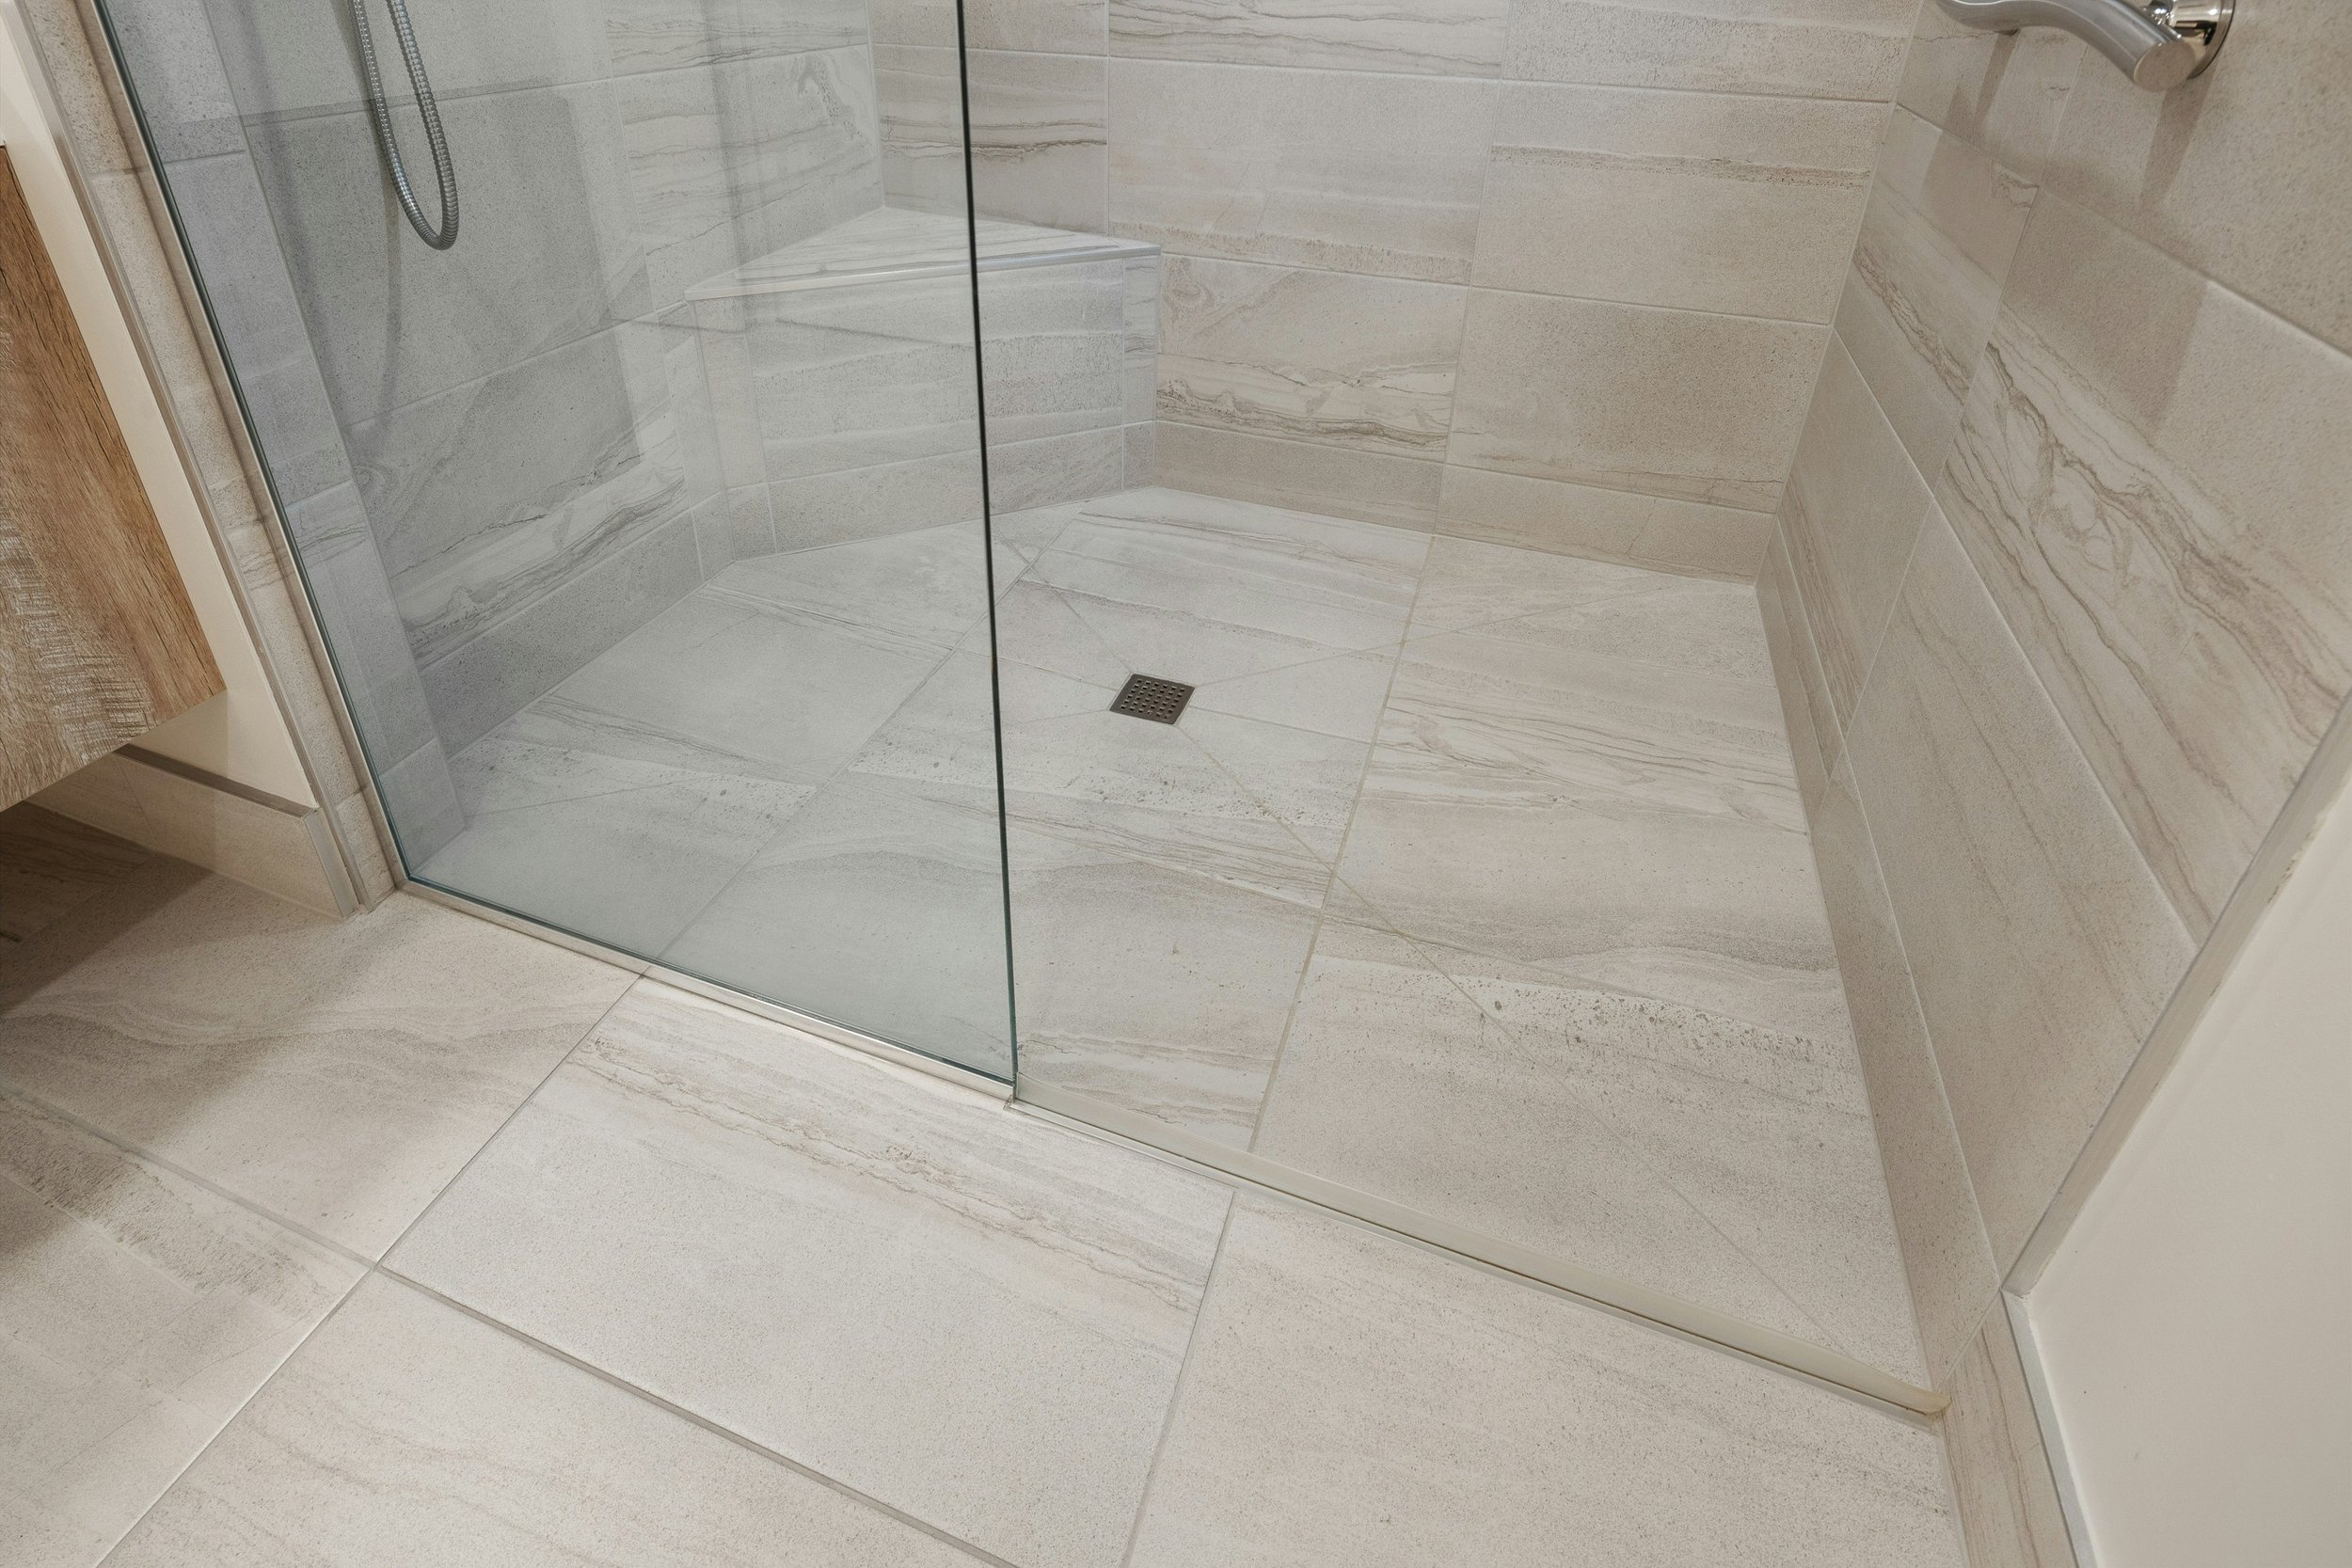
Tile Showers: These require a special drain assembly with a clamping collar that works with the waterproof membrane. The process is similar but requires extra attention to maintaining the waterproof barrier.
Concrete Pans: Old-school concrete shower pans are tough but can be tricky. You might need to chip away some concrete to fit the new drain, and definitely use a quality sealant since concrete is porous.
Dealing with Offset Drains
Sometimes the new drain doesn't line up perfectly with the existing waste pipe. Don't worry; this happens more often than you'd think! You can use offset fittings or flexible connectors to bridge the gap. Just make sure to maintain proper slope for drainage.
Converting Drain Sizes
Going from a 1.5-inch to a 2-inch drain? Or vice versa? You'll need reducer fittings. These are readily available at any plumbing supply store. The key is making sure all your connections are secure and properly sealed.
Maintenance Tips for Longevity
Now that you've successfully installed your shower drain, let's keep it working like a charm for years to come!
Regular Cleaning
Make it a habit to remove and clean the strainer basket weekly. Yeah, I know it's gross pulling out that hair-and-soap combo, but it's way better than dealing with a clog. A pair of rubber gloves makes this task less icky!
Pour boiling water down the drain once a month to help dissolve soap scum and other buildup. Follow it up with a mixture of baking soda and vinegar for a natural cleaning boost. Let it fizz for about 15 minutes, then flush with more hot water.
Annual Inspections
Once a year, take a few minutes to inspect your drain installation. Check for any signs of leaking, corrosion, or damage. Look at the caulk or putty seal around the flange; if it's cracking or pulling away, it might be time for a touch-up.
What to Avoid
Never use harsh chemical drain cleaners on a regular basis. They can damage your pipes and drain components over time. If you must use them, do so sparingly and always follow up with plenty of water.
Avoid dropping heavy objects on the drain cover. Those decorative metal finishes can chip or dent easily, and replacing just the cover can be surprisingly expensive!
Cost Comparison: DIY vs Professional Installation
Let's talk money because that's often what motivates us to pick up the tools in the first place!
DIY Costs:
Basic drain kit: $15-50
Quality drain assembly: $50-150
Tools (if you don't have them): $50-100
Materials (putty, cement, etc.): $20-30
Total: $85-330
Professional Installation:
Labor: $200-500
Parts markup: 20-50% above retail
Service call fee: $50-100
Total: $300-800+
Looking at these numbers, the savings are pretty obvious! Plus, once you have the tools, future plumbing projects become even more economical.
Safety Considerations
Safety might not be the most exciting topic, but spending a few minutes thinking about it beats spending hours in the emergency room!
Always wear safety glasses when working under the shower. Trust me, getting plumber's putty or PVC cement in your eye is not fun. Rubber gloves protect your hands from sharp edges and harsh chemicals.
If you're working in a crawl space or cramped area, make sure someone knows you're under there. Keep your phone handy in case you need help. And please, if you're not comfortable working in tight spaces or if your back isn't what it used to be, there's no shame in calling a professional.
Watch out for mold or mildew when removing old drains. If you discover extensive mold, stop and address that issue first. Your health is worth more than any DIY savings!
Conclusion
Installing a shower drain might have seemed daunting at first, but you've now got all the knowledge needed to tackle this project with confidence! Remember, how to install shower drain in simple steps really is as straightforward as following the process methodically and not rushing through important details. Whether you're updating your bathroom's look or fixing a problematic drain, this skill will serve you well throughout your homeownership journey. Take your time, double-check your work, and don't hesitate to ask for help when needed!
Read next: How to Plumb a Shower Drain: Step-by-Step Guide
Frequently Asked Questions
Q1: How long does it take to install a shower drain?
A: Most DIYers complete the installation in 2-4 hours, depending on accessibility.
Q2: Can I install a shower drain without access from below?
A: Yes, but it's more challenging and may require special retrofit drain kits.
Q3: What's the difference between PVC and ABS drain pipes?
A: PVC is white, ABS is black; check local codes for requirements.
Q4: How often should I replace my shower drain?
A: With proper maintenance, a quality drain lasts 15-20 years or more.
Q5: Is plumber's putty better than silicone sealant?
A: Both work well; putty is easier to adjust, silicone lasts longer.
Stay up to date with our latest ideas!