How to Replace a Kitchen Faucet: Step-by-Step
Is your old faucet leaving you all washed up? Discover how to replace a kitchen faucet: step-by-step and transform your kitchen sink into a showroom-worthy masterpiece with our hassle-free guide.
Ever find yourself smacking that ancient faucet in frustration, only for it to taunt you with another slow (and painfully steady) drip? Well, it might be time to roll up your sleeves, break a little sweat, and finally master how to replace a kitchen faucet: step-by-step. But don’t start panicking just yet! Replacing a faucet is one of those household tasks that initially sounds scarier than it truly is. You just need a dash of know-how, a handful of patience, and a few everyday tools to put that old faucet to bed for good.
Swapping out an aging fixture can elevate both the style and functionality of your kitchen in one fell swoop. If you’ve been contemplating a sleek, modern upgrade—or maybe you’re just sick of that annoying drip—this guide’s got you covered. We’ll explore each crucial step in detail, peppering in a few time-saving hints so you can avoid those eye-roll-worthy plumbing pitfalls. By the end, you’ll be the proud new owner of a sparkling faucet that not only runs like a dream but also gives your entire kitchen a much-needed face-lift.
So, are you ready to get your hands dirty and put your inner DIY champion to the test? If you’ve been itching to tackle “How to Replace a Kitchen Faucet: Step-by-Step,” take a deep breath—because, friend, you’re in the right place.
Why Replace Your Kitchen Faucet?
So, what’s all the fuss over a seemingly innocent fixture? Turns out, a lot can hinge on the right faucet. Let’s take a quick look at some common reasons for taking the leap:
Constant Drips: That incessant drip-drip-drip can drive you up the wall faster than you can say “plumber’s wrench.” A worn-out valve, rust, or corroded seal often cause leaks.
Outdated Design: If your faucet’s been hanging around since your parents first moved into the house, it might be time for a style upgrade.
Poor Water Pressure: Struggling to rinse off crusty dishes? Old fixtures or mineral buildup can reduce water flow.
Stuck Handle: Whether you’re battling a squeaky handle or one that keeps sticking, this annoyance can make washing up an absolute chore.
Higher Efficiency: Modern faucets often boast water-saving features, making them more eco-friendly and wallet-friendly.
Selecting the right faucet doesn’t just solve your immediate woes—it can also make your daily kitchen tasks much more enjoyable. After all, anything that enhances your cooking and dishwashing experience is a total win in my book!
Prepping for Success: Tools and Materials
Before you dismantle your existing faucet, it’s essential to assemble everything you’ll need. Nobody wants to scramble to the hardware store mid-project, all wet and grumbling. Here’s your no-fuss checklist:
New kitchen faucet (make sure it matches the existing mounting holes and suits your sink configuration)
Adjustable wrench or channel-lock pliers
Basin wrench (this specialized tool makes it easier to loosen hard-to-reach nuts under the sink)
Teflon tape (also called plumber’s tape)
Plumber’s putty or silicone caulk (to seal any gaps and prevent water damage)
Bucket or shallow container (to catch any stray water from supply lines)
Rags or towels (because spills happen)
Flashlight (for those dark nooks beneath the sink)
Cleaning supplies (you might unearth some questionable gunk under that faucet)
Once you’ve rounded up these supplies, set them within arm’s reach. Trust me, you’ll be thanking yourself when you’re contorted under the sink, wrestling with old fittings.
Out with the Old: Removing Your Existing Faucet
Wondering where to begin? Don’t fret—this process is simpler than you might think. Here’s the lowdown on how to disconnect and remove your current faucet:
Turn Off the Water Supply
Look beneath your sink for the two shutoff valves (one for hot, one for cold).
Turn both knobs clockwise until they’re fully closed. If the valves are stuck or you don’t have individual shutoffs, you’ll need to shut off your home’s main water supply.
Test the faucet to ensure no water flows.
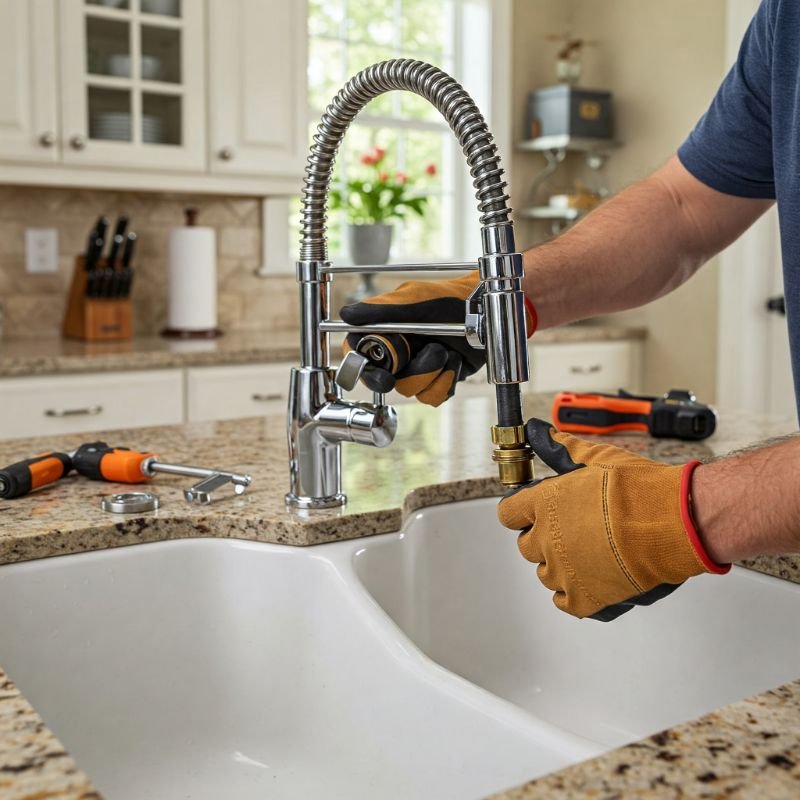
Disconnect the Supply Lines
Place a bucket or shallow container under the faucet connections.
Using an adjustable wrench, loosen the nuts that connect the hot and cold supply lines to the faucet’s tailpieces. Expect a bit of water to trickle out!
Gently wiggle the lines free.
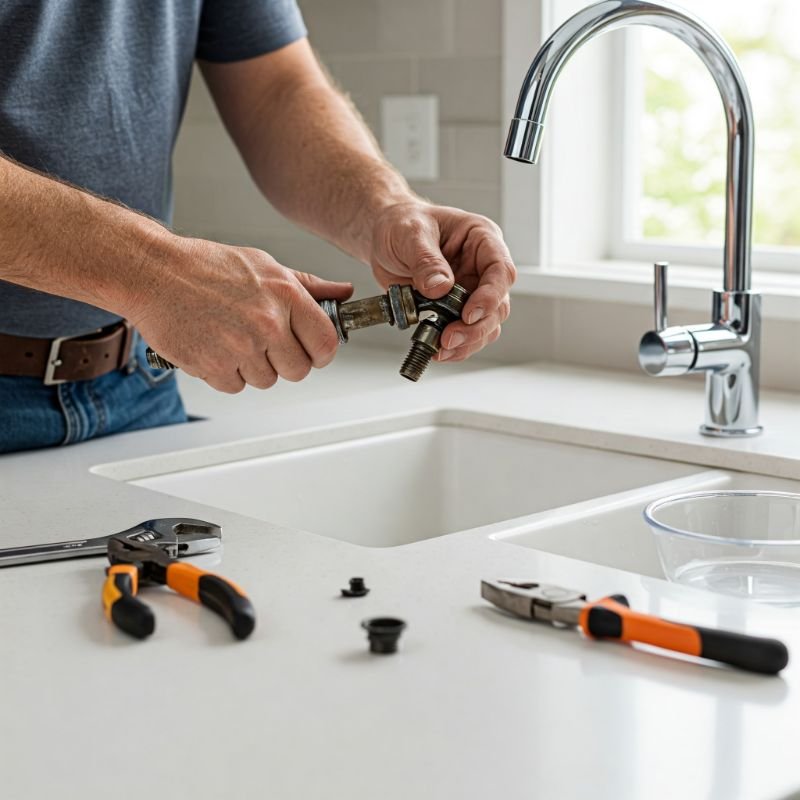
Remove Mounting Nuts
Shine a flashlight up into that cramped cavity under your sink.
Locate the mounting nuts (often plastic or metal) that secure the faucet.
Use a basin wrench if needed—these nuts can be tricky to reach with standard pliers.
Lift Out the Old Faucet
Once the mounting nuts are removed, carefully wiggle the faucet upward.
If it’s stuck due to old sealant or mineral buildup, gently use a putty knife to break the seal.
Lift the entire faucet assembly off the sink.
Clean the Sink Deck
Use a rag or sponge to clear away any grime, putty residue, or mineral deposits left behind.
Give the sink surface a quick wipe so your shiny new faucet has a smooth surface to rest on.
Ta-da! With your old faucet gone, you’re halfway through “How to Replace a Kitchen Faucet: Step-by-Step.” The next act? Introducing your beautiful, brand-spanking-new fixture to its future forever home.
In with the New: Installing Your Shiny Replacement
Now that you’ve got a nice, clean canvas, it’s time for the main event: installing your new faucet. Let’s break it down:
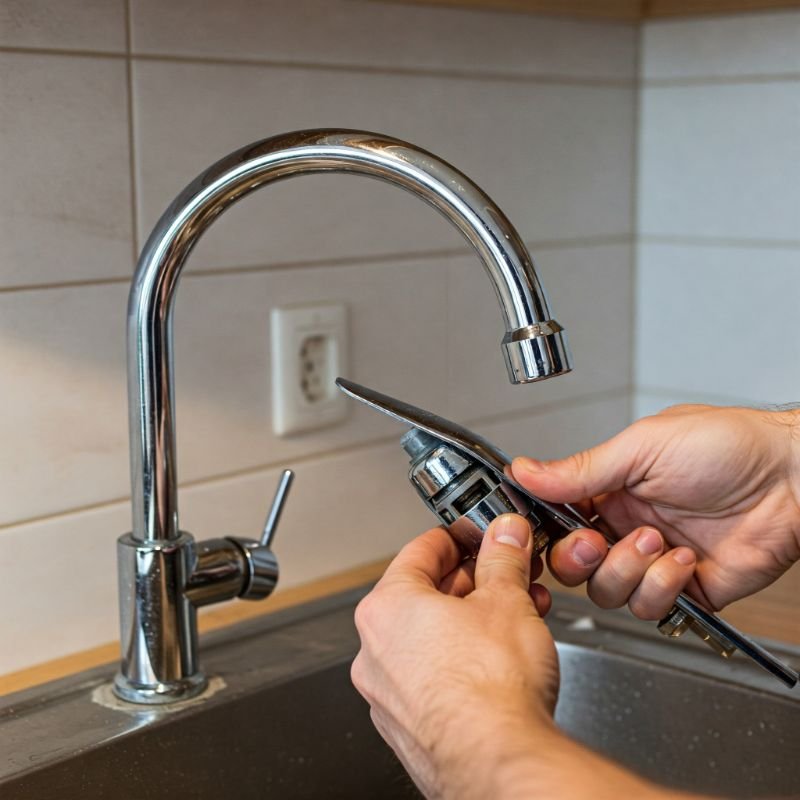
1. Prep the Faucet Assembly
Check Your Instructions: Different faucets come with unique installation elements. Quickly scan the manufacturer’s guide to confirm you’ve got all parts and hardware.
Assemble as Instructed: Attach the faucet’s gaskets, O-rings, or decorative escutcheon plate (if your sink requires it).
2. Position the Faucet
Slide Faucet into Place: Carefully guide the faucet’s shank or tailpieces through the sink’s mounting holes.
Line It Up: Ensure the faucet sits straight and lines up with the sink edges. No one wants a crooked fixture!
Seal the Base: Apply a thin bead of plumber’s putty or silicone caulk around the base of the faucet (or the escutcheon plate if you’re using one). This step keeps water from seeping under the faucet and damaging the cabinet below.
3. Secure from Below
Hand-Tighten Mounting Nuts: Crawl back under the sink and twist the mounting nuts onto the faucet’s tailpieces. If your faucet has a special fastening system or bracket, follow the instructions that came with it.
Double-Check Alignment: Peek back up top to confirm the faucet hasn’t shifted out of place.
Tighten Carefully: Use your basin wrench or pliers to secure the nuts. Don’t go full-on Hulk strength, or you might damage the fixture or sink.
4. Connect Water Supply Lines
Attach Lines to the Faucet: Thread each supply line—hot on the left, cold on the right—onto the corresponding faucet tailpiece. Hand-tighten first, then use an adjustable wrench for a snug fit.
Wrap Threads with Teflon Tape: If your supply lines have male threads, wrap them in Teflon tape a couple of times for a leak-free seal.
Double-Check Connections: While you’re down there, confirm everything lines up properly and there are no visible kinks in the hoses.
5. Test for Leaks and Proper Flow
Turn the Water Back On: Slowly open the shutoff valves (or main water supply) and let the faucet run.
Look for Drips: Check each connection under the sink. Any sign of water droplets indicates a need for some additional tightening.
Flush the Faucet: Turn the faucet on full blast, switching between hot and cold. Sometimes, new fixtures come with manufacturing debris, so let water run for about a minute to flush the lines.
With all these steps complete, you should be grinning from ear to ear at your brand-new installation! By nailing “How to Replace a Kitchen Faucet: Step-by-Step,” you’ve taken a huge leap in mastering your own home maintenance. High-fives all around!
Tips, Tricks, and Gotchas
While replacing a faucet isn’t rocket science, it’s still easy to fall into a few common traps. Here are some extra tidbits to keep you smooth-sailing from start to finish:
Measure Twice, Buy Once: Make sure your new faucet is compatible with your sink’s mounting holes (e.g., one-hole, three-hole, etc.).
Mind the Depth: Check for enough clearance behind the faucet—some faucets with pull-out sprayers need extra space to maneuver.
Be Gentle with Old Parts: If your shutoff valves or supply lines are ancient, consider replacing them, too. Better safe than sorry.
Don’t Overtighten: Give everything a good firm twist, but going overboard can strip threads or warp components.
Test Before You Seal: If you’re using silicone caulk for sealing, do a quick leak test before finalizing. It’s easier to adjust the faucet alignment without that sticky stuff fully cured.
Keeping It Fresh: Maintenance and Care
You didn’t dive into “How to Replace a Kitchen Faucet: Step-by-Step” just to let your new fixture fall into disrepair, did you? Of course not! Maintaining your faucet’s performance is a breeze if you keep a few simple habits:
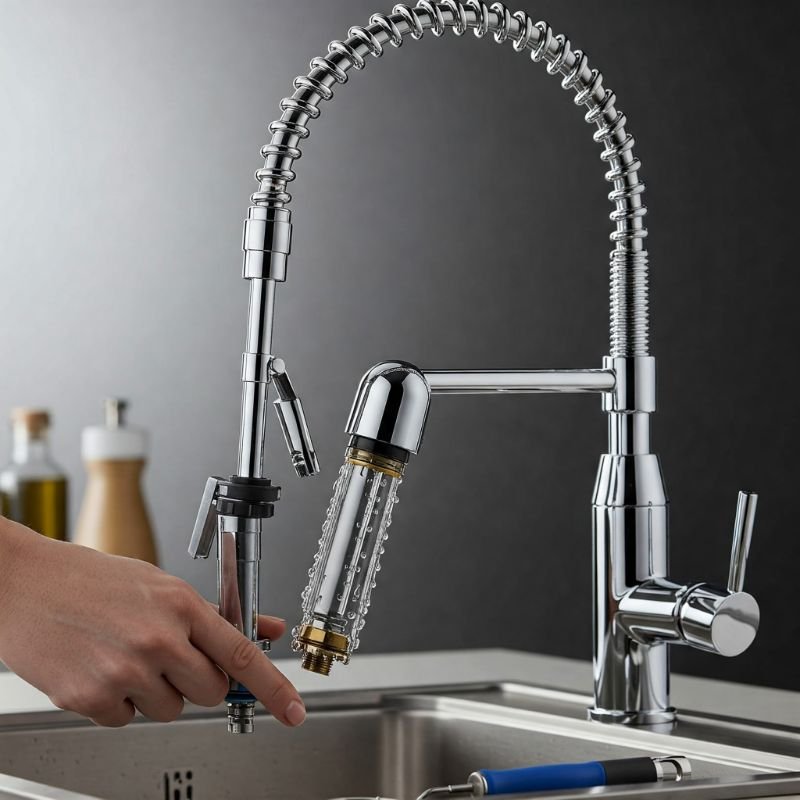
Clean the Aerator
Unscrew the faucet aerator occasionally and give it a quick rinse to remove mineral deposits.
A white vinegar soak can help dissolve stubborn buildup.
Wipe It Down
After doing the dishes, wipe away water splashes from the faucet base.
Standing water can lead to unsightly water spots or even corrosion over time.
Fix Small Leaks Immediately
Did you notice a slight drip or dampness around the faucet handle? Investigate early to prevent more extensive damage.
Use Mild Cleaners
Avoid abrasive scrubbers or harsh chemicals that can scratch or discolor the faucet finish.
A gentle dish soap solution is usually enough for everyday cleaning.
Don’t Hang Heavy Items
While it might be tempting to hang a wet cloth or small accessory on the faucet neck, too much weight could stress the fixture and loosen connections.
By sticking to these easy-peasy tips, your new faucet will shine bright for years to come.
Conclusion
There you have it—your foolproof blueprint on “How to Replace a Kitchen Faucet: Step-by-Step,” complete with pro tips, cautionary notes, and a little dash of confidence-boosting humor. If you followed along, you’ve successfully swapped out that old, leaky fixture for a spiffy new faucet that works like a dream and makes your kitchen sink look as stylish as ever.
From selecting the ideal fixture to removing the old faucet (without flooding the entire kitchen!) and meticulously installing the new one, you’ve proven that a bit of DIY courage can go a long way. And let’s not forget: you’ve just spared yourself the cost of hiring a professional. That’s worthy of a pat on the back (or maybe an extra piece of pie at dessert time).
So go on—step back, admire your handiwork, and treat yourself to the sweet sound of a perfect water flow that responds on command, minus the pesky drips. Remember to do a final leak check after a day or two, ensuring those fittings remain tight and secure. But chances are you’ve already done such a stellar job that your new faucet isn’t going anywhere anytime soon.
Who said home improvement projects had to be stressful, anyway? Now that you know how to replace a kitchen faucet: step-by-step, you’re ready to tackle other DIY tasks with the same can-do spirit. No more nights tossing and turning over that slow drip—only the reassuring hum of fresh water when you actually need it. Congratulations on adding another skill to your toolbox, and here’s to more fuss-free, efficient, and downright gorgeous kitchen experiences ahead!
Frequently Asked Questions
1. Can I replace a kitchen faucet without a plumber’s help?
Absolutely! In fact, “How to Replace a Kitchen Faucet: Step-by-Step” is designed for handy homeowners. As long as you’re comfortable working with tools, turning off the water supply, and following instructions, you’re good to go.
2. How long does faucet replacement usually take?
Most faucet swaps can be done in about one to two hours, give or take. Much depends on whether you run into stubborn nuts, corroded parts, or inconvenient angles that require extra elbow grease.
3. Should I install shutoff valves if my sink doesn’t have them?
Yes! It’s much safer and far more convenient to have individual shutoff valves under the sink. If something goes haywire, you won’t need to turn off the water for the entire house.
4. Do I need plumber’s putty if my faucet came with a rubber gasket?
Generally, the rubber gasket alone can provide a decent seal, especially if instructions say so. However, a little plumber’s putty or silicone caulk can offer extra protection against water leaks. Check your faucet’s manual for precise guidelines.
5. Why is my new faucet’s water pressure so low?
There could be several culprits—like a kinked supply line, an aerator clogged with debris, or insufficient water pressure in your home overall. First, remove the aerator and flush the lines to see if that helps. If not, inspect the connections or consult a plumber if necessary.
Stay up to date with our latest ideas!