How to Build a Closet: Step-by-Step Guide for Beginners
Learn how to build a closet from scratch with this beginner-friendly guide. Simple steps, essential tools, and expert tips included.

So you've finally decided to tackle that empty corner of your bedroom or transform a spare room into something functional. Building your own closet might sound intimidating at first, but here's the thing. It's actually one of those rewarding DIY projects that practically anyone can accomplish with a bit of patience and the right guidance.
Whether you're dealing with a cramped apartment that desperately needs more storage or you've got a new home that came without adequate closet space, this project is going to change your life. And honestly, there's something incredibly satisfying about opening closet doors you installed yourself and seeing perfectly organized shelves that you built with your own two hands.
Now, I won't sugarcoat it. This isn't a weekend afternoon kind of project. You'll need to set aside some serious time, gather your materials, and probably make a couple trips to the hardware store. But trust me when I say that the money you'll save compared to hiring a professional is substantial. We're talking hundreds, sometimes thousands of dollars staying right where they belong. In your pocket.
This comprehensive guide on how to build a closet: step-by-step guide for beginners will walk you through everything from planning and measuring to the final touches that make your closet look professionally done. By the time you're finished reading, you'll have all the knowledge you need to get started on this exciting home improvement adventure.
Why Build Your Own Closet?
Before we dive into the nuts and bolts, let's talk about why this project is worth your time and energy. First off, custom closets from professional installers can cost anywhere from $1,500 to $5,000 or more depending on the size and features. When you do it yourself, you're looking at material costs of maybe $200 to $800 for a standard reach-in closet.
Beyond the financial benefits, building your own closet means you get exactly what you want. No compromises. No settling for pre-made configurations that don't quite fit your needs. Got a weird collection of vintage hats that needs special storage? No problem. Need extra shoe shelving because your partner has a slight footwear obsession? You can make that happen.
Plus, there's the pride factor. Every time someone compliments your organized space, you get to casually mention that you built it yourself. That feeling never gets old, I promise you.
Planning Your Closet Project
Assessing Your Space and Needs
Before you buy a single piece of lumber, you need to figure out what you're working with. Grab a tape measure and start documenting everything about your intended closet space. Measure the width, depth, and height of the area. Check for any obstacles like electrical outlets, light switches, or heating vents that might affect your design.
Think carefully about what you'll be storing. A closet designed primarily for hanging clothes will look different from one meant to store linens, crafting supplies, or a combination of items. Consider these questions:
How many long hanging items do you have, like dresses and coats?
What about shorter items such as shirts and jackets?
Do you need drawer space for folded items?
How many pairs of shoes require storage?
Will you need space for accessories, bags, or specialty items?
Choosing Your Closet Type
Generally speaking, you've got three main options when it comes to closet styles. Each has its own advantages depending on your space and storage requirements.
Reach-in closets are the most common type found in homes. They're typically 24 inches deep and can span anywhere from 3 to 8 feet wide. These work wonderfully in bedrooms, hallways, or any spot where you want functional storage without sacrificing floor space.
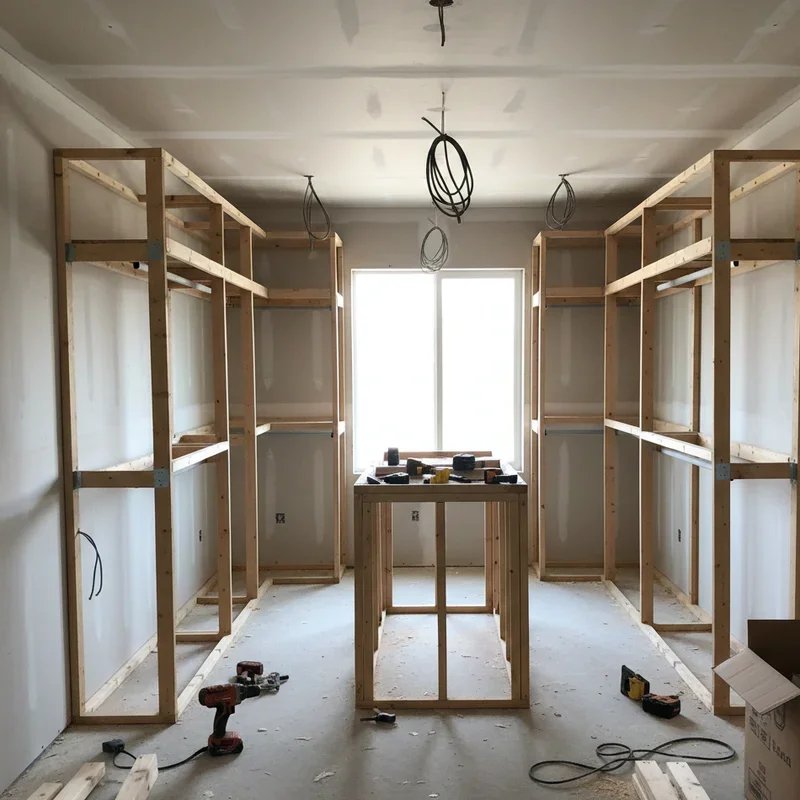
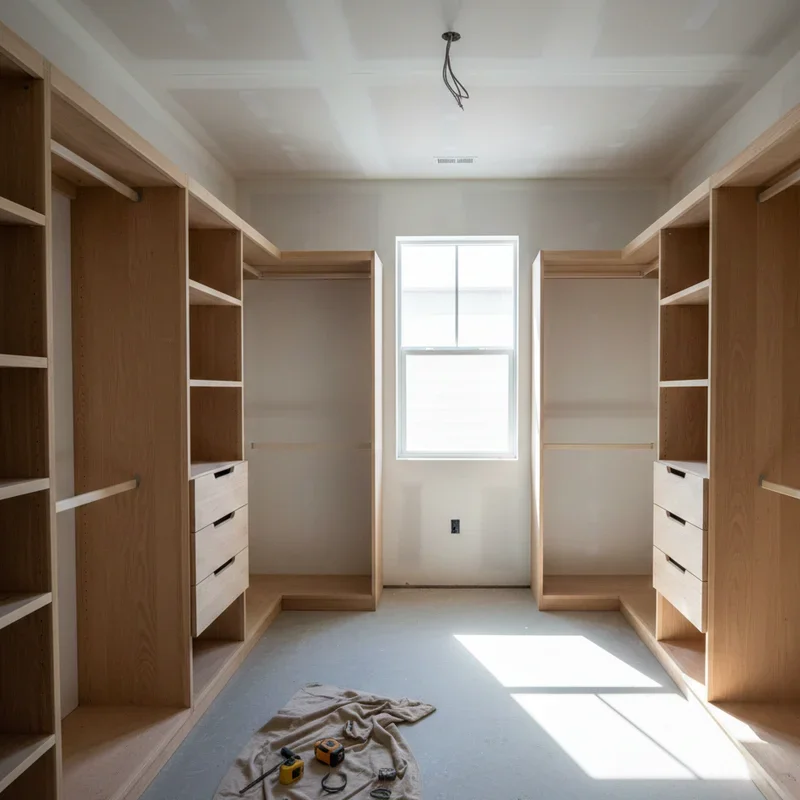
Walk-in closets require more square footage but offer incredible storage capacity. If you've got a spare room or a large bedroom corner, this might be the way to go. You'll need at least 6.5 feet of width to create a comfortable walk-in space.
Wardrobe closets are freestanding units that don't require any construction attached to walls. These are perfect for renters or anyone who might want to relocate their storage solution in the future.
Creating Your Design
Sketch out your closet design on paper or use free online closet planning tools. Include measurements for every shelf, rod, and divider you plan to install. A typical closet configuration includes double hanging rods on one side for shorter items, a single rod at standard height of 66 inches for longer garments, and shelving above for less frequently accessed items.
Standard shelf depth for closets is 12 to 16 inches. Rod placement should allow clothes to hang freely without touching the back wall or shelf below. Leave about 2 inches of clearance between the top of hanging garments and the shelf above.
How to Build a Closet: Step-by-Step Guide for Beginners Materials and Tools
Essential Materials
Getting your materials list sorted before starting will save you countless trips to the store and keep your project moving smoothly. Here's what you'll typically need:
Lumber and panels: Three-quarter inch plywood or melamine boards work great for shelving. You'll also need 2x4 boards for framing if you're building walls.
Hardware: Wood screws in various sizes, shelf brackets or cleats, closet rod brackets, drywall screws if applicable, and L-brackets for extra support.
Closet rods: Standard rods come in chrome, brushed nickel, or wood finishes. Choose oval or round rods based on your preference.
Finishing materials: Paint or stain, primer, wood filler, and sandpaper for a polished look.
Tools You'll Need
Don't worry if you don't own every tool on this list. Many hardware stores offer tool rental programs, or you might be able to borrow from neighbors or friends.
A power drill with various bits is absolutely essential. You'll use it constantly throughout this project. A circular saw or miter saw will help you make clean cuts on your lumber. A level is critical for ensuring your shelves don't become inadvertent slides for your belongings.
You'll also want a stud finder for locating wall studs, a tape measure, pencil for marking, square for accurate angles, clamps for holding pieces in place, and safety equipment including glasses and ear protection.
Building Your Closet Frame
Locating Wall Studs
This step is crucial and honestly, it's where a lot of beginners run into trouble. Your closet shelving and rods need to be anchored into wall studs to support the weight of your belongings. A stud finder takes the guesswork out of this process.
Run your stud finder along the wall and mark each stud location with a light pencil mark. Studs are typically spaced 16 inches apart, though some homes use 24-inch spacing. Once you've found them, double check by tapping the wall. A solid sound indicates a stud while a hollow sound means empty wall space.
Installing Support Cleats
Cleats are horizontal strips of wood that provide a foundation for your shelves. They're incredibly important for creating a sturdy, lasting closet system. Cut your cleats to the appropriate length and pre-drill holes to prevent wood splitting.
Hold each cleat in position using your level to ensure it's perfectly horizontal. Mark through your pre-drilled holes onto the wall, then drill pilot holes into the studs. Secure the cleats with screws long enough to penetrate at least 1.5 inches into the studs.
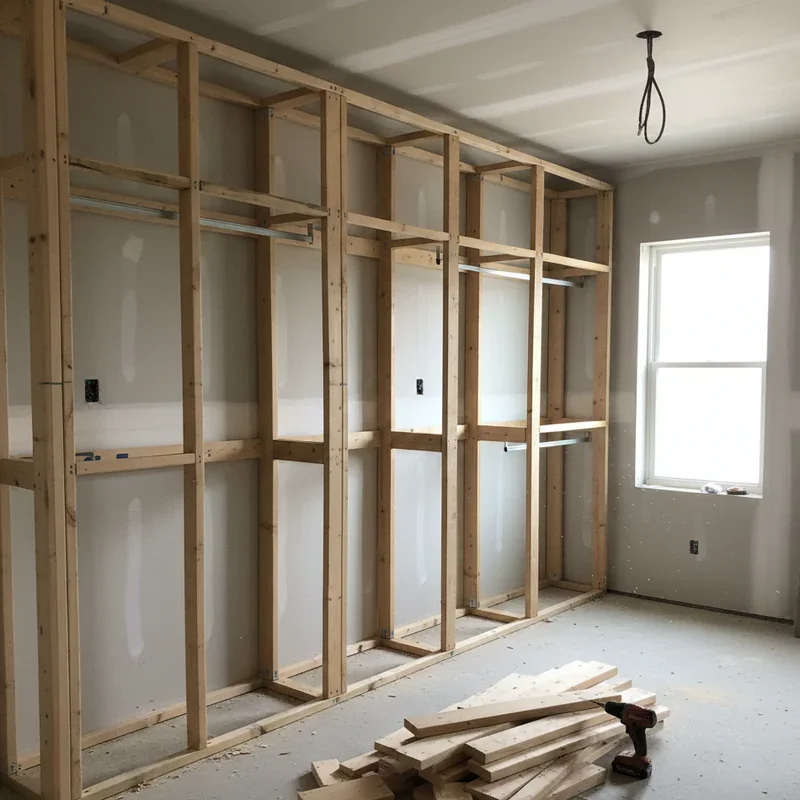
Framing New Walls (If Needed)
If you're carving a closet out of a larger room, you'll need to build new walls. This involves constructing a simple frame using 2x4 lumber. Start with a bottom plate secured to the floor, add vertical studs every 16 inches, and cap it with a top plate attached to the ceiling joists above.
Use a plumb bob or long level to ensure your walls are perfectly vertical. Secure the frame to existing wall studs where possible for maximum stability. Once framed, cover with drywall, tape the seams, and finish with joint compound.
Installing Shelving and Rods
Cutting and Preparing Shelves
Measure twice, cut once. You've probably heard this saying before, and it couldn't be more relevant here. Take accurate measurements of each shelf space and transfer them to your plywood or melamine boards.
When using a circular saw, cut with the finished side facing down to minimize splintering on the visible surface. If you've opted for melamine, apply edge banding to exposed edges for a clean, professional appearance. Simply iron on the banding and trim excess with a utility knife.
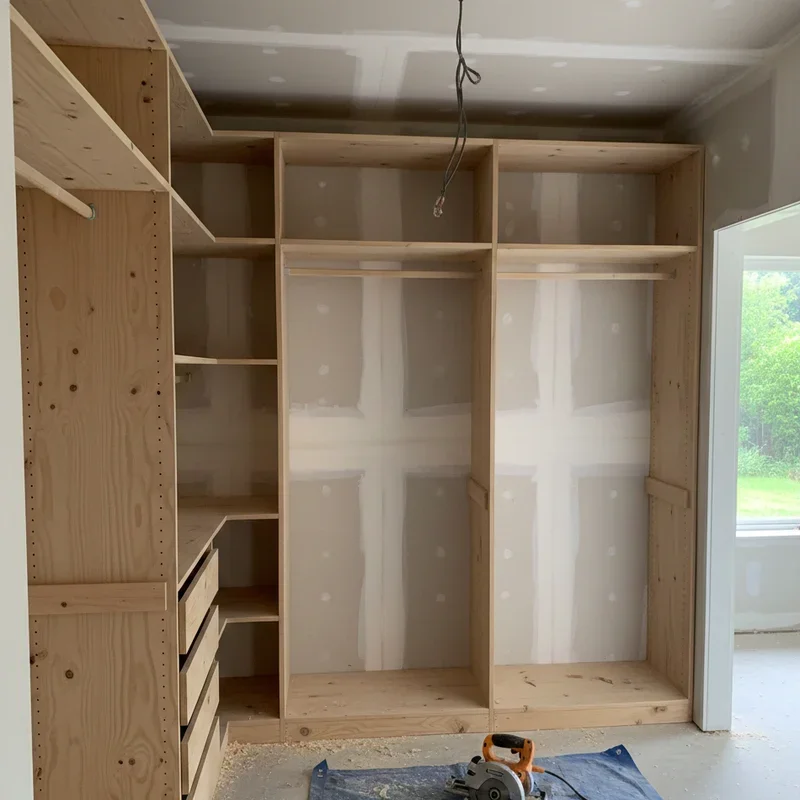
Mounting Shelves
Rest your cut shelves on the cleats you've already installed. For additional support, especially on wider shelves, add a front edge support or additional brackets at intervals. Secure shelves to cleats with screws from underneath, countersinking the screws slightly so they don't protrude.
For adjustable shelving, install shelf standards (the metal tracks with holes) on each side of the closet. These allow you to move shelf heights as your storage needs change over time.
Installing Closet Rods
Rod brackets should be mounted approximately 10 to 12 inches from the back wall, giving clothes adequate clearance. Position double rods with the upper rod at around 80 inches and the lower rod at approximately 40 inches from the floor.
Mark your bracket locations carefully, ensuring both sides are at identical heights. Pre-drill holes and secure brackets into studs whenever possible. If you must mount into drywall, use heavy-duty wall anchors rated for the weight you'll be hanging.
Adding Doors and Finishing Touches
Choosing Closet Doors
Your door selection dramatically impacts both functionality and aesthetics. Sliding doors work well for tight spaces where swinging doors would be impractical. Bifold doors are a popular choice for reach-in closets, folding neatly to the sides and allowing full access to the closet interior.
French doors or standard hinged doors create a more elegant look but require clearance space in front of the closet. Consider mirrored doors to make your room feel larger while providing a convenient dressing mirror.
Installing Door Hardware
Follow manufacturer instructions for your specific door type. Generally, you'll install tracks at the top and guides at the bottom. Sliding door tracks must be perfectly level, or your doors will drift to one side. Bifold doors need pivot brackets at top and bottom corners.
Take your time with door alignment. Adjust pivot points and guide wheels until doors operate smoothly and sit evenly when closed. Most door hardware includes adjustment features specifically for fine-tuning alignment.
Finishing Your Closet Interior
Sand any rough edges on your shelving and fill screw holes with wood filler. Once dry, sand smooth and apply primer followed by your chosen paint color. White or light colors make closet interiors feel larger and help you see your belongings clearly.
Consider adding lighting inside your closet. Battery-operated LED strip lights or motion-activated puck lights make finding items much easier, especially in deeper closets or walk-ins without windows.
Organizing Your New Closet
Maximizing Storage Efficiency
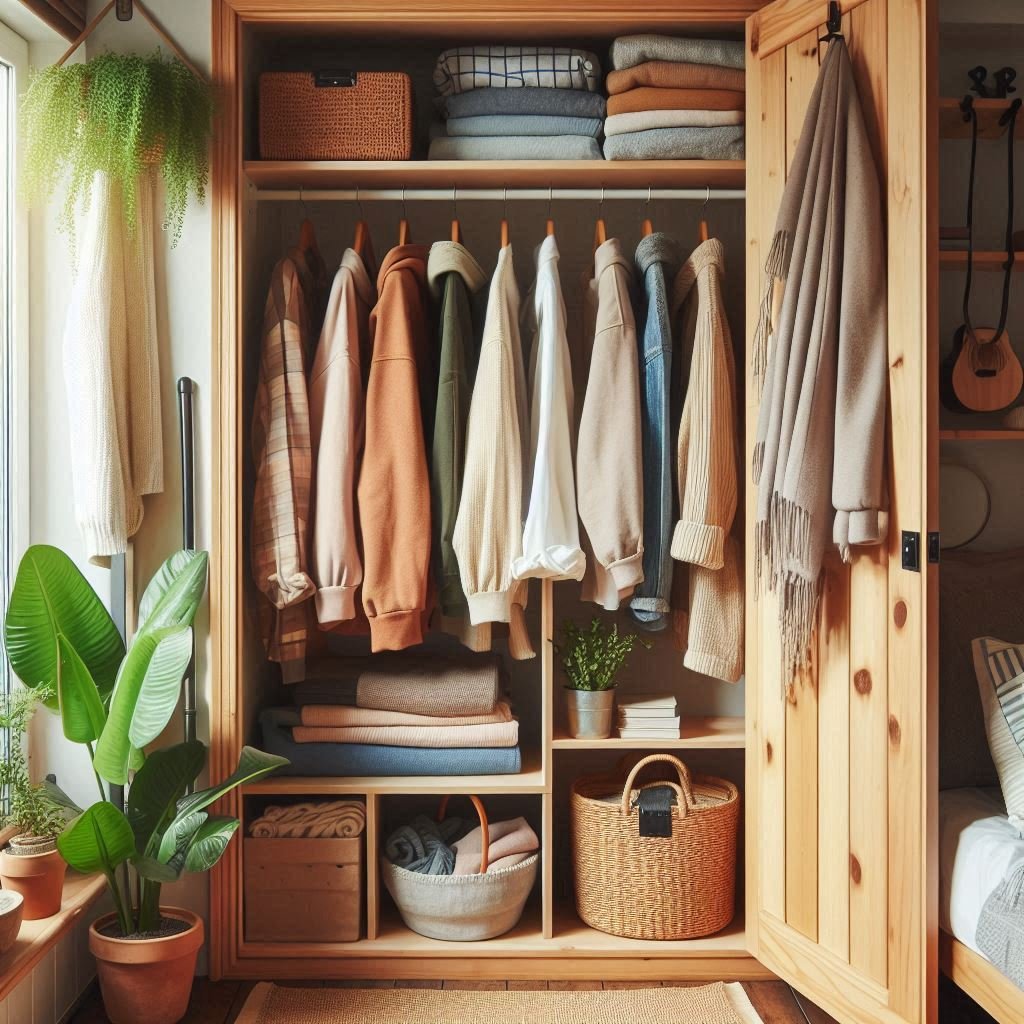
Now that you've completed your build, it's time to think about organization. Use the vertical space above your hanging clothes for storing seasonal items or rarely used belongings. Add drawer units or fabric bins on lower shelves for folded items.
Over-the-door organizers can hold accessories, scarves, or small items without taking up valuable interior space. Shelf dividers help keep stacked items neat and prevent the dreaded sweater avalanche.
Maintaining Your Closet
A well-built closet should last for decades with minimal maintenance. Check bracket screws annually and tighten any that have loosened. Wipe down shelves periodically and touch up paint as needed.
Avoid overloading shelves beyond their rated capacity. If you notice sagging, add additional support brackets before the problem worsens.
Common Mistakes to Avoid
Even experienced DIYers sometimes make errors during closet construction. Not anchoring into studs is probably the most common mistake. It leads to shelves pulling away from walls under the weight of clothing.
Measuring incorrectly causes frustrating delays and wasted materials. Always double check measurements before cutting anything. Forgetting to account for trim or baseboard thickness can throw off your entire design.
Skipping the level is another frequent error. Shelves that look "close enough" will drive you crazy every time you notice items sliding toward one end.
Conclusion
Building your own closet is genuinely one of the most satisfying home improvement projects you can tackle. With careful planning, the right materials, and patience, even complete beginners can create beautiful, functional storage spaces. This guide on how to build a closet: step-by-step guide for beginners has given you the foundation you need to succeed. So gather your tools, measure your space, and start building the organized home you've always wanted.
Read next: How to Install a Door Knob: A Step-by-Step Guide
Frequently Asked Questions
1. How much does it cost to build a closet yourself?
DIY closet projects typically cost between $200 and $800 depending on size and materials chosen.
2. Can I build a closet without professional help?
Absolutely, beginners with basic tools and patience can successfully complete most closet building projects.
3. How long does building a closet take?
Most reach-in closets take one to two weekends to complete from start to finish.
4. What wood is best for closet shelving?
Three-quarter inch plywood or melamine boards offer excellent durability and a clean finished appearance.
5. Do I need a permit to build a closet?
Usually no, but adding electrical or modifying structural walls may require permits locally.
Stay up to date with our latest ideas!