How to Remove Ceiling Light Cover Without Damage
Master the art of removing ceiling light covers safely! Step-by-step guide for every fixture type. No cracks, no stress, just success!
Well, here's a bright idea for you! Standing on a ladder, staring up at that dusty ceiling light cover, and wondering how on earth it comes off without shattering into a million pieces? You're not alone in this head-scratching moment. Whether you're dealing with dead bugs that somehow made it their final resting place, changing a burnt-out bulb, or just giving things a good cleaning, knowing how to remove ceiling light cover without damage is a skill every homeowner should have in their back pocket.
Let's face it, ceiling light covers seem to have been designed by someone who never actually had to remove one. They're like puzzle boxes suspended above your head, and one wrong move could mean you're sweeping up glass for the next hour. But hey, don't throw in the towel just yet! This comprehensive guide will walk you through every type of ceiling light cover you might encounter, from those sneaky flush-mount fixtures to the fancy chandeliers that look like they belong in a palace.
Armed with the right knowledge and a dash of patience, you'll be removing and replacing these covers like a seasoned pro. No more calling your handy neighbor or shelling out cash for something you can totally handle yourself!
Understanding Different Types of Ceiling Light Covers
Before jumping into the how-to, let's get our ducks in a row and figure out what we're dealing with. Ceiling light covers come in more varieties than flavors at an ice cream shop, and each one has its own personality when it comes to removal.
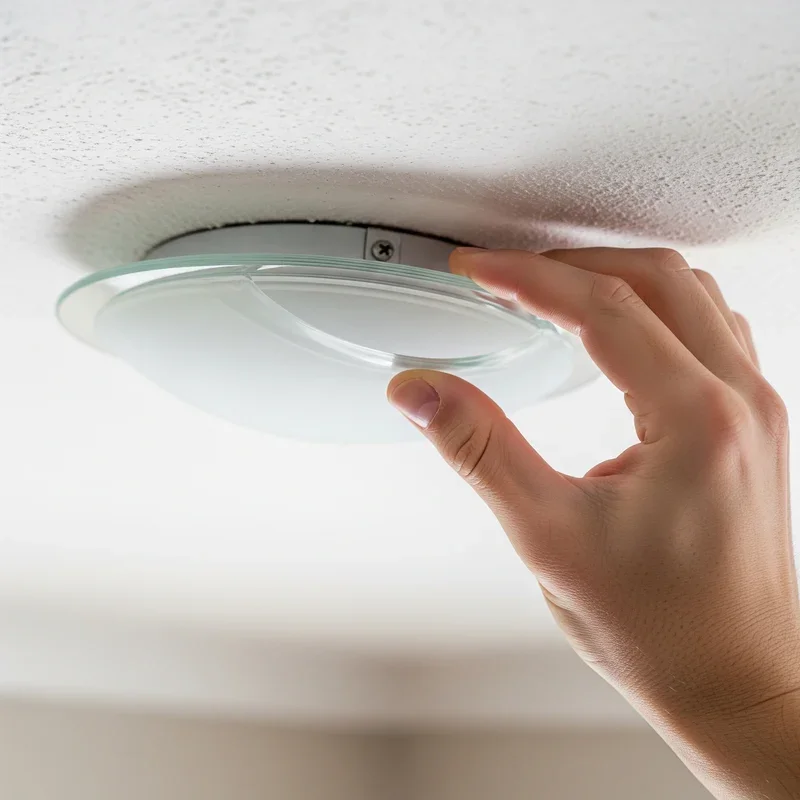
Flush Mount Fixtures
These bad boys sit snug against the ceiling, looking all sleek and modern. They're probably the most common type you'll find in homes today. Usually held in place by decorative screws, spring clips, or a twist-lock mechanism, they're actually pretty straightforward once you know their secret.
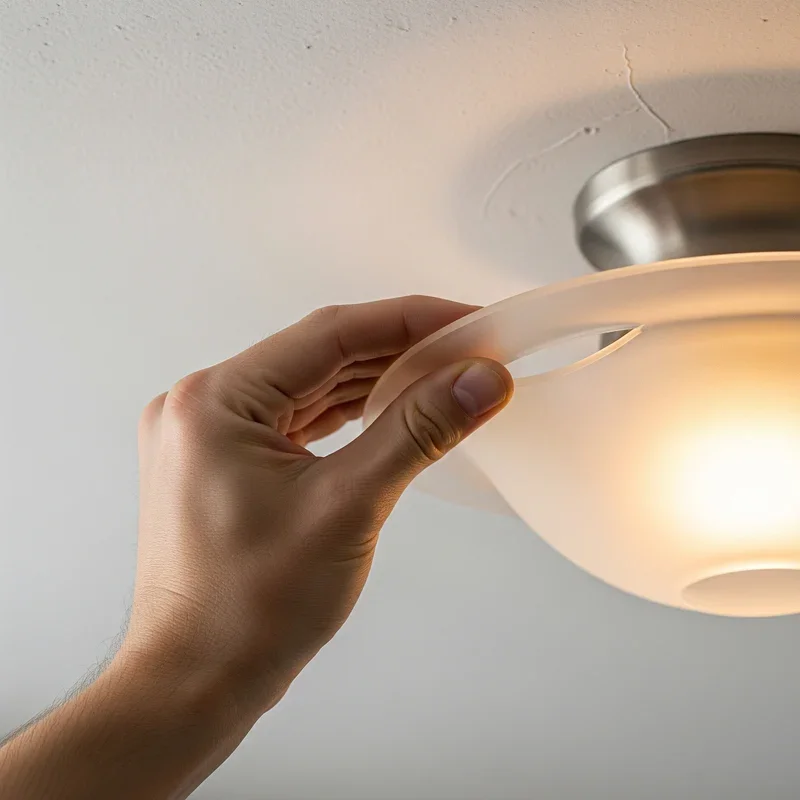
Semi-Flush Mount Fixtures
Think of these as flush mount's slightly fancier cousin. They hang down a few inches from the ceiling, giving you a bit more wiggle room to work with. The extra space makes them easier to handle, though they often have more decorative elements to navigate around.
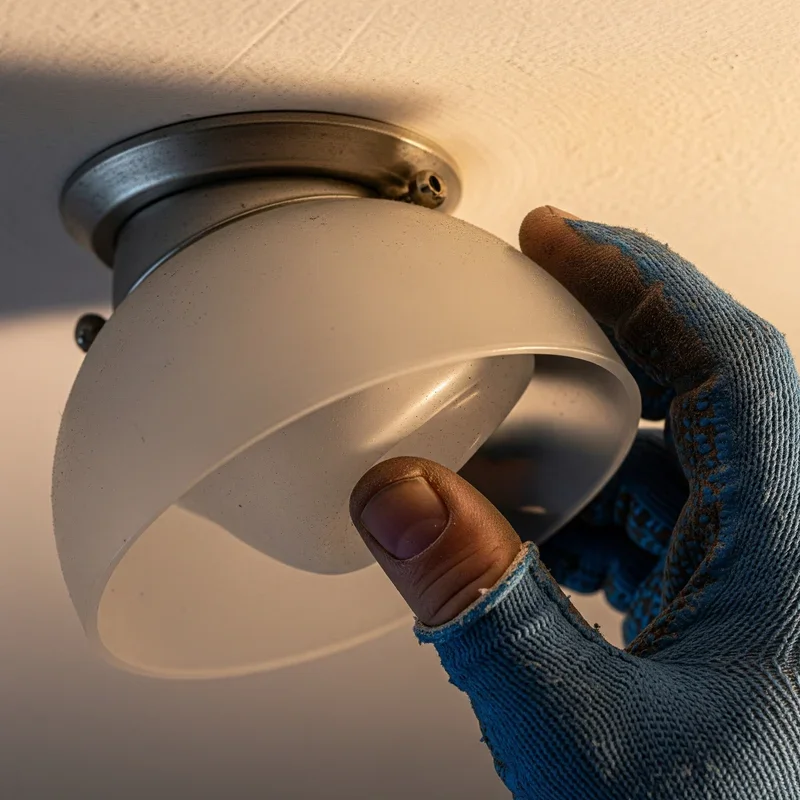
Dome or Bowl Covers
Round, glass covers that look like inverted bowls are everywhere in older homes. They're typically held up by a center finial (that decorative knob in the middle) or by screws around the rim. Simple in design, but boy, can they be stubborn sometimes!
Recessed Light Covers
These sneaky fixtures are built right into the ceiling, with covers that either snap in place or twist-lock. They're minimalist's dream, but removing them requires a gentle touch and sometimes a special technique to avoid damaging the surrounding ceiling.
Chandelier Glass Shades
Oh, the fancy ones! Individual glass shades on chandeliers might be held by clips, screws, or simply resting in decorative holders. Each shade needs individual attention, making this a bit more time-consuming but not necessarily harder.
Essential Tools and Preparation
Alright, before you start your ceiling light cover adventure, let's talk tools and prep work. Having everything ready means you won't be stuck on a ladder realizing you need something from the garage.
Tools You'll Need
• A sturdy step ladder (wobbling while reaching overhead? No thanks!) • Soft cloths or microfiber towels • Rubber gloves for better grip • Flathead and Phillips screwdrivers • Needle-nose pliers (just in case) • Painter's tape (for marking positions) • A headlamp or flashlight • Safety glasses (because nobody wants dust in their eyes) • A friend to spot you (optional but recommended)
Pre-Removal Prep Work
First things first, turn off the light switch and let the bulbs cool down completely. Trust me, grabbing a hot bulb is a mistake you only make once! If you're planning to clean the cover, have your cleaning supplies ready to go.
Clear the area below the light fixture. Move that coffee table, roll up that fancy rug, and give yourself plenty of room to maneuver. Nothing worse than trying to balance on a ladder while navigating around furniture!
Take a quick photo of the fixture before you start. Sounds silly, but when you're trying to remember how everything goes back together, that photo's worth its weight in gold.
How to Remove Ceiling Light Cover Without Damage: Step-by-Step Methods
Now we're cooking! Let's dive into the actual techniques for different types of covers. Remember, patience is your best friend here.
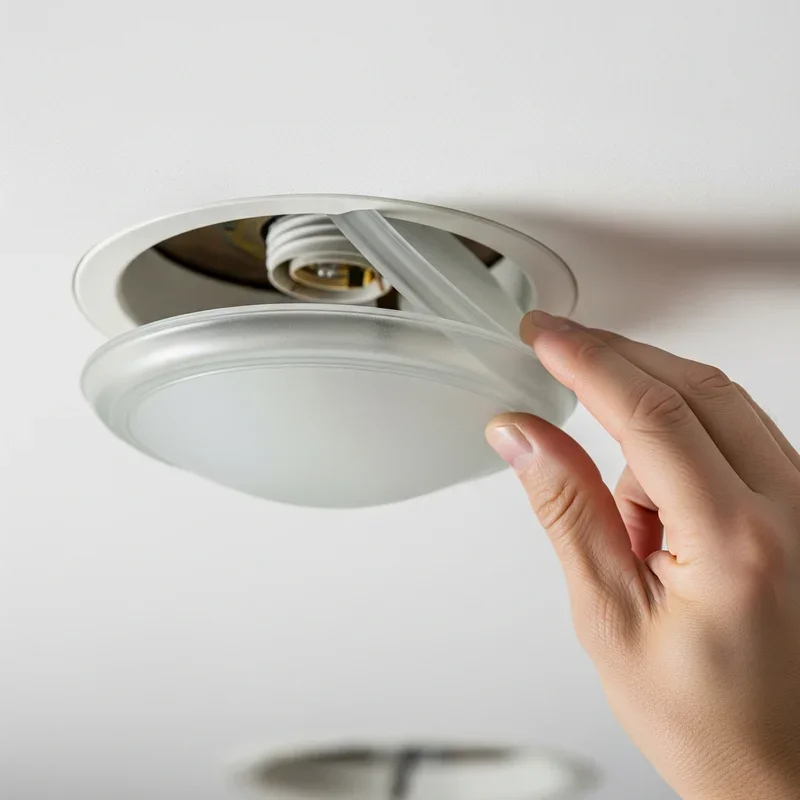
Method 1: Removing Flush Mount Covers
Looking up at that flush mount fixture? Here's how to tackle it without any drama.
Start by examining the edge of the cover. Run your fingers around the rim, feeling for screws, clips, or notches. Many flush mounts have small decorative caps hiding the screws. Gently twist these caps counterclockwise to reveal the screws underneath.
If you find screws, support the cover with one hand while loosening them with the other. Don't remove them completely at first! Just loosen them enough to see if the cover drops slightly. This tells you if you're on the right track.
For spring-loaded clips, gently pull down on one side of the cover while supporting the rest. You'll feel the resistance of the springs. Pull down about an inch, then work your way around, releasing each clip gradually.
Method 2: Twist-Lock Fixtures
These can be tricky little devils! The entire cover twists off, usually counterclockwise, but sometimes they fool you and go the other way.
Place both hands on opposite sides of the cover. Apply gentle upward pressure while turning counterclockwise. If it doesn't budge, try clockwise. Never force it! If it's really stuck, a tiny spray of WD-40 on the threads (not the glass!) can work wonders.
Some twist-locks have a safety catch. You might need to push up slightly before turning, kind of like a child-proof medicine bottle. Feel for any give when you push up, that's your clue.
Method 3: Center Finial Fixtures
That decorative knob in the center? It's not just for looks! Support the glass cover with one hand placed flat against it. With your other hand, turn the finial counterclockwise.
Here's the kicker: sometimes the entire finial unscrews, sometimes just the decorative cap. Start gently and see what moves. As you unscrew, the cover might start to drop, so keep that supporting hand ready!
Once the finial's off, the cover should come straight down. Watch for any washers or decorative pieces that might fall. Having someone hold a towel underneath can catch any droppers.
Method 4: Recessed Light Covers
These require a different approach altogether. For snap-in covers, locate the springs or clips around the edge. Using your fingers or a flathead screwdriver, gently pry one edge down while supporting the cover.
Work your way around gradually. These covers can pop out suddenly, so don't stand directly underneath! Once one side releases, the rest usually follows pretty easily.
For twist-lock recessed covers, look for small arrows or marks indicating the direction to turn. These usually only need a quarter turn to release.
Common Mistakes to Avoid
Boy, have I seen some doozies over the years! Here's what NOT to do when removing ceiling light covers.
Never yank or pull forcefully. If it's not coming off easily, you're probably missing something. Force is the enemy of glass fixtures, and nobody wants to explain to their spouse why there's glass embedded in the ceiling.
Don't assume all fixtures in your house work the same way. Even identical-looking covers might have different mechanisms. What works in the bedroom might not work in the bathroom.
Skipping the cooling-down period is asking for trouble. Those bulbs stay hot longer than you'd think, and burned fingers make for cranky DIYers.
Working alone on large or heavy fixtures? That's a recipe for disaster. Some covers are heavier than they look, and trying to juggle them while on a ladder is like trying to pat your head and rub your belly while riding a unicycle.
Cleaning and Maintenance Tips
While you've got that cover off, might as well give it some TLC, right?
Cleaning Glass Covers
Fill your sink with warm, soapy water before removing the cover. That way, you can pop it right in for a soak. Add a splash of white vinegar to cut through any greasy buildup.
For stubborn spots, a paste of baking soda and water works miracles. Apply it, let it sit for a few minutes, then gently scrub with a soft brush.
Dry thoroughly with a lint-free cloth. Water spots on a freshly cleaned cover? That's just embarrassing!
Checking for Damage
While the cover's off, inspect it for cracks, chips, or loose parts. Even hairline cracks can worsen over time, potentially leading to a dangerous situation.
Check the fixture's mounting hardware too. Loose screws, worn gaskets, or corroded metal parts should be addressed now, not when the fixture falls at 2 AM.
How to Remove Ceiling Light Cover Without Damage: Troubleshooting Stubborn Fixtures
Sometimes, despite your best efforts, that cover just won't budge. Don't worry, we've got solutions!
Dealing with Painted-Over Edges
Previous painters got a bit enthusiastic? Use a utility knife to carefully score around the edge where the paint has sealed the cover to the ceiling. Go slowly and keep the blade angled away from the glass.
Corroded or Rusted Parts
For metal components that won't turn, apply penetrating oil and let it sit for 15 minutes. Gently tap around the stuck area with a rubber mallet to help the oil penetrate.
Sometimes, temperature changes can help. Try using a hair dryer to warm the metal slightly, causing it to expand. Just don't overdo it with glass fixtures!
Mystery Mechanisms
Can't figure out how it comes off? Check the manufacturer's website or search for your fixture model online. You'd be surprised how many installation guides are floating around the internet.
When all else fails, peek above the cover with your phone's camera. Sometimes there are hidden clips or latches you can't see from below.
Safety Considerations
Let's talk safety, because a trip to the emergency room really puts a damper on home improvement projects.
Ladder Safety
Your ladder should extend at least three feet above the point you're reaching. Set it on level ground, and never, ever stand on the top two rungs. That "This is not a step" sticker? They mean it!
Lock the spreaders completely open. Having a ladder collapse while you're holding a glass cover? That's nightmare fuel right there.
Electrical Safety
Even though you're just removing a cover, turn off the light switch. Accidentally touching exposed wires or hot components isn't worth the risk.
If you notice any exposed wires, burnt smells, or unusual discoloration while the cover's off, stop and call an electrician. Some things are better left to the pros.
Glass Handling
Wear safety glasses and gloves when handling glass covers. They might look sturdy, but glass can be unpredictable, especially if it's been heated and cooled repeatedly over the years.
Have a safe place ready to set the cover once it's removed. A towel-lined box or soft surface prevents rolling and protects against scratches.
Reinstalling Your Ceiling Light Cover
Getting it back up there is usually easier than taking it down, but there are still some tricks to make it smooth sailing.
Clean the fixture base and check that all bulbs are working before replacing the cover. Nothing's more annoying than putting everything back together only to realize a bulb's dead.
For screw-mounted covers, start all screws before tightening any of them. This ensures even pressure and prevents cracking.
Twist-lock covers should click or stop firmly when properly seated. If it keeps turning, you've probably gone too far. Back it off and try again.
Conclusion
There you have it, folks! Mastering how to remove ceiling light cover without damage isn't rocket science, but it does take patience and the right approach. Whether you're dealing with flush mounts, dome covers, or fancy fixtures, the key is understanding the mechanism and working methodically. Remember, every ceiling light cover comes off somehow; it's just a matter of finding its secret. With these techniques in your toolbox, you'll handle any light cover situation with confidence and keep those fixtures looking great for years to come.
Read next: How to Balance a Ceiling Fan for Smooth Operation
Frequently Asked Questions
Q1: How often should I clean my ceiling light covers?
A: Clean covers every 3-6 months, or sooner if you notice dimming.
Q2: Can I use vinegar on all types of light covers?
A: Vinegar's safe for glass but avoid it on metallic or painted finishes.
Q3: Why won't my flush mount cover budge?
A: Check for painted edges, hidden clips, or try turning the opposite direction.
Q4: Is it safe to remove covers with the light on?
A: Never remove covers with lights on; always switch off and cool down.
Q5: Should I replace old ceiling light covers?
A: Replace covers showing cracks, yellowing, or any structural damage immediately for safety.
Stay up to date with our latest ideas!