How to Replace a Light Switch Safely in Easy Steps
Learn how to replace a light switch like a pro! Simple instructions, safety tips, and tools needed. No electrician required for this DIY project!

So, your light switch has seen better days, huh? Maybe it's making that annoying crackling sound, or perhaps it's just stuck somewhere between on and off like it can't make up its mind. Whatever the case, you've come to the right place! Replacing a light switch isn't exactly brain surgery, and with the right guidance, you'll have that bad boy swapped out faster than you can say "let there be light!"
This How to Replace a Light Switch Safely in Easy Steps guide will walk you through everything from choosing the right replacement switch to flipping it on for the first time. Best part? You won't need a degree in electrical engineering or a toolbox the size of Texas. Just some basic tools, a healthy respect for electricity, and about thirty minutes of your time.
Now, before you start thinking this is too complicated for your DIY skills, let me tell you something: if you can follow a recipe or assemble IKEA furniture, you can definitely handle this project. We're talking about saving yourself a pretty penny on electrician fees while gaining the satisfaction of fixing something with your own two hands. Pretty sweet deal, right?
Understanding Light Switches: The Basics
Before diving headfirst into our How to Replace a Light Switch Safely in Easy Steps, let's talk about what we're actually dealing with here. Knowledge is power, and when you're working with electricity, that's not just a figure of speech!
Types of Light Switches You Might Encounter
Single-pole switches are the bread and butter of the light switch world. They're your standard on-off switches that control one light or outlet from a single location. Chances are, this is what you're replacing.
Three-way switches are a bit fancier, controlling a light from two different locations. You know, like those hallway lights you can turn on from either end? Yeah, those are the ones.
Dimmer switches let you set the mood by adjusting light levels. Going from bright reading light to romantic dinner ambiance? That's dimmer switch territory.
Four-way switches work with two three-way switches to control lights from three or more locations. These bad boys are less common in typical homes but show up in larger spaces.
Signs Your Switch Needs Replacing
Knowing when to replace a switch can save you from bigger headaches down the road. Here's what to watch out for:
• The switch feels warm or hot to the touch (yikes, that's not normal!) • You hear crackling, popping, or buzzing sounds when flipping the switch • The lights flicker when the switch is in the "on" position • The switch doesn't stay in position or feels loose • You see scorch marks or discoloration on the switch plate • The switch only works if you jiggle it just right
Safety First: The Non-Negotiables
Listen up, because this part's crucial! Working with electricity isn't the time to play fast and loose with safety rules. One wrong move, and you could be in for a shocking experience, literally.
The Golden Rules of Electrical Work
First and foremost, turn off the power at the breaker box. I can't stress this enough! Flipping the light switch to "off" isn't enough. You need to cut power at the source. Mark the breaker with tape so nobody accidentally flips it back on while you're working.
Test everything twice. After turning off the breaker, use a voltage tester to confirm there's no power flowing to the switch. Better safe than sorry, folks!
Never work in wet conditions or with wet hands. Water and electricity mix about as well as oil and water, which is to say, they don't!
If you're not 100% comfortable or encounter anything unexpected, stop and call a professional. There's no shame in admitting when something's beyond your skill level.
Tools and Materials You'll Need
Gathering your supplies beforehand makes the whole process smoother than a fresh jar of peanut butter. Here's your shopping list:
Essential Tools
Voltage tester (non-contact ones are super handy)
Flathead screwdriver
Phillips head screwdriver
Wire strippers (if needed)
Needle-nose pliers
Wire nuts
Electrical tape
Flashlight or headlamp (you'll be working in the dark, remember?)
Materials to Have on Hand
• New light switch (make sure it matches your needs) • Switch plate cover (if the old one's looking shabby) • Wire connectors (usually come with the new switch) • Maybe some coffee (this isn't technically necessary, but hey, it helps!)
How to Replace a Light Switch Safely in Easy Steps: The Main Event
Alright, drumroll please! It's time to get down to business. Following these steps carefully will have you switching lights like a pro in no time.
Step 1: Turn Off the Power
Head to your electrical panel and locate the breaker controlling the switch you're replacing. Flip it to the "off" position. Stick a piece of tape over it with a note saying "DO NOT TURN ON" just to be extra cautious.
Now, try flipping the light switch. Nothing should happen. If the light turns on, you've got the wrong breaker, buddy! Keep searching until you find the right one.
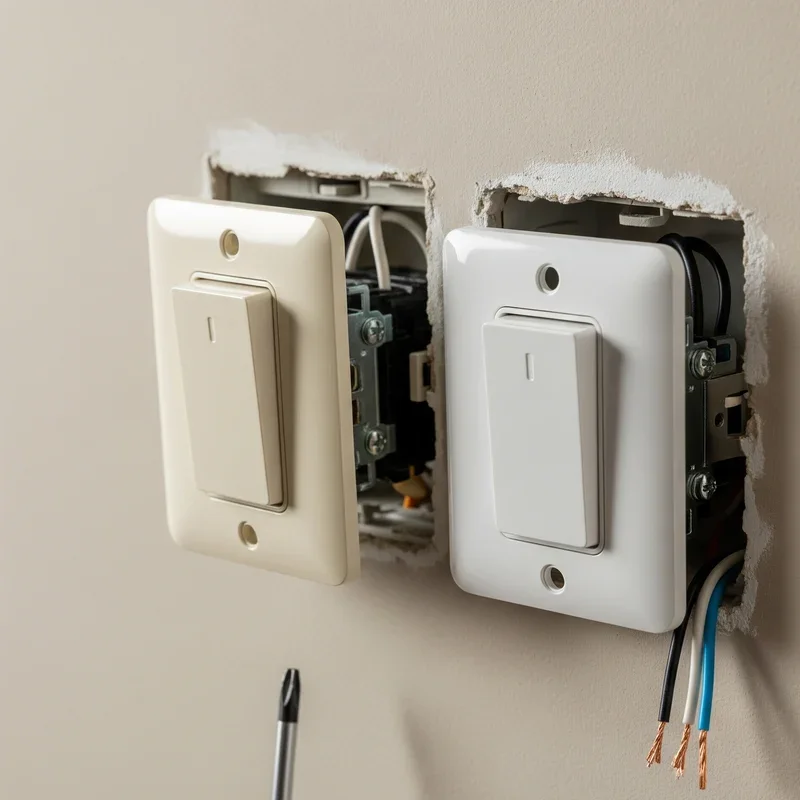
Step 2: Remove the Switch Plate
Using your flathead screwdriver, carefully remove the screws holding the switch plate cover. Set them aside somewhere safe (those little buggers love to roll away and hide).
With the plate removed, you'll see the switch mounted in the electrical box. Don't touch anything yet! We're just looking for now.
Step 3: Test for Power
Here's where that voltage tester earns its keep. Touch it to the terminal screws on the side of the switch. If it beeps, lights up, or gives any indication of power, STOP! The circuit's still hot, and you need to find the correct breaker.
No response from the tester? Good! But test it on a outlet you know is working just to make sure the tester itself is functioning properly.
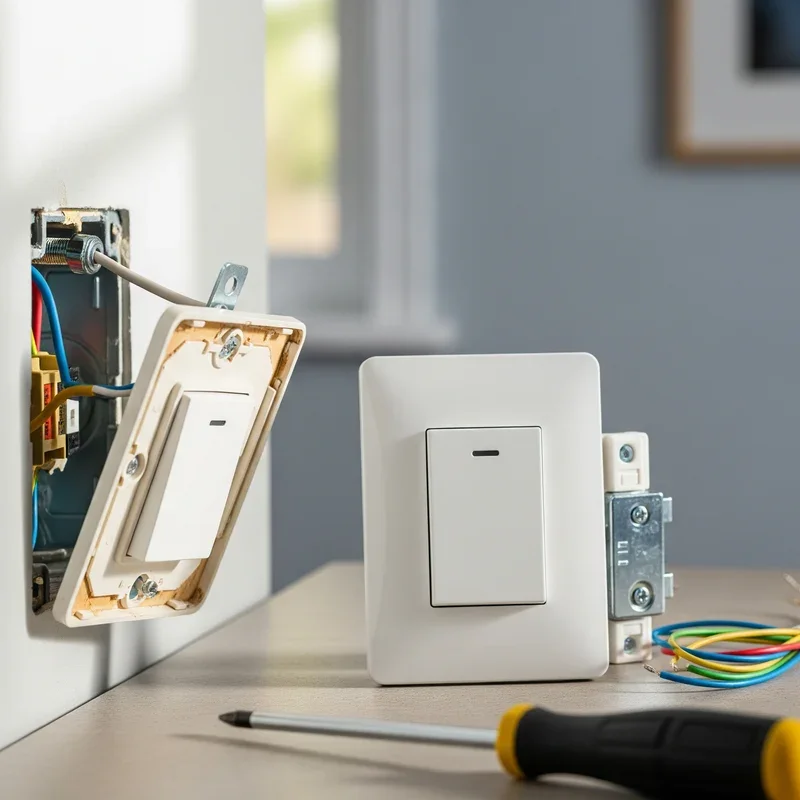
Step 4: Remove the Old Switch
Unscrew the mounting screws at the top and bottom of the switch. Gently pull the switch out from the electrical box, being careful not to touch the wires to anything.
Now you can see how the wires are connected. Taking a quick photo with your phone isn't a bad idea, just in case you need a reference later.
Step 5: Disconnect the Wires
Looking at the old switch, you'll see wires connected to terminal screws or pushed into holes in the back. Loosen the terminal screws counterclockwise to release the wires. If they're backstabbed (pushed into holes), insert a small screwdriver into the release slot while pulling the wire out.
Keep track of which wire went where. Usually, you'll have: • A black (hot) wire • A white (neutral) wire, though sometimes this is absent in switch boxes • A green or bare copper (ground) wire
Step 6: Prepare the New Switch
Before connecting anything, compare your new switch to the old one. Make sure the terminals are in similar positions. Some switches have different configurations, so double-check you've got the right type.
If the wire ends look frayed or damaged, trim them slightly and strip about 3/4 inch of insulation off the ends. Nice, clean copper is what we're after!
Step 7: Connect the Wires
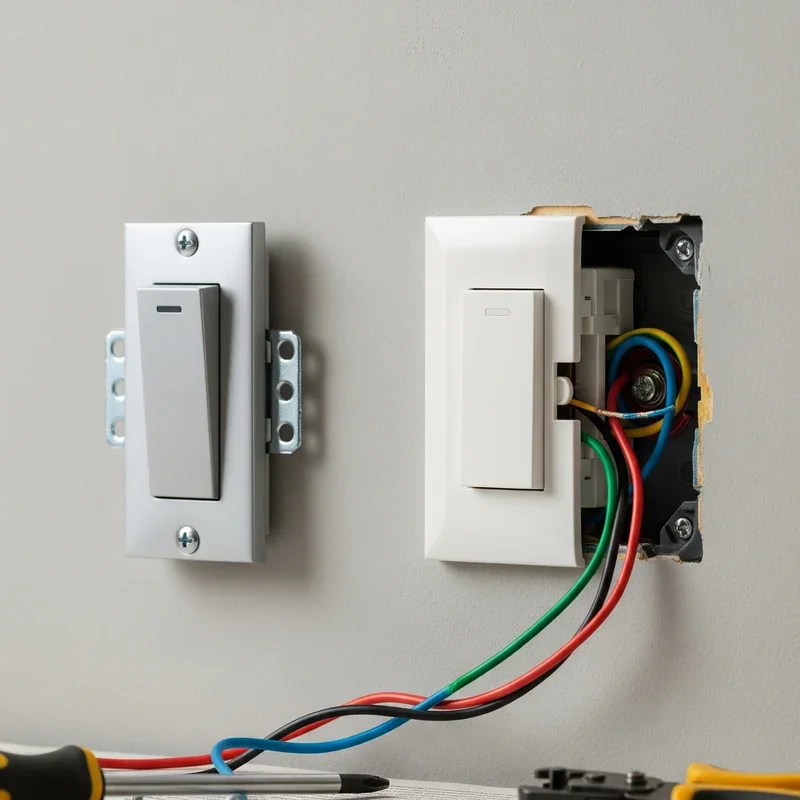
Time to hook up your new switch! If your wires are bent from the old switch, straighten them out a bit first.
Connect the ground wire (green or bare copper) to the green ground screw on the switch. Wrap it clockwise around the screw so it tightens as you turn the screw.
Attach the hot wire (usually black) to one of the brass terminal screws. Again, wrap it clockwise and tighten securely.
If there's a neutral wire (white), it typically doesn't connect to a simple switch but might be bundled with other whites in the back of the box.
Step 8: Secure the Switch
Carefully fold the wires back into the electrical box. This part's like trying to stuff a sleeping bag back into its sack, requiring patience and maybe a few choice words muttered under your breath.
Align the switch vertically (nobody likes a crooked switch!), and screw it to the electrical box using the mounting screws. Don't overtighten; snug is good enough.
Step 9: Replace the Cover Plate
Almost there! Screw the switch plate cover back on, making sure it sits flush against the wall. If it doesn't, the switch might not be seated properly in the box.
Step 10: Restore Power and Test
Head back to the breaker panel and flip that breaker back on. Return to your newly installed switch and give it a flip. Let there be light!
If everything works, congratulations! You've just successfully replaced a light switch. If not, don't panic. Turn the breaker back off and double-check your connections.
Troubleshooting Common Issues
Even with careful work, sometimes things don't go as planned. Here's how to handle common hiccups:
The Light Won't Turn On
First, check the obvious: is the bulb burned out? Is the breaker actually on? Sometimes it's the simple things that trip us up.
If those check out, you might have a loose wire connection. Turn off the power and inspect each wire connection, making sure they're secure.
The Switch Feels Loose
A wobbly switch usually means it's not properly secured to the electrical box. Check that the mounting screws are tight and that the box itself isn't loose in the wall.
The Breaker Keeps Tripping
This could indicate a short circuit or overloaded circuit. If the breaker trips immediately when you turn it on, you've likely got wires touching that shouldn't be. Time to call in the pros!
Different Switch Types and Special Considerations
Not all switch replacements are created equal. Let's talk about some special cases you might encounter.
Replacing a Dimmer Switch
Dimmer switches have a few extra considerations. They're typically deeper than regular switches, so make sure your electrical box has enough room. Also, not all dimmer switches work with LED bulbs, so check compatibility.
Smart Switches
Welcome to the 21st century! Smart switches often require a neutral wire, which older switch boxes might not have. They're also bulkier than traditional switches, so space can be an issue.
Three-Way Switch Replacement
These are trickier because you're dealing with travelers (wires that connect between switches). Label everything clearly, and take multiple photos before disconnecting anything. When in doubt, this might be worth hiring an electrician for.

When to Call a Professional
Look, there's no shame in knowing your limits. Here are situations where calling an electrician is the smart move:
• You encounter aluminum wiring (common in homes from the '60s and '70s) • The wiring doesn't match what you expected • You smell burning or see scorch marks • The electrical box is damaged or too small • You're just not comfortable with what you're seeing
Conclusion
There you have it! You've now got all the knowledge needed to tackle a light switch replacement with confidence. Remember, taking your time and prioritizing safety will ensure success. This simple DIY project saves money and gives you valuable home maintenance skills. With proper preparation and these step-by-step instructions, you'll flip that new switch with pride, knowing you did it yourself. Who knows? This might just be the beginning of your DIY electrical journey!
Read next: How to Wire Two Light Switches: Step-by-Step Guide
Frequently Asked Questions
Q1: How long does it take to replace a light switch?
A: Most people can complete this project in 20-30 minutes once comfortable.
Q2: Can I replace a regular switch with a dimmer?
A: Yes, but ensure your lights are dimmable and box has space.
Q3: Do I need a permit to replace a light switch?
A: Generally no, but check local codes for specific requirements in area.
Q4: What's the difference between a 15-amp and 20-amp switch?
A: The amp rating should match your circuit breaker for safety compliance.
Q5: Is it safe to replace switches in an old house?
A: Usually yes, but watch for outdated wiring requiring professional help immediately.
Stay up to date with our latest ideas!