How to Wire a Light Switch Step by Step
Master electrical work at home! Learn how to wire a light switch step by step with our beginner-friendly guide. Safety tips included for DIYers.

So, you've decided to take the plunge into the wonderful world of home electrical work, huh? Well, buckle up! Learning how to wire a light switch step by step might seem like rocket science at first glance, but here's the thing: it's actually one of those DIY projects that'll make you feel like an absolute superstar once you've nailed it. Whether you're replacing a faulty switch that's been driving you up the wall or installing a brand new one in your latest home improvement venture, this guide has got your back. We're going to walk through everything together, from gathering your tools to flipping that switch for the first time and basking in the glory of your handiwork. Trust me, by the time we're done here, you'll be wondering why you ever hesitated in the first place!
Why You Should Learn This Essential Skill
Listen, I get it. Calling an electrician seems easier, right? But here's the deal: knowing how to wire a light switch step by step is one of those life skills that pays dividends. You'll save yourself a pretty penny on labor costs, gain confidence in handling basic home repairs, and honestly? There's something incredibly satisfying about fixing things with your own two hands. Plus, once you've mastered this, you'll find yourself tackling other electrical projects with newfound courage. It's like learning to ride a bike – scary at first, but once you've got it down, you never forget.
Safety First: What You Absolutely Must Know Before Starting
Hold your horses! Before we dive into the nitty-gritty, we need to talk about safety because, let's face it, electricity isn't something to mess around with. Here's what you need to burn into your brain:
Always turn off the power at the circuit breaker before touching any wires
Use a voltage tester to double-check that the power is actually off
Never work on electrical components when you're tired or distracted
Keep one hand in your pocket when testing circuits to prevent current from traveling through your heart
Wear rubber-soled shoes for extra insulation
If something feels wrong or you're unsure, stop and consult a professional
Look, I'm not trying to scare you off here, but respect for electricity is crucial. One wrong move and you could be in for a nasty shock or worse. Better safe than sorry, as they say!
Gathering Your Tools and Materials
Alright, now we're cooking with gas! Before you can wire anything, you'll need to round up some essential tools and materials. The good news? You probably have some of these lying around already.
Tools you'll need:
Voltage tester or multimeter
Screwdrivers (both flathead and Phillips)
Wire strippers
Needle-nose pliers
Wire nuts or connectors
Electrical tape
Flashlight or headlamp
Materials required:
New light switch (make sure it matches your current setup)
Wire connectors if yours are worn out
Mounting screws (usually come with the new switch)
Pro tip: Don't skimp on quality here. A decent voltage tester is worth its weight in gold, and good wire strippers will make your life exponentially easier.
Understanding Your Switch Type and Wiring Setup
Here's where things get interesting. Not all light switches are created equal, folks! You've got your standard single-pole switches, three-way switches, four-way switches, and even those fancy dimmer switches. For this guide, we're focusing on the most common type: the single-pole switch. This bad boy controls one light or set of lights from a single location.
Now, when you peek inside that electrical box, you're going to see some wires. Typically, you'll encounter:
Black wires (hot wires carrying current)
White wires (neutral wires)
Green or bare copper wires (ground wires)
Sometimes red wires (secondary hot wires in three-way setups)
The color coding isn't just for show. It's actually there to keep you from making potentially dangerous mistakes. Black wires are usually the ones you'll be connecting to your switch terminals.
How to Wire a Light Switch Step by Step: The Main Event
Okay, time to roll up those sleeves and get down to business! This is where all that preparation pays off. Follow these steps carefully, and you'll be golden.
Step 1: Kill the Power
First things first – march yourself over to that circuit breaker panel and flip off the breaker that controls your light switch. Not sure which one it is? Flip them one by one until the light goes out, or better yet, have someone help you test it. Once you think you've got it, flip the light switch a few times to make absolutely certain it's dead. Then, slap a piece of tape over that breaker so nobody accidentally turns it back on while you're working.
Step 2: Test for Power
Grab your voltage tester and stick it in that outlet or against those wires. If it lights up or beeps, you've still got power flowing. Go back to the breaker panel and try again. This step is non-negotiable, people! I can't stress this enough.
Step 3: Remove the Old Switch
Using your screwdriver, remove the cover plate. You'll see two screws holding the switch in the electrical box – take those out too. Gently pull the switch out, but don't yank on it like you're starting a lawnmower! The wires are still attached, remember?
Step 4: Document Everything
This is huge, and so many folks skip this part. Before you disconnect anything, take a photo with your phone or make a quick sketch showing which wire goes where. You'll thank yourself later, I promise. Note the position of each wire – which terminal it's connected to, whether it's on the top or bottom, everything.
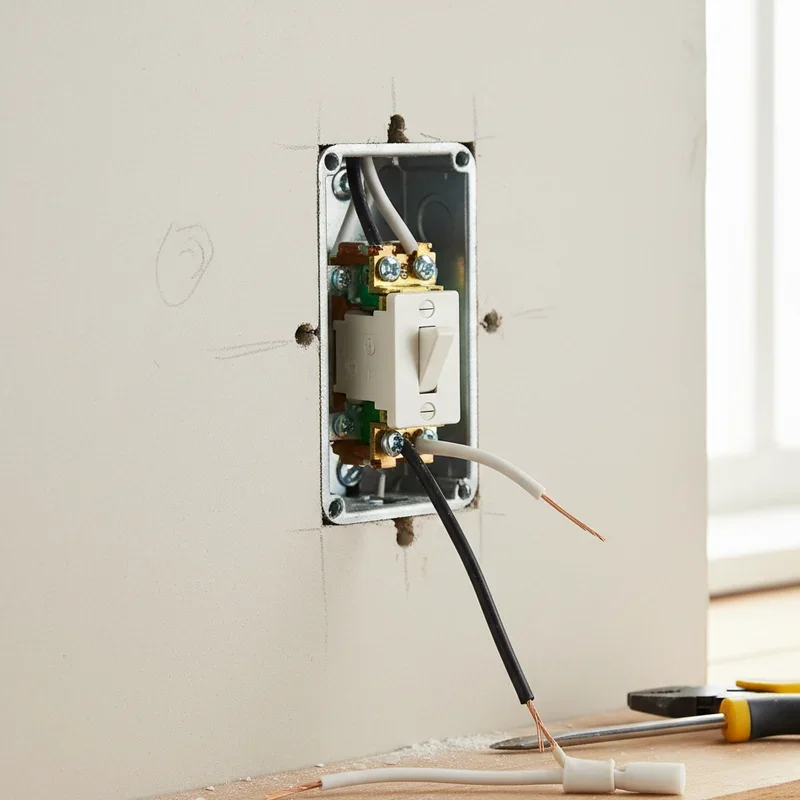
Step 5: Disconnect the Wires
Now you can start removing wires from the old switch. Most switches have screw terminals where the wires are wrapped around and secured. Loosen these screws by turning them counterclockwise. Some newer switches use push-in connections – for these, you'll need to press a release tab while pulling the wire out.
Step 6: Inspect Your Wires
Take a good look at those wire ends. Are they damaged, corroded, or looking worse for wear? If so, use your wire strippers to cut off the damaged portion and strip about three-quarters of an inch of fresh insulation. This ensures a solid, safe connection.
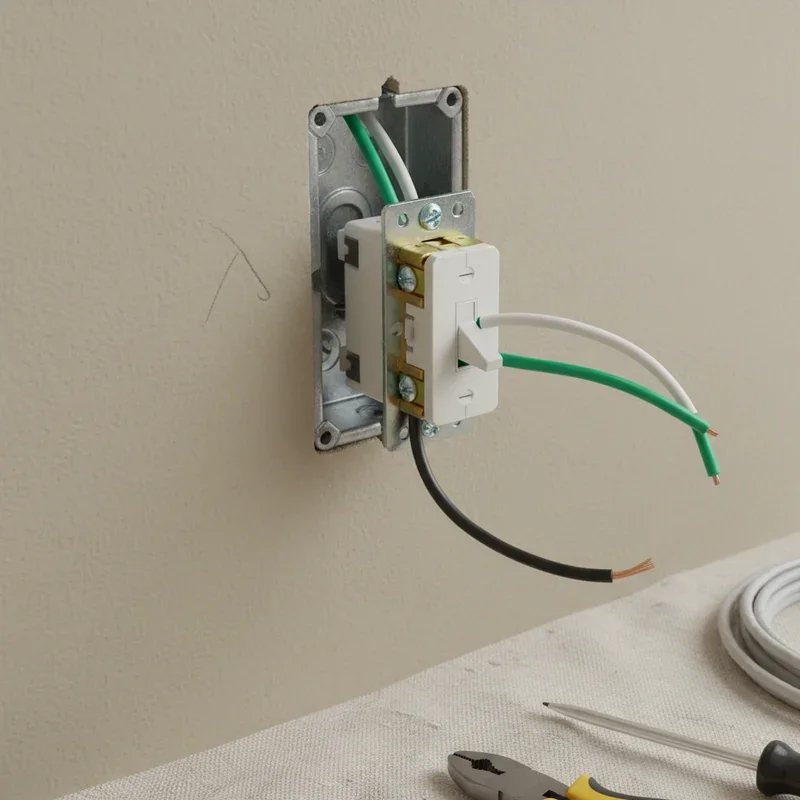
Step 7: Connect the Ground Wire
The ground wire (green or bare copper) gets connected first. Your new switch will have a green screw terminal, usually at the bottom. Wrap the ground wire clockwise around this screw and tighten it down. This is your safety net if something goes wrong, so make sure it's secure!
Step 8: Connect the Hot Wires
Here's where that photo you took comes in handy! Connect your black wires to the brass-colored screw terminals on the sides of your new switch. It typically doesn't matter which black wire goes to which terminal on a single-pole switch, but stick with your original configuration to be safe. Wrap each wire clockwise around its terminal and tighten those screws down good and tight.
Step 9: Secure Everything Properly
Make sure all your connections are snug as a bug. Give each wire a gentle tug to confirm it's not going anywhere. Loose connections are a fire hazard and can cause your switch to malfunction. Once you're satisfied, carefully fold the wires back into the electrical box. This can be a bit like trying to stuff a sleeping bag back into its sack, but take your time.
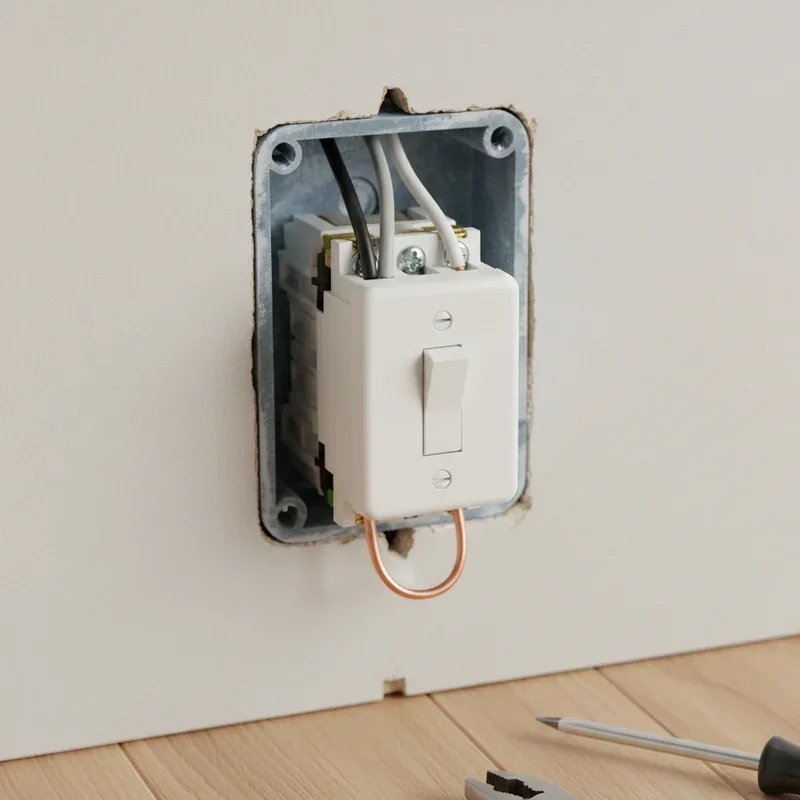
Step 10: Mount the Switch
Line up your switch with the mounting holes in the electrical box and drive those screws in. Don't overtighten them – you want the switch secure but not cracked. Make sure the switch is oriented correctly (typically, "up" should turn the light on).
Step 11: Attach the Cover Plate
Almost there! Screw on that cover plate and make sure it sits flush against the wall. If it doesn't, your switch might not be positioned quite right in the box.
Step 12: Restore Power and Test
The moment of truth! Head back to your circuit breaker and flip that breaker back on. Return to your newly wired switch and give it a flip. Did the light come on? Congratulations, you've just successfully completed how to wire a light switch step by step! If nothing happened, don't panic – we'll troubleshoot in the next section.
Troubleshooting Common Issues
So things didn't go exactly according to plan? Don't sweat it! Even experienced DIYers run into hiccups. Here are some common problems and their solutions:
The light won't turn on: Double-check all your connections. A loose wire is usually the culprit. Also, verify you've got the right breaker turned on and that the light bulb itself isn't burned out (yes, it happens to the best of us!).
The switch feels loose or wobbly: You might need to adjust the mounting screws or add spacers if the electrical box is recessed too far into the wall.
The breaker trips immediately: This could indicate a short circuit. Turn off the breaker again and carefully inspect your wiring for any bare wires touching each other or the metal box.
The switch works but sparks when flipped: This isn't normal for a properly installed switch. Turn off the power and check for loose connections or damaged wire insulation.
If you've tried everything and still can't figure it out, there's absolutely no shame in calling a licensed electrician. Sometimes it's better to admit defeat than to risk your safety or your home's electrical system.
Different Switch Configurations You Might Encounter
While we've focused on basic single-pole switches, you might eventually want to tackle more complex setups. Three-way switches let you control one light from two different locations – super handy for stairways or large rooms. Four-way switches add even more control points. Dimmer switches give you adjustable lighting levels. Each type has its own wiring configuration, but the fundamental principles remain the same. Master the basics with how to wire a light switch step by step, and you'll be ready to level up when the time comes.
Maintaining Your Newly Installed Switch
Good news! Light switches are pretty low-maintenance once they're properly installed. However, keep an eye out for warning signs that something might be amiss:
Switches that feel hot to the touch
Flickering lights when the switch is on
Buzzing or crackling sounds
Switches that don't click decisively
Any of these symptoms could indicate loose connections or a failing switch. Address them promptly to prevent bigger problems down the road.
When to Call a Professional Electrician
Real talk: there are situations where DIY just isn't the way to go. If you're dealing with aluminum wiring, if your home's electrical system is ancient, or if you're working with circuits above 120 volts, leave it to the pros. Also, if your local building codes require permits and inspections for switch replacement, you'll want to go through proper channels. And hey, if you've followed this guide but still feel uncomfortable working with electricity, that's totally okay! Not everyone's cup of tea.
Building Your Confidence for Future Projects
Completing this project is just the beginning! Once you've mastered how to wire a light switch step by step, you'll find that tons of other household electrical projects suddenly seem less intimidating. Replacing outlets, installing ceiling fans, or adding under-cabinet lighting all use similar principles. Each successful project builds on the last, expanding your skillset and your confidence. Before you know it, you'll be the go-to person in your circle for electrical advice!
Conclusion
There you have it! You've journeyed through the complete process of how to wire a light switch step by step, from safety preparations to that satisfying final test flip. Remember, the key ingredients here are patience, attention to detail, and unwavering respect for electrical safety. This skill will serve you well throughout your homeownership journey, saving money and giving you genuine pride in maintaining your space. Now get out there and show that light switch who's boss!
Frequently Asked Questions
1. Can I wire a light switch without turning off the power?
Absolutely not. Working on live electrical circuits is extremely dangerous and potentially fatal.
2. How long does it typically take to wire a light switch?
For beginners, expect 30 minutes to an hour including safety checks and troubleshooting time.
3. Do I need special permits to replace a light switch?
Most areas don't require permits for simple replacements, but check your local building codes.
4. What's the difference between a switch and a dimmer?
Dimmers allow variable light control while standard switches only toggle on and off completely.
5. Can I use any light switch as a replacement?
No. Match the amperage, voltage rating, and switch type to your original configuration exactly.
Stay up to date with our latest ideas!