Can You Paint Tile Floor? What to Know Before You Start
Wondering can you paint tile floor? Learn what to know before you start, including prep, paint types, and tips for lasting results.

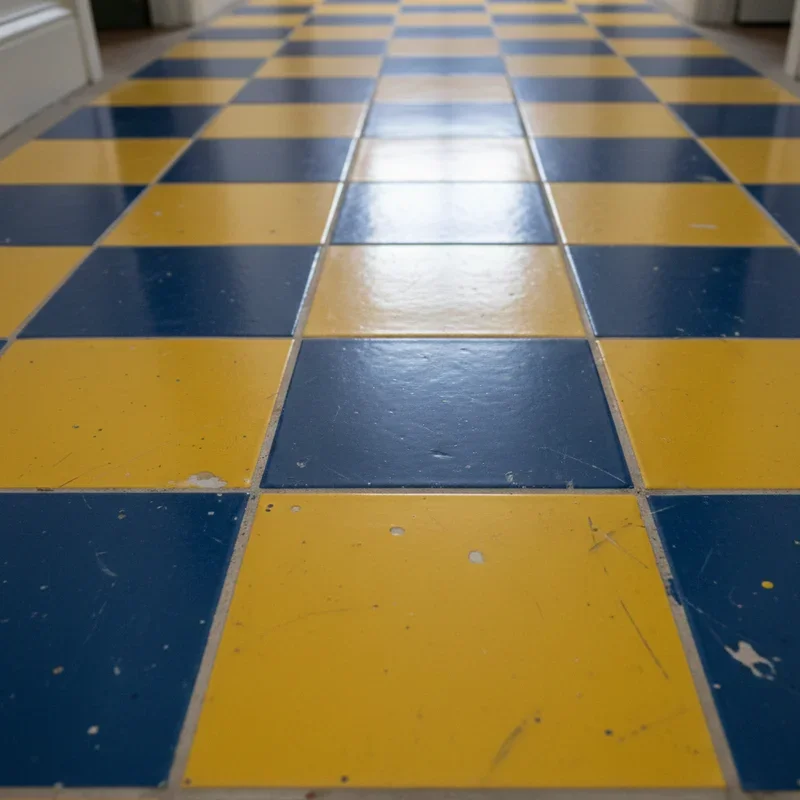
Staring at that dated tile floor every day can feel like being stuck in a time warp. Maybe it's those peachy-pink tiles from the 1980s bathroom or the kitchen floor with patterns that seemed trendy twenty years ago but now just look tired. Ripping out tile and installing new flooring costs a small fortune, but you've got champagne taste on a beer budget. So here's the million-dollar question: can you actually paint tile floors and get decent results?
The short answer is yes, absolutely! But before you grab any old can of paint and start rolling away, pump the brakes. Painting tile floors isn't quite as straightforward as slapping paint on drywall. This project requires specific preparation, the right products, and realistic expectations about durability and longevity. Skip any step, and you'll end up with a peeling, chipping mess that looks worse than what you started with.
Here's the thing though: when done correctly, painted tile floors can look absolutely stunning and last for years. We're talking transformations that make people do double-takes when they see the before and after photos. The technique has been around for ages, and modern paint technology has made results better than ever.
This comprehensive Can You Paint Tile Floor? What to Know Before You Start guide covers everything from assessing whether your tile is a good candidate to maintaining your finished floors for maximum longevity. Whether you're tackling a bathroom, kitchen, or entryway, we've got the information you need for success. Ready to give those ugly tiles a brand-new life? Let's dive in!
Understanding the Reality of Painted Tile Floors
Why This Method Works
Paint adheres to tile surfaces through a combination of mechanical and chemical bonding. Proper preparation creates microscopic texture that gives paint something to grip onto, while specialized primers form chemical bonds with both the tile surface and the topcoat paint.
Modern tile paints and epoxies have been specifically formulated to handle the challenges tiles present: smooth, often glossy surfaces that regular paint would slide right off. These products contain bonding agents that create surprisingly durable finishes when applied correctly.
The key word here is "correctly." Tile painting failures almost always trace back to inadequate preparation, wrong product choices, or impatience during the curing process. When people complain about painted tile peeling off, they usually skipped critical steps or cut corners somewhere along the way.
Setting Realistic Expectations
Let's be honest upfront: painted tile floors won't be as durable as factory-finished ceramic or porcelain. You're essentially creating a surface coating that sits on top of the original tile rather than being baked into the material itself.
High-traffic areas will show wear over time. Heavy furniture can leave marks if dragged across the surface. Dropped items may chip the paint in ways they wouldn't damage actual tile. These realities don't mean painting tile is a bad idea; they just mean going in with eyes wide open.
For many homeowners, painted tile represents a perfect intermediate solution. It buys time and transforms the look while you save up for eventual replacement, or it provides a satisfactory long-term fix for low-traffic areas where durability demands are lower.
Assessing Your Tile's Suitability
Good Candidates for Painting
Ceramic and porcelain tiles in good structural condition are ideal painting candidates. These common tile types accept primer and paint well when properly prepared.
Smooth, glazed tiles actually work better than you might expect. Though the glossy surface seems like it would reject paint, proper sanding and priming creates excellent adhesion.
Tiles without significant damage, cracking, or water intrusion issues provide the best foundation for painted finishes. Minor cosmetic flaws can actually be hidden by paint, but structural problems will telegraph through any finish.
Grout in decent condition is important too. While you can paint over grout along with tiles, severely deteriorated grout should be repaired first. Paint won't fix grout that's crumbling or pulling away from tiles.
Tiles to Avoid Painting
Tiles with moisture problems underneath present major concerns. If water is migrating through the tile assembly, paint will trap that moisture and lead to adhesion failure, mold growth, or worse problems.
Heavily textured tiles with deep relief patterns are difficult to paint evenly. Paint tends to pool in low spots and skip over high points, creating streaky, uneven coverage.
Tiles in constantly wet environments, like shower floors or pool surrounds, face too much water exposure for painted finishes to hold up. The occasional splash is fine, but standing water and constant saturation will cause failure.
Natural stone tiles including marble, granite, slate, and travertine don't accept tile paint as reliably as ceramic. These materials may require different approaches or simply aren't good painting candidates.
Can You Paint Tile Floor? What to Know Before You Start on Products
Primer Selection
Primer is non-negotiable for tile floor painting. Regular wall primer won't cut it because tile surfaces need products specifically designed to bond with smooth, non-porous materials.
Bonding primers formulated for tile, glass, and glossy surfaces create the foundation everything else builds upon. Look for products explicitly mentioning tile compatibility on the label.
Epoxy-based primers offer superior adhesion for demanding applications. These two-part products require mixing before application but provide a bulletproof foundation for your topcoat.
Some all-in-one tile paint products claim to eliminate the need for separate primer. While these can work in low-traffic areas, using dedicated primer almost always produces more durable results.
Paint and Topcoat Options
Latex porch and floor paint provides a budget-friendly option for tile floors in moderate-traffic areas. These products are easy to apply, clean up with water, and come in many colors.
Epoxy floor paint delivers significantly better durability than standard latex products. The two-part formulation creates a hard, chemical-resistant finish that handles foot traffic and moisture exposure well.
Specialized tile paint products target this exact application. Brands like Rust-Oleum and BEHR offer products specifically formulated for painting tile surfaces with good results.
Polyurethane topcoats add an extra layer of protection over painted tiles. Clear, water-based polyurethane extends paint life and makes cleaning easier, though it adds another step to the process.
Color and Finish Considerations
Light colors show dirt, scuffs, and wear more readily than darker shades. Consider your tolerance for maintenance when selecting colors, especially for high-traffic areas.
Satin finishes offer the best balance of appearance and practicality for floors. High gloss shows every imperfection and scratch, while flat finishes can be difficult to clean.
Patterns and designs are absolutely possible! Stenciled patterns, geometric designs, or faux cement tile looks can transform plain painted floors into stunning features. These projects require more skill and planning but produce amazing results.
Preparation: The Make-or-Break Step
Deep Cleaning
Grease, soap residue, and general grime must be completely removed before any painting begins. Even invisible films prevent proper paint adhesion.
Start with a thorough cleaning using trisodium phosphate (TSP) or a heavy-duty degreasing cleaner. Scrub the entire floor, paying special attention to grout lines and corners where gunk accumulates.
Rinse multiple times to ensure no cleaning residue remains. Soap residue is just as bad as the original dirt when it comes to paint adhesion problems.
Allow the floor to dry completely, which may take 24 to 48 hours depending on conditions. Moisture trapped under primer causes adhesion failure, so patience here prevents problems later.
Sanding and Scuffing
Creating texture on glazed tiles is essential for mechanical paint adhesion. The smooth, shiny surface must be roughened enough to give primer something to grip.
Sand the entire floor using 120 to 180 grit sandpaper. Floor sanding machines or pole sanders make this job much easier than hand sanding. You're not trying to remove the glaze completely, just scuff it uniformly.
Vacuum thoroughly after sanding to remove all dust particles. Then wipe down with a tack cloth to catch any remaining dust. This dust will ruin your paint job if left behind.
Don't skip the grout lines! These need sanding attention too, even though the texture there is already rougher than the tile surface.
Repairing Damage
Fill any chips, cracks, or missing grout before painting. Epoxy filler works well for tile repairs and sands smooth after curing.
Address loose or hollow-sounding tiles before proceeding. Paint won't fix structural tile problems, and loose tiles will continue moving underneath your new finish.
Let all repairs cure completely according to product directions before continuing with primer application.
The Painting Process Explained
Applying Primer
Work in small sections rather than trying to prime the entire floor at once. This prevents stepping on wet primer and ensures even coverage.
Use a brush to cut in along edges and work primer into grout lines, then follow with a roller for tile faces. Foam rollers produce smoother results than nap rollers on smooth tile surfaces.
Apply thin, even coats rather than trying to cover everything heavily in one pass. Multiple thin coats build better adhesion than single thick applications.
Allow primer to cure for the time specified on the product label, typically 24 hours minimum. Don't rush this step because properly cured primer makes all the difference in final durability.
Applying Paint
Follow the same brush-and-roller technique used for primer. Cut in edges and grout lines with a brush, then roll tile faces for even coverage.
Thin coats remain the key to success. Two or three thin coats produce far better results than one thick coat that might drip, pool, or fail to cure properly.
Allow adequate drying time between coats, usually two to four hours depending on product and conditions. Test that the previous coat is dry before adding the next.
For patterned designs, allow the base coat to cure completely before applying stencils or tape. Pulling tape from uncured paint creates disasters!
Adding Protective Topcoat
Clear polyurethane or tile sealer provides valuable extra protection for painted floors. This step is technically optional but highly recommended for any floor seeing regular traffic.
Apply topcoat using the same thin-coat methodology. Brush corners and edges, roll larger areas, and build protection through multiple applications.
Water-based polyurethane won't yellow like oil-based versions, keeping white and light paint colors true over time.
Curing and Initial Use
The Patience Required
Here's where most DIYers shoot themselves in the foot! Paint may feel dry to the touch long before it's actually cured and ready for traffic.
Most tile paints require seven to fourteen days of curing time before they reach full hardness and durability. Walking on floors too soon leaves permanent footprints and damages the finish.
Avoid placing furniture, rugs, or heavy items on newly painted floors for at least two weeks. Better yet, wait a full month for the most durable results.
Plan your project timing to accommodate this curing period. Painting a bathroom floor and needing to use it the next day guarantees disappointment.
Protecting Fresh Paint
If you must access painted areas during curing, remove shoes and walk carefully in socks. Even then, limit traffic as much as humanly possible.
Keep pets off painted floors during curing. Claws and paw pads can damage uncured paint easily.
Avoid cleaning painted floors for at least two weeks after painting. Even gentle mopping can damage paint that hasn't fully hardened.
Long-Term Maintenance
Daily Care
Sweep or dry mop regularly to prevent grit and dirt from scratching the painted surface. Abrasive particles act like sandpaper under foot traffic.
Clean up spills promptly before they have a chance to stain or soften the paint surface. Acidic substances like vinegar, citrus, or certain cleaners can damage some paint finishes.
Place mats at entry points to catch debris before it reaches your painted floor. Prevention beats repair every time!
Cleaning Products to Use
Mild dish soap diluted in warm water handles most cleaning needs. Harsh chemicals aren't necessary and may actually damage your painted finish.
Avoid abrasive cleaners, scrubbing powders, and stiff brushes. These scratch painted surfaces and accelerate wear.
Test any new cleaning product in an inconspicuous area first to ensure compatibility with your specific paint and topcoat combination.
Touching Up Wear
Keep leftover paint for inevitable touch-ups. Store it properly so it remains usable when needed.
Address chips and scratches promptly before they spread or allow moisture underneath the paint film.
For heavily worn areas, light sanding and recoating can restore appearance. This maintenance extends painted floor life significantly.
Can You Paint Tile Floor? What to Know Before You Start: Honest Assessment
Weighing Pros and Cons
The affordability of painting tile versus replacement is undeniable. A complete tile floor painting project might cost a hundred dollars or so, while replacement could run into thousands.
Painted floors offer unlimited color customization that tile shopping can't match. Want a specific shade of sage green? Mix it yourself rather than hoping to find it in tile form.
However, the maintenance requirements and reduced durability compared to actual tile represent real trade-offs. High-traffic areas may need repainting every few years.
Making Your Decision
Painting works wonderfully for rental properties, temporary situations, or budget-constrained makeovers. It's also ideal for homeowners who enjoy DIY projects and don't mind periodic maintenance.
If you're planning to sell soon and want updated-looking floors affordably, painting can provide great return on minimal investment. Just disclose the painted floors to potential buyers.
For forever homes where you want truly maintenance-free flooring, eventual tile replacement might be the better long-term choice despite higher upfront costs.
Conclusion
Painting tile floors absolutely works when you approach the project with proper preparation, appropriate products, and realistic expectations about the results. This Can You Paint Tile Floor? What to Know Before You Start guide has walked you through every consideration from assessing your tile's suitability to maintaining your finished floors for years of enjoyment. Remember that surface preparation makes or breaks this project, so don't rush the cleaning, sanding, and priming stages. Allow adequate curing time before subjecting your new floors to traffic, and plan for periodic maintenance to keep them looking beautiful. With patience and attention to detail, your dated tile floors can become stunning features you're actually proud of.
Read next: How to Paint a Front Door: Tools, Prep, and Tips
Frequently Asked Questions
1. How long does painted tile flooring typically last?
Properly painted tile floors last three to five years or longer with careful maintenance.
2. Can you paint tile floors in bathrooms with high humidity?
Yes, but avoid areas with standing water; use moisture-resistant epoxy products for best results.
3. Is it necessary to sand tile before painting?
Yes, sanding creates texture that helps primer and paint bond properly to smooth surfaces.
4. Can you paint over previously painted tile floors?
Yes, with proper cleaning and light sanding, you can repaint previously painted tile successfully.
5. What type of paint works best for kitchen tile floors?
Epoxy floor paint offers the best durability for kitchen floors with regular foot traffic.
Stay up to date with our latest ideas!