How to Install Attic Ladder: Tools, Tips, and Measurements
Learn how to install attic ladder with our complete guide. Essential tools, tips, and measurements for a safe, professional installation.
Got a bunch of holiday decorations, old photo albums, and who-knows-what-else crammed into your attic with no easy way to get up there? You're not alone! Countless homeowners struggle with awkward attic access, balancing precariously on step stools or dragging out extension ladders every time they need to retrieve something from storage. There's gotta be a better way, right? Well, there absolutely is!
Installing an attic ladder transforms that hard-to-reach space into genuinely usable storage territory. No more wrestling with wobbly ladders or performing acrobatic feats just to grab the Christmas tree stand. A properly installed fold-down ladder makes attic access as simple as pulling a cord and climbing a few steps.
Now, here's the thing: this project might seem intimidating at first glance. After all, you're cutting into your ceiling and installing something people will literally climb on. But with the right preparation, tools, and know-how, it's completely manageable for handy homeowners willing to take their time and follow proper procedures.
This comprehensive How to Install Attic Ladder: Tools, Tips, and Measurements guide walks you through everything from initial planning to final adjustments. Whether you're replacing an old rickety ladder or creating brand-new attic access, we've got you covered. Ready to finally make your attic accessible? Let's get climbing!
Understanding Attic Ladder Types
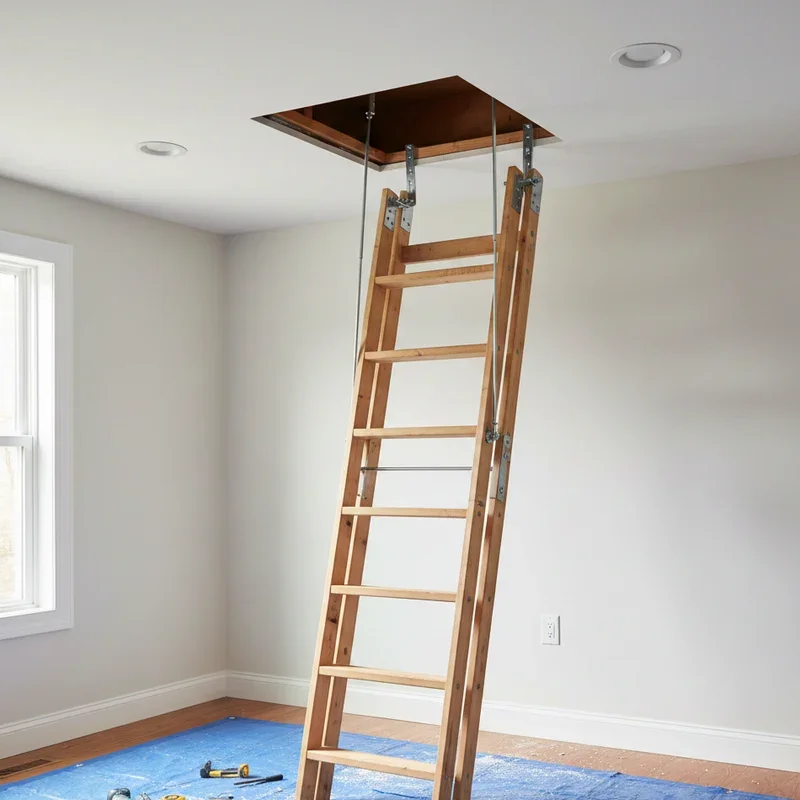
Folding Wooden Ladders
The classic folding attic ladder remains incredibly popular for good reason. These wooden models fold into three or four sections, tucking neatly against the attic door when not in use. They're sturdy, relatively affordable, and blend nicely with most ceiling finishes.
Wooden ladders do have some drawbacks worth considering. They're heavier than aluminum alternatives, making installation slightly more challenging. Over time, wood can warp in temperature-extreme attics, potentially affecting smooth operation. However, for most residential applications, quality wooden ladders perform beautifully for decades.
Aluminum Folding Ladders
Lightweight aluminum ladders have gained serious ground in recent years. They weigh significantly less than wooden counterparts, making them easier to pull down and push up during daily use. Aluminum also resists temperature-related warping better than wood.
The trade-off? Aluminum ladders often feel less substantial underfoot and can be noisier during use. They typically cost a bit more than comparable wooden options too. For homeowners prioritizing ease of operation over heft, aluminum makes excellent sense.
Telescoping Ladders
These space-savers collapse into remarkably compact packages, sliding down from the attic opening rather than folding. Telescoping designs work wonderfully in tight spaces where traditional folding ladders might not fit properly.
Installation differs somewhat from folding models, though the basic principles remain similar. Telescoping ladders often carry higher price tags but offer smooth operation and impressive durability.
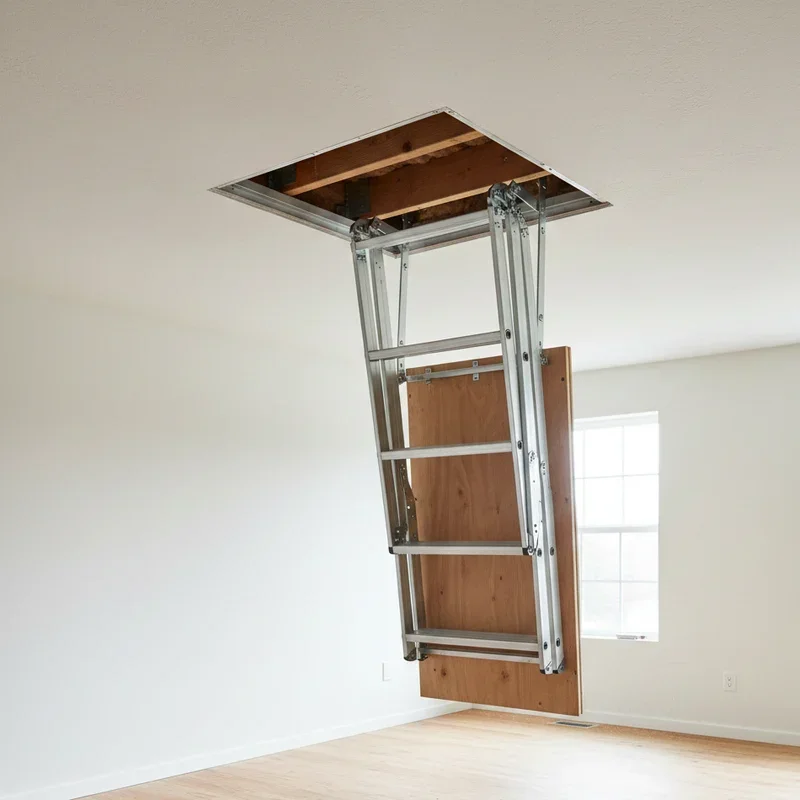
Scissor-Style Ladders
Scissor ladders fold accordion-style, providing sturdy access with minimal ceiling space requirements. They're particularly popular in spaces with lower ceilings where traditional folding ladders might prove awkward.
These models often feature heavy-duty construction suited for frequent use or heavier users. If you'll be accessing your attic daily or carrying heavy items up and down, scissor-style designs deserve serious consideration.
Essential Tools for the Job
Must-Have Equipment
Before starting any attic ladder installation, assemble these essential tools. Having everything within reach prevents frustrating mid-project interruptions and keeps your workflow smooth.
A quality circular saw handles the ceiling opening cuts that most installations require. If you're creating a new opening rather than using an existing one, this tool is absolutely non-negotiable. A reciprocating saw helps with tighter cuts and removing existing framing.
A drill or impact driver proves essential for driving the numerous screws involved in securing your ladder frame. Grab both standard and Phillips bits, along with appropriately sized drill bits for pilot holes. A level ensures your installation sits perfectly horizontal, which affects ladder operation significantly.
A tape measure, carpenter's square, and pencil handle the critical measuring and marking tasks. Never underestimate how important accurate marking is because mistakes here create problems throughout the entire installation.
Safety equipment matters too! Safety glasses protect your eyes from sawdust and debris falling from above. Work gloves prevent splinters and improve grip when handling heavy ladder components.
Helpful Additions
A stud finder locates ceiling joists accurately, essential information when planning your opening location. Guessing about joist positions leads to nasty surprises mid-cut.
Sawhorses or a sturdy work surface support ladder components during assembly and adjustment. You'll also appreciate having a helper available because attic ladder installation genuinely works better as a two-person job. That extra set of hands holding things steady while you drill makes life much easier.
A headlamp or clip-on work light illuminates the attic space where overhead lighting probably doesn't exist yet. Working in the dark invites mistakes and safety hazards.
Critical Measurements Before You Begin
Ceiling Height Considerations
Attic ladders come sized for specific ceiling height ranges, so measuring accurately is crucial. Measure from your finished floor to the finished ceiling in the location where you plan to install. Most residential ceilings fall between eight and ten feet, with corresponding ladder sizes available for each range.
Don't guess or assume your ceilings match standard heights! Older homes, custom builds, and basement ceiling conversions often feature non-standard dimensions. Using a ladder rated for the wrong ceiling height creates serious safety problems or simply won't work at all.
Rough Opening Dimensions
Your attic ladder requires a rectangular opening in the ceiling of specific dimensions. Standard sizes include 22.5 by 54 inches, 25 by 54 inches, and 30 by 54 inches, though variations exist depending on manufacturer and model.
Measure the rough opening size your chosen ladder requires before purchasing. If you're working with an existing opening, measure it carefully and find a ladder that fits. Enlarging existing openings is possible but adds significant work to your project.
Attic Space Requirements
Often overlooked, the attic side needs adequate space for your ladder to unfold and store properly. Measure from the attic floor (or top of ceiling joists) to the rafters above. Low attic spaces may not accommodate all ladder styles.
Also consider the swing clearance needed when the ladder unfolds. You need clear space in the room below where the ladder extends when deployed. Measure and ensure no furniture, fixtures, or obstructions interfere with full ladder extension.
How to Install Attic Ladder: Tools, Tips, and Measurements Step by Step
Preparing the Work Area
Clear the room below your installation site completely. Move furniture, cover remaining items with drop cloths, and create ample working space around your project area. Cutting into ceilings creates substantial debris, and you'll need room to maneuver ladder components.
In the attic, clear away insulation and any stored items from the work area. You'll need access from above during installation, so create a safe pathway and working platform using plywood across joists if necessary.
Turn off any electrical circuits running through your work area. Cutting into unknown wiring creates serious hazards, so locate circuits and shut them down before sawing begins.
Locating and Marking the Opening
Using your stud finder, locate the ceiling joists in your planned installation area. Attic ladder frames attach directly to joists, so your opening position depends on joist locations. Most installations require cutting one or two joists, which we'll address shortly.
Mark your opening dimensions carefully on the ceiling, using a carpenter's square to ensure perfect corners. Double-check measurements against your ladder specifications before making any cuts. The old saying about measuring twice applies doubly here!
If possible, drive small nails through your corner marks up into the attic. This transfers your layout to the attic side where you'll verify clearances and framing needs before cutting.
Cutting the Ceiling Opening
Working from below, cut along your marked lines using a circular saw set to the appropriate depth for your ceiling material. Drywall typically requires about 5/8-inch depth, while plaster over lath needs deeper cuts.
Support the ceiling section you're removing so it doesn't crash down unexpectedly. Having a helper hold it while you complete cuts prevents damage and injury. Remove the ceiling material carefully once cuts are complete.
Now you'll see the exposed joists and can assess the framing situation. Most installations require cutting through one or two joists to create the proper opening size. Before cutting any joists, install temporary support on both sides to carry the load while you work.
Framing the Opening
Cut through any joists that cross your opening, leaving them flush with your opening edges. Install headers perpendicular to the cut joists, connecting the uncut joists on either side of your opening. These headers transfer the cut joists' load to the surrounding structure.
Use joist hangers or structural screws appropriate for load-bearing connections. This framing work is critical for both ladder security and overall ceiling integrity. Don't skimp on fasteners or connection quality here.
Install trimmers if required by your ladder specifications or local building codes. The finished rough opening should match your ladder frame dimensions exactly, with square corners and level surfaces all around.
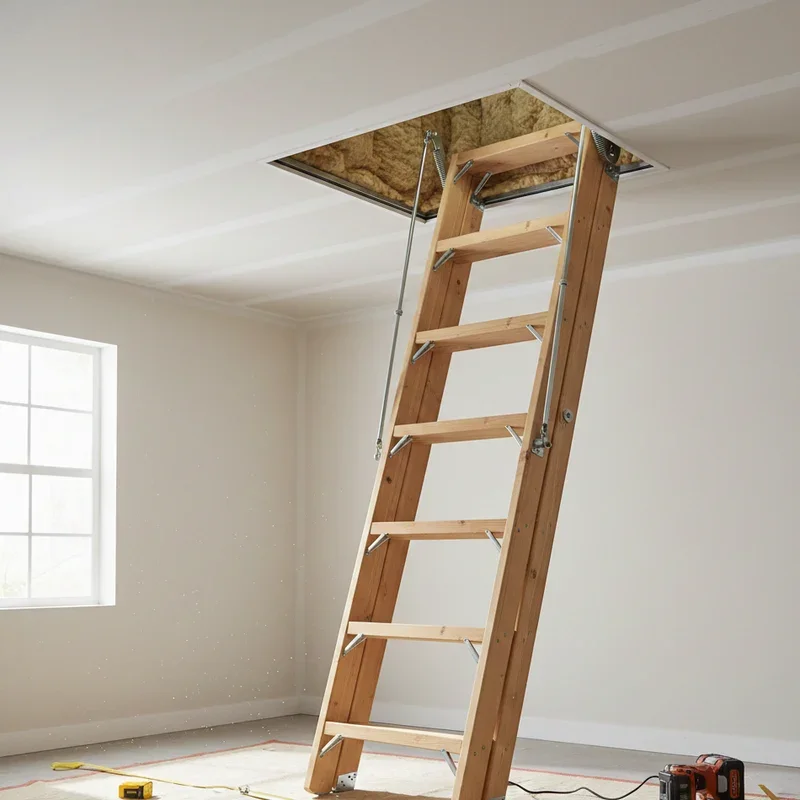
Installing the Ladder Frame
Most attic ladders arrive with temporary installation boards that support the unit while you work. Position these boards across the rough opening, resting on the ceiling surface, with the ladder frame hanging into the opening below.
From inside the attic, check that the frame sits level and flush with the ceiling surface. Shim as needed to achieve perfect positioning. Once satisfied, drill pilot holes and drive screws through the frame into the surrounding joists and headers.
Start with a few screws at each corner, verifying level and alignment before adding remaining fasteners. The frame must be solidly secured all around its perimeter because this connection supports everyone who climbs the ladder.
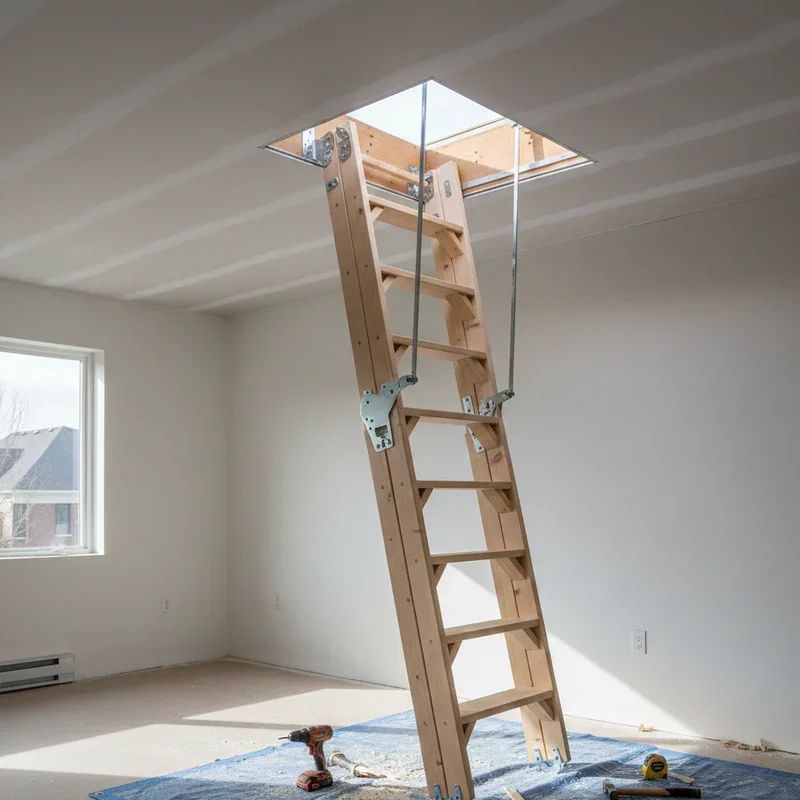
Attaching and Adjusting the Ladder
With the frame secured, install the ladder sections according to manufacturer instructions. Most folding ladders attach via hinges or pins that connect to the mounted frame. Ensure all hardware is tight and properly engaged.
Now comes the adjustment phase! Extend the ladder fully and check how it reaches the floor. Most ladders require cutting the bottom section to achieve proper length and angle. Measure carefully following manufacturer guidelines because cutting too much creates safety issues.
The ladder feet should rest flat on the floor with the ladder at the correct climbing angle, typically about 65 to 70 degrees from horizontal. Adjust feet angles if your ladder includes this feature.
Finishing Touches
Install any provided trim pieces around the opening to cover gaps between the frame and ceiling material. Caulk small gaps to prevent air infiltration and improve energy efficiency.
Test the ladder operation thoroughly. It should open and close smoothly, lock securely in the deployed position, and feel stable under weight. Make any final adjustments to hinges, springs, or latches to achieve optimal operation.
Add weatherstripping to the door panel if your ladder includes this feature. Attic air sealing significantly impacts home energy efficiency, and every gap matters.
Safety Considerations You Can't Ignore
Weight Capacity Matters
Every attic ladder carries a specific weight rating, typically ranging from 250 to 375 pounds. This rating accounts for the climber plus anything they're carrying. Choose a ladder rated well above your expected maximum load to ensure adequate safety margin.
Never exceed the stated weight capacity because doing so risks structural failure with serious injury consequences. If you'll be hauling heavy items into your attic regularly, invest in a heavy-duty ladder designed for the task.
Proper Climbing Technique
Always face the ladder when climbing, maintaining three points of contact at all times. Never carry loads that prevent you from gripping the ladder properly. Make multiple trips rather than overloading yourself.
Don't allow children to play on attic ladders unsupervised. These are functional tools, not playground equipment, and accidents happen quickly with improper use.
Building Code Compliance
Many localities require permits for attic access modifications and specify requirements for framing, clearances, and ladder specifications. Check with your local building department before starting work.
Inspections may be required at various stages, particularly for the framing phase. Working with rather than against your local codes protects you legally and ensures safe installation.
Common Installation Mistakes to Avoid
Inadequate Framing Support
Skimping on header installation or using undersized lumber compromises the entire installation. Cut joists transfer their loads through your new headers, and inadequate connections cause sagging, cracking, and potential failure over time.
Follow framing specifications exactly, using appropriate lumber sizes and connection hardware. This isn't the place to improvise or use whatever materials happen to be lying around.
Improper Length Adjustment
Cutting ladder legs too short creates dangerous instability, while leaving them too long prevents proper angle and causes binding during operation. Measure multiple times before cutting, and follow manufacturer guidance precisely.
If you accidentally cut too short, some ladders offer extension feet as accessories. Check availability before assuming a cutting mistake ruins your entire investment.
Ignoring Energy Efficiency
Attic openings are notorious energy wasters. Without proper sealing, conditioned air escapes through gaps around your ladder, driving up utility bills year-round. Install weatherstripping, caulk gaps, and consider insulated door panels for maximum efficiency.
Conclusion
Installing an attic ladder opens up valuable storage space while eliminating the hassle and danger of temporary ladder solutions. This How to Install Attic Ladder: Tools, Tips, and Measurements guide has walked you through every phase from initial planning through final adjustments. Remember that accurate measurements, proper framing, and careful attention to safety create installations that serve reliably for decades. Take your time with critical steps, don't hesitate to recruit a helper, and follow manufacturer instructions precisely. Before long, you'll be enjoying easy access to your attic whenever you need it.
Read next: 15 Home Addition Ideas to Upgrade Your Living Area in Style
Frequently Asked Questions
1. How long does attic ladder installation typically take?
Most installations take four to eight hours depending on framing complexity and experience level.
2. Can I install an attic ladder by myself without help?
While possible, having a helper makes installation significantly easier, safer, and faster overall.
3. Do I need a permit to install an attic ladder?
Many localities require permits for ceiling modifications; check local building codes before starting.
4. What ceiling height do standard attic ladders accommodate?
Most residential ladders accommodate ceiling heights between seven and ten feet comfortably.
5. How much weight can typical attic ladders safely support?
Standard residential ladders support 250 to 375 pounds including climber and cargo combined.
Stay up to date with our latest ideas!