How to Level a Subfloor: A Simple Guide
Master the art of leveling your subfloor with our comprehensive, step-by-step guide. Learn essential techniques to fix uneven surfaces, eliminate squeaks, and create the perfect foundation for beautiful floors that will last for years to come.
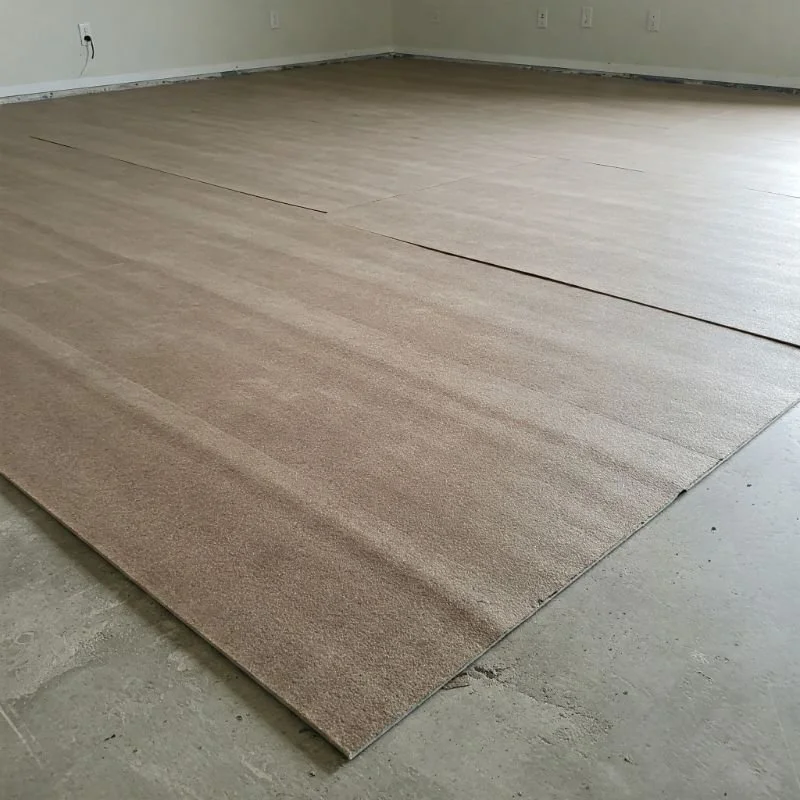
Holy moly, I still remember the sinking feeling in my stomach when I pulled up that old carpet in our first home. What I'd hoped would be a straightforward weekend project turned into a nightmare faster than you could say "uneven subfloor." There it was—a wavy, warped wooden surface that looked more like a skate park than a foundation for our dream hardwood floors.
No matter what gorgeous flooring material you've picked out—be it hardwood, laminate, tile, or luxury vinyl—it's only going to look as good as what's underneath it. That beautiful (and expensive) new floor will telegraph every bump, dip, and imperfection in your subfloor like a billboard advertising your DIY shortcomings. Trust me, nothing ruins the satisfaction of a new floor faster than feeling it bounce, squeak, or crack beneath your feet because the foundation wasn't properly prepared.
Understanding how to level a subfloor: a simple guide to preparing this crucial foundation isn't just about aesthetics—it's about ensuring the longevity and performance of your entire flooring system. Whether you're dealing with plywood over joists, concrete that's seen better days, or an old particleboard disaster, I'm about to walk you through the process that will save your sanity and your flooring investment.
Grab your level and put on your patience hat—we're diving into the world of subfloor leveling, where small adjustments make big differences, and where a little effort now means years of walking on perfectly stable, quiet floors later.
Understanding Your Subfloor: Know What You're Working With
Before you start mixing compounds or swinging hammers, you've got to understand exactly what type of subfloor you're dealing with. Different materials require different approaches to leveling.
Common Subfloor Types and Their Characteristics
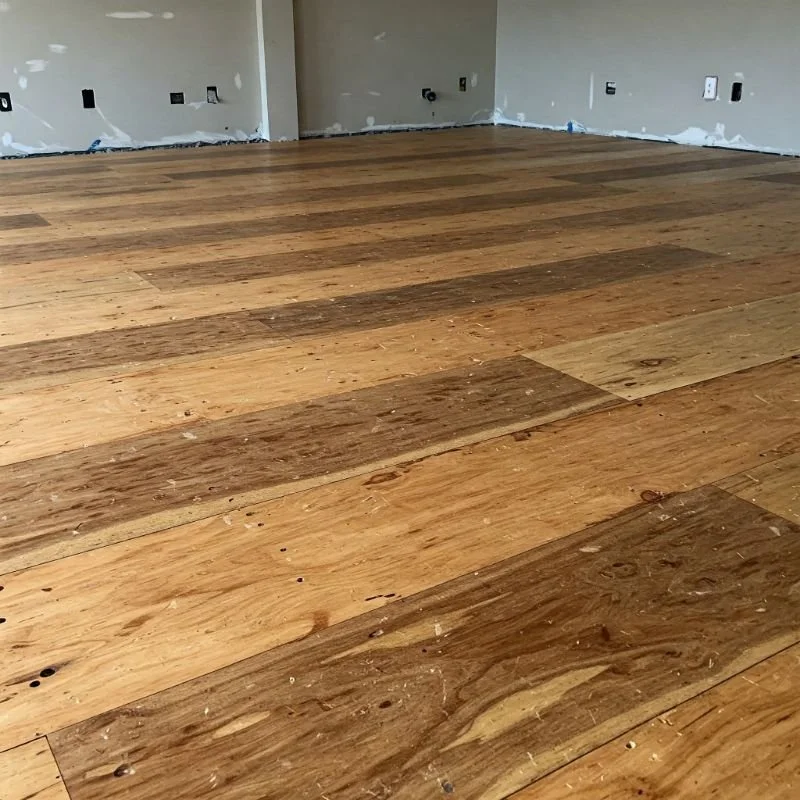
Wood Subfloors:
Plywood: Usually 5/8" to 3/4" thick sheets, often the most stable wooden option when properly installed
OSB (Oriented Strand Board): Similar to plywood but made from compressed wood strands, tends to be more uniform but can swell more if exposed to moisture
Particleboard: Older homes might have this less stable material that crumbles easily when damaged by water
Planks: Very old homes might have actual wood planks as subflooring, which can shrink, creating gaps over time
Concrete Subfloors:
Basement slabs: Typically poured concrete that may have settled unevenly or cracked over time
First-floor slabs: Common in slab-on-grade construction, subject to moisture issues and settling
Apartments/condos: Often concrete with sound-dampening properties, may have specific leveling restrictions
Each material has unique challenges. Wood subfloors typically have issues with warping, sagging between joists, or damage from previous installations. Concrete typically suffers from cracks, low spots, or overall slopes caused by settling.
Common Subfloor Problems You'll Need to Address
Sagging or bouncy areas: Indicates insufficient support below or damaged subfloor material
Humps or high spots: Often caused by swollen materials, improperly installed patches, or floor joists that have twisted
Squeaking: Usually from loose subfloor not properly secured to joists
Uneven seams: Where panels meet but aren't flush with each other
Overall slope: The entire floor might slope in one direction (older homes are notorious for this)
Damaged areas: Rot, water damage, or insect damage requiring replacement
Testing and Measuring Your Subfloor's Level
Before diving into fixes, you need to thoroughly assess the situation:
Visual inspection: Walk around barefoot feeling for obvious dips, rises, or soft spots
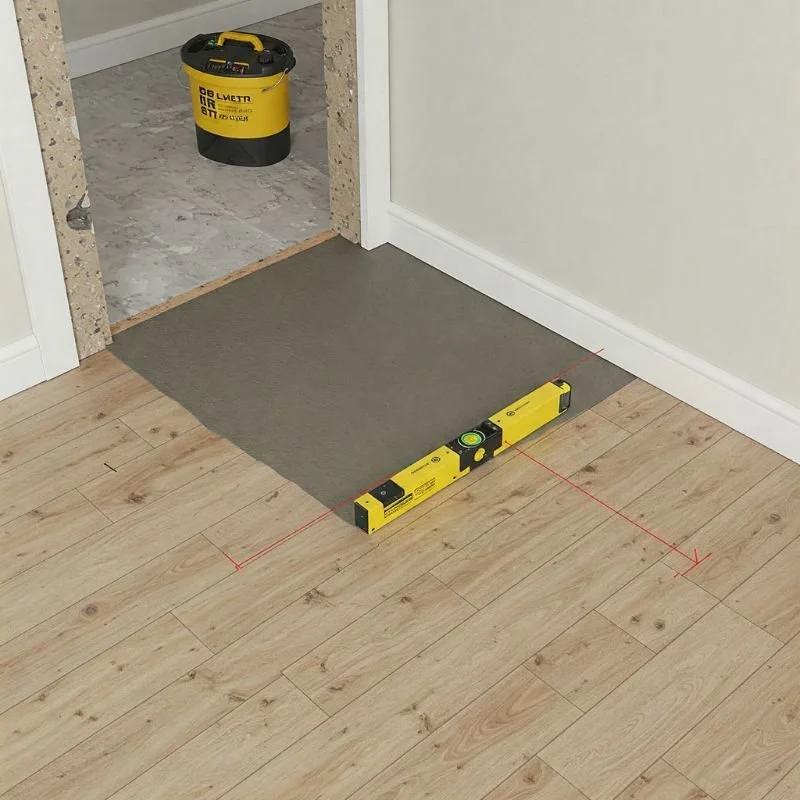
Use a long level: A 4-foot or longer level will help identify slopes and uneven areas
String line test: For larger rooms, stretch string tightly across the floor from corner to corner to spot high and low areas
Marble test: Place a marble on the floor—if it rolls consistently in one direction, you've got an overall slope
Moisture testing: Particularly important for concrete and basement installations, use a moisture meter to ensure your subfloor isn't harboring excess moisture that could damage your new flooring
Document your findings on a floor plan, marking problem areas so you can tackle them systematically. There's nothing worse than thinking you've fixed everything only to discover a missed low spot after installing your finish flooring.
Essential Tools and Materials for Leveling Success
Having the right equipment on hand before you start saves multiple trips to the hardware store (and we all know one trip always becomes three).
Must-Have Tools for Any Subfloor Leveling Project
4-foot level (or longer): Your most valuable tool for identifying uneven spots
Chalk line: For marking joists and problem areas
Sander (for wood subfloors): Belt sander for major high spots, orbital for finish work
Hammer and nail set: For securing loose boards and resetting protruding nails
Circular saw or oscillating multi-tool: For cutting out damaged sections
Drill/driver: For securing loose subfloor to joists
Pry bar and cat's paw: For removing damaged sections
Trowels: Various sizes for applying leveling compounds
Gauge rake (for concrete leveling): Creates uniform thickness of self-leveling compound
Mixing bucket and paddle: For preparing leveling compounds
Moisture meter: Essential for testing moisture content before leveling
Materials You'll Need (Based on Subfloor Type)
For Wood Subfloors:
Plywood or OSB sheets: For replacing damaged sections (match existing thickness)
Construction screws: 2-inch or longer for securing to joists
Wood shims: For addressing minor low spots under existing subfloor
Construction adhesive: For eliminating squeaks and adding stability
Asphalt shingles: Old-school but effective for shimming small areas
For Concrete Subfloors:
Self-leveling compound: The star of the show for concrete leveling
Concrete primer: Essential for proper adhesion of leveling compounds
Patching compound: For filling cracks and holes before self-leveling
Grinding stones (for a grinder): To remove high spots in concrete
Plastic sheeting: For moisture barriers if needed
For Both Types:
Floor leveling compound: Available in different formulations for wood or concrete
Respirator mask: For protection from dust and chemical fumes
Knee pads: Your knees will thank you later
How to Level a Subfloor: A Simple Guide for Wood Subfloors
Wooden subfloors present unique challenges but are often more straightforward to fix than concrete. Let's tackle them piece by piece.
Step 1: Preparation and Assessment
Remove all existing flooring: Strip it down to the bare subfloor
Clean thoroughly: Remove all debris, staples, and protruding fasteners
Conduct a thorough inspection: Mark problem areas with chalk or pencil
Address moisture issues: If you find evidence of water damage, locate and fix the source before proceeding
Check for structural issues: If floors are severely sloped or sagging, consult a structural engineer as the problem might be with the floor joists or foundation
Step 2: Fixing Common Wood Subfloor Issues
Dealing with Squeaks and Loose Boards
Nothing's more annoying than a squeaky floor. Here's how to silence it:
Locate the joists: Use a stud finder or tap along the floor to identify the joist locations
Mark joist positions: Use a chalk line to mark joist locations across the entire floor
Secure loose boards: Drive screws (not nails) through the subfloor into the joists
For persistent squeaks: Apply construction adhesive from below if you have access, or use specialized squeak-elimination screws that break off below the surface
Addressing High Spots and Ridges
For minor ridges between panels: Use a belt sander with coarse-grit sandpaper to smooth transitions
For significant humps: Use a circular saw set to the thickness of the subfloor to score the peak, then tap it down with a hammer (be careful not to cut into joists!)
For crowned joists: You may need to plane down the top of joists that have bowed upward over time
Fixing Low Spots and Dips
For small dips between joists: Use floor leveling compound designed for wood subfloors
For larger depressions: Consider building up with layers of thin plywood adhered with construction adhesive
For significant low areas over joists: Shim between the joist and subfloor with wooden shims and construction adhesive
Step 3: Replacing Damaged Sections
Sometimes sections are too damaged to salvage:
Mark the damaged area: Extend a few inches beyond the visible damage
Cut out the section: Use a circular saw set to the depth of the subfloor
Install blocking: Add additional framing between joists to support the edges of your new panel
Cut a replacement piece: Ensure it fits the opening exactly
Install the new section: Secure with screws into joists and blocking
Check for level: Ensure the new section is flush with the surrounding floor
Step 4: Final Leveling for Wood Subfloors
After addressing major issues, you'll likely need to make final adjustments:
Use floor leveling compound: Mix according to manufacturer's instructions
Fill remaining low spots: Apply with a flat trowel, feathering edges to blend with surrounding areas
Allow to dry completely: Follow manufacturer's recommended drying times
Sand if necessary: Some compounds may need light sanding after drying
Conduct final inspection: Use your level to verify the surface is now flat and ready for new flooring
How to Level a Subfloor: A Simple Guide for Concrete Floors
Concrete presents different challenges but follows similar principles of identifying and correcting problem areas.
Step 1: Concrete Subfloor Preparation
Remove all existing flooring and adhesives: Get down to bare, clean concrete
Clean thoroughly: Vacuum and wash the surface to remove all dust and debris
Identify and mark problem areas: Use a long level or straight edge to find high and low spots
Repair cracks and holes: Fill with concrete patching compound before leveling
Test for moisture: Conduct proper moisture tests—excess moisture can ruin your new flooring and must be addressed first
Step 2: Addressing Concrete High Spots
High spots on concrete require more aggressive treatment:
For minor high spots: Use a concrete grinder with appropriate grinding stone
For significant protrusions: You may need a more powerful floor maintainer with a diamond grinding attachment
Clean thoroughly after grinding: Remove all dust before proceeding to leveling
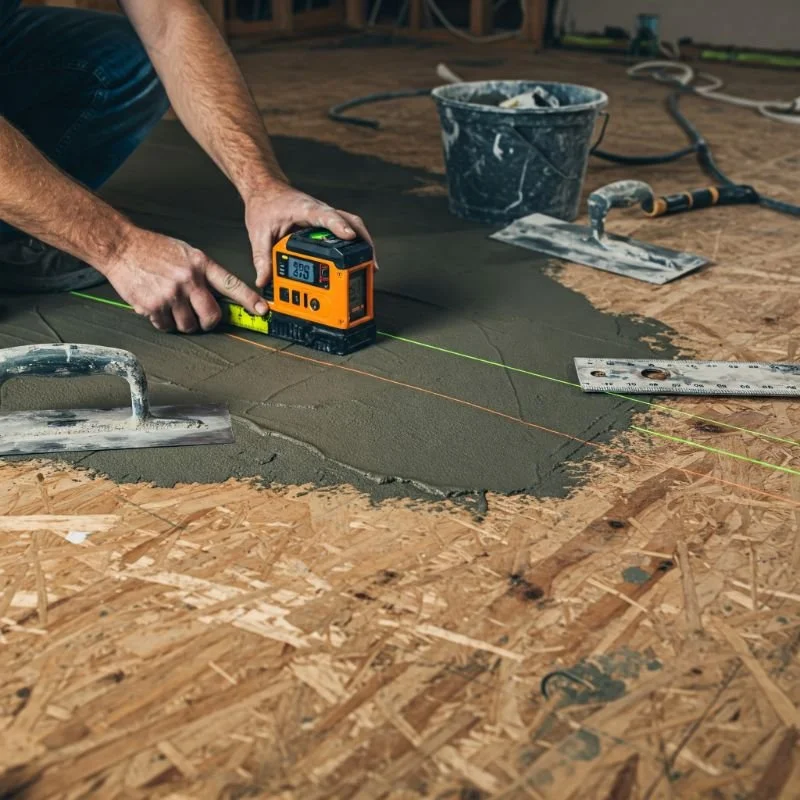
Step 3: Self-Leveling Compound Application
Self-leveling compound is the go-to solution for concrete floors:
Apply primer: Most self-leveling compounds require a primer for proper adhesion
Mix the compound: Follow manufacturer's instructions exactly—improper mixing can cause failures
Pour and spread: Working in sections, pour the compound and use a gauge rake to spread to desired thickness
Use a smoother: A flat smoother tool helps work out bubbles and create an even finish
Work quickly: Self-leveling compound begins setting fast, so have everything ready before mixing
Tips for Successful Self-Leveling Compound Application
Dam off sections: For large areas, work in manageable sections
Maintain a wet edge: Don't let one section dry before connecting to the next
Watch your thickness: Check manufacturer's minimum and maximum thickness recommendations
Temperature matters: Most compounds require specific temperature ranges to cure properly
Ventilate but avoid drafts: Good air circulation helps drying, but direct drafts can cause uneven curing
Step 4: After Leveling Care
Allow proper curing time: Don't rush this step—follow manufacturer's guidelines
Conduct moisture tests again: Especially important before installing moisture-sensitive flooring
Address any remaining imperfections: Small issues can be fixed with additional patching compound
Seal if necessary: Some flooring types require sealed concrete
Special Situations and Advanced Solutions
Sometimes standard approaches aren't enough. Here are solutions for more challenging scenarios.
Leveling Extremely Uneven Floors
When floors have significant slopes or unevenness:
Consider sistering joists: Attaching additional lumber to existing joists to correct sagging
Sleeper system: Installing a grid of "sleepers" (flat lumber strips) that can be shimmed to create a level surface
Two-stage leveling: For concrete with severe issues, applying a rough leveling layer followed by a finish layer
Consulting professionals: Some level issues indicate structural problems that may require professional assessment
Working with Radiant Heat Systems
Special considerations apply when leveling floors with radiant heating:
Identify heating elements: Mark all areas where heating elements are present
Use compatible materials: Not all leveling compounds are rated for use with heated floors
Minimum coverage requirements: Ensure you maintain minimum required coverage over heating elements
Manufacturer guidelines: Always follow the radiant system manufacturer's specifications
Addressing Moisture Issues Before Leveling
Moisture is the enemy of flooring installations. Address it properly:
Identify the source: Is it coming from below, the sides, or above?
For concrete slabs: Consider moisture barriers or sealants designed to block vapor
For wood subfloors: Ensure proper ventilation beneath the subfloor and address any plumbing leaks
Dehumidification: In some cases, ongoing dehumidification may be necessary
Waterproofing membranes: Consider installing these before leveling in persistently damp areas
Final Inspection and Preparation for Flooring Installation
You're almost at the finish line. These final steps ensure your newly leveled subfloor is ready for its new covering.
Conducting the Final Flatness Check
Use a long straightedge: Check across the entire floor in multiple directions
Look for any remaining dips or bumps: Industry standards typically allow for no more than 3/16" variation in 10 feet
Perform the light test: Using a bright work light placed on the floor, look for shadows that indicate remaining unevenness
Do a final walk test: Walk the entire floor feeling for any movement or soft spots
Cleaning and Preparation Before Flooring Installation
Vacuum thoroughly: Remove all dust and debris
Check for any protruding fasteners: Set or remove them
Ensure proper drying time: Verify all compounds and materials have cured completely
Final moisture testing: Especially important for wood flooring installations
Acclimation: Allow your new flooring material to acclimate to the room before installation
Conclusion
Mastering how to level a subfloor: a simple guide techniques may seem daunting at first, but it's truly one of those foundational skills that pays dividends with every step you take on your finished floor. By properly addressing issues like uneven surfaces, squeaks, and structural concerns, you're not just preparing for new flooring—you're investing in the comfort, stability, and longevity of your entire home. Remember that patience during the leveling process leads to perfection in the final result. Whether you've tackled a minor dip or completely transformed a wavy disaster into a flawlessly flat surface, the satisfaction of walking on your properly prepared floors will remind you that some jobs are simply too important to rush or skip.
Read next: How to Replace Subfloor: A Step-by-Step Guide
Frequently Asked Questions
Q1: How level does a subfloor really need to be?
A: Industry standards typically call for no more than 3/16" variation in 10 feet for most flooring types. Tile installations are even more demanding, requiring 1/8" or less variation in 10 feet. Always check your specific flooring manufacturer's requirements.
Q2: Can I install new flooring over an old floor instead of leveling the subfloor?
A: While sometimes possible, this approach often compounds problems. Existing flooring may hide serious subfloor issues, and adding another layer reduces clearance for doors and creates height disparities at transitions. It's generally better to remove old flooring and address the subfloor directly.
Q3: How long does self-leveling compound take to dry?
A: Most self-leveling compounds allow light foot traffic within 2-4 hours but require 24-48 hours before flooring installation. However, drying time varies significantly based on product, thickness applied, and environmental conditions. Always follow the manufacturer's specifications.
Q4: Can I level just part of a floor, or do I need to do the entire room?
A: While you can address specific problem areas, feathering the edges of your repair is crucial for a smooth transition. For significant level differences, it's usually better to level the entire area to avoid noticeable transitions.
Q5: Do I need to remove baseboards before leveling a floor?
A: It's generally recommended to remove baseboards for the best results, as leveling may change the floor height. If you choose to leave them in place, you may need to install shoe molding to cover any gaps that result from the new floor height.
Stay up to date with our latest ideas!